KT&C KVR-0412H User Manual
Page 39
39
Interval
Set clock-update-interval from NTP Server. Normally, user can adjust 1 hour up to 24 hours.
System Clock
Display DVR clock.
Server Clock
Display NTP Server’s clock if Internet is connected to Server Clock. If not displaying, please click ( ) Connect button.
When Server Clock is displayed, please click ( ) Sync button to synchronize NTP Server’s clock with DVR clock.
Choose ‘OK’ to confirm the clock synchronization.
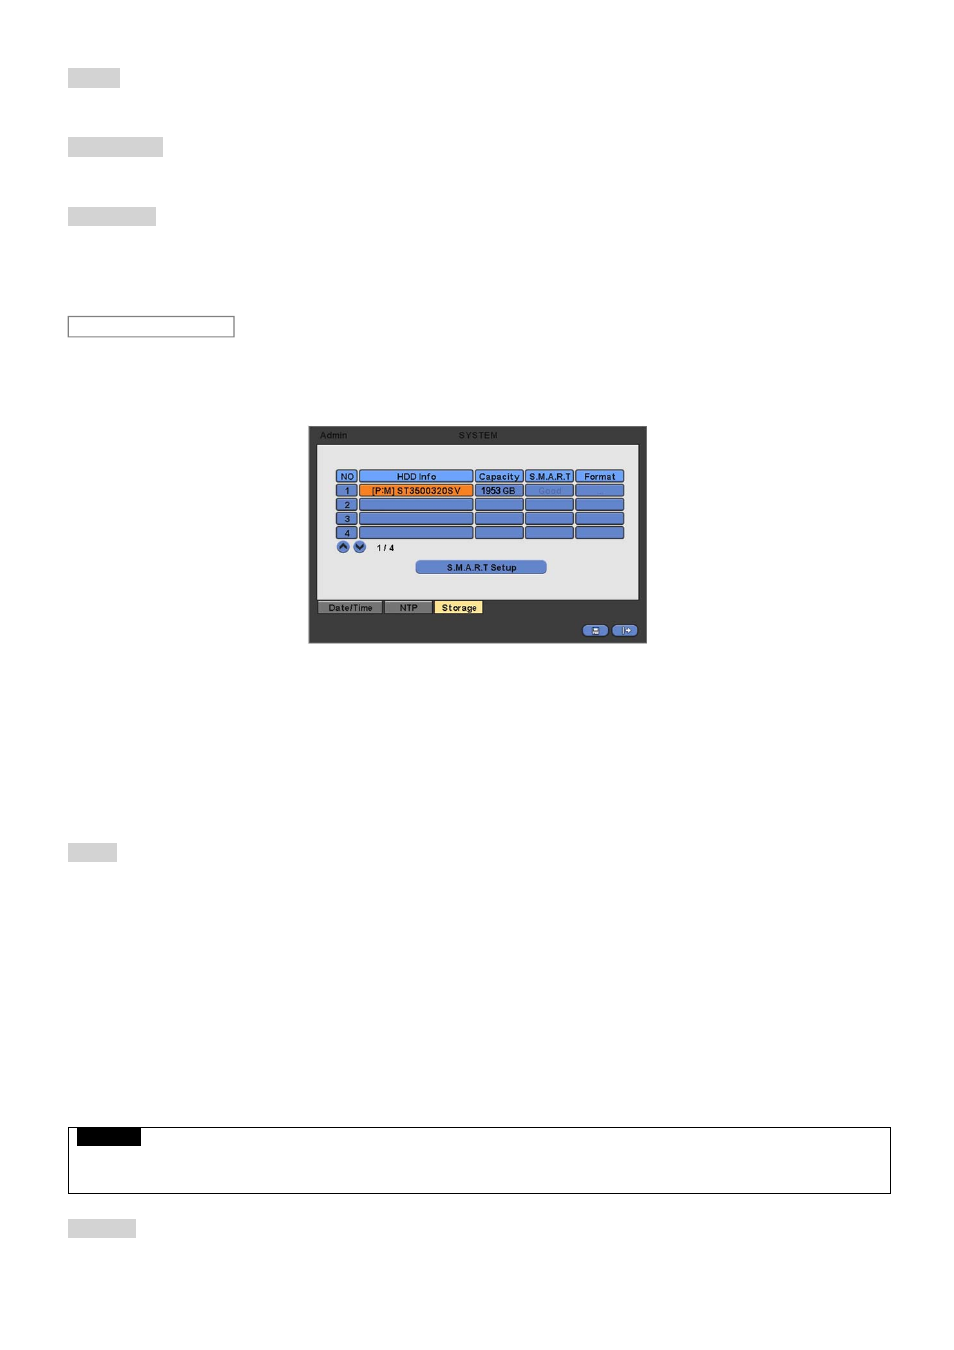
When users click the storage tab, following screen will appear.
Set S.M.A.R.T. (Self-Monitoring Analysis and Reporting Technology) function for HDD format and auto-display of HDD
information. DVD-RW is not shown here.
Clicking Up and Down button for checking up the status of HDD and DVD-RW devices.
Using E-SATA port will allow users to connect up to maximum 8 HDD +1 DVD-RW. (B, C and F Type)
When user installs full storage device and DVD-RW including two e-SATA storage, then following procedures will be listed
as below:
-
1. Internal SATA 1~4 Ports
-
2. External SATA 1
-
3. DVD-RW
Format
User must format when:
-
install new HDD
-
add another HDD
-
replace HDD
-
move HDD (change installation port)
-
remove HDD
Click ( ) Add/Remove frame in Format column and choose ‘OK’ on the dialogue box to start formatting.
Following format, DVR will auto-reboot. If there are more than 2 HDDs, please formats each of HDDs. DVR will auto-reboot
when all the HDDs are formatted.
If the format changes to ‘---‘after reboot, it means formatting has been properly done.
CAUTION
EXECUTE REMOVE PROCEDURE EVEN WHEN USER REMOVE PREVIOUSLY INSTALLED HDD. THE REMOVE PROCEDURE IS THE
SAME AS THE FORMAT PROCEDURE DESCRIBED ABOVE.
S.M.A.R.T
Click the frame on S.M.A.R.T column and temperature and HDD damage will show.
Storage