5 installation of the sample tray, Installation – Hach-Lange GANIMEDE N User Manual
Page 26
26
Installation
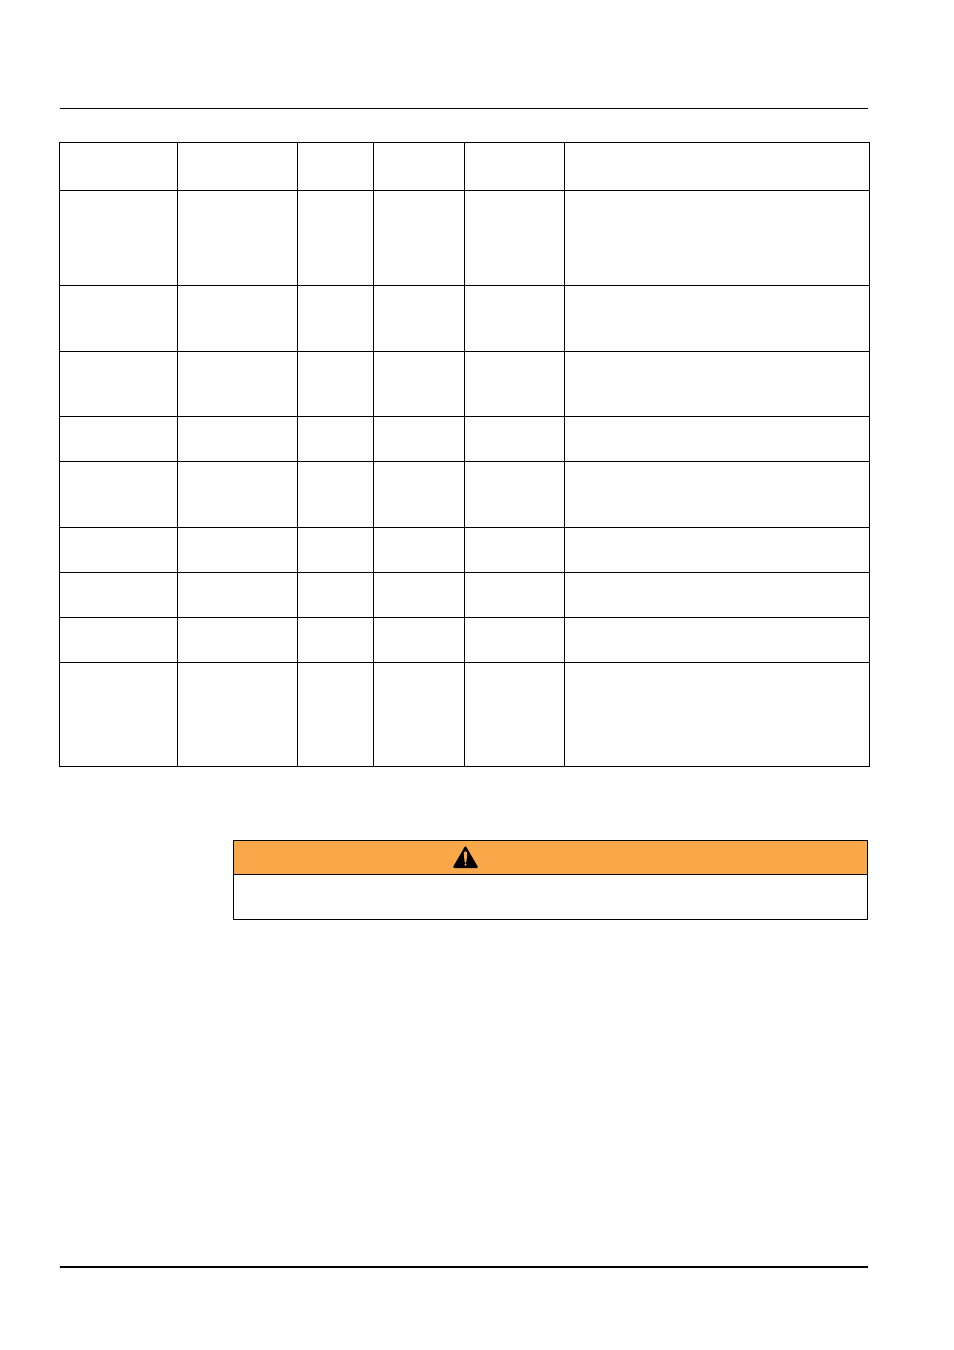
Table 2 Tube overview for analysis unit N
3.1.5
Installation of the sample tray
The position designations for the sample containers are printed next to the sampling
openings.
1. Make sure that the sample changer is switched off.
2. Load the sample containers with at least 15 mL of homogenized samples and zero or
standard solution. Add magnetic rods if necessary.
3. Place the filled sample containers on the sample tray without interruption, starting
with position 1.
4. Place the sample tray on the spindle of the sample changer from above.
5. Turn the sample tray until it locks.
6. Switch on the sample changer.
Identification
Color in tube
plan
Length
Dia-
meter
Colored
adapter
Connected:
A: (included in
the scope of
delivery of the
sample
changer)
Gray
400 mm
2.67 mm
-
Sample changer sample needle
-> Left-hand side of the analysis unit housing
-> Valve 1 connection f
B
Black
950 mm
3.2 mm
Yellow/blue
Acid solution A
-> Pump 3
-> Left-hand analysis cuvette
C
Purple
380 mm
3.2 mm
Blue/yellow
Valve 1 connection g
-> Pump 1
-> Digestion cuvette
D
Red
215 mm
2.7 mm
Blue/yellow
Digestion cuvette
-\> Valve 2 connection d
E
Green
550 mm
3.2 mm
Gray
Valve 2 connection g
-> Pump 2
-> Right-hand analysis cuvette
F
Purple
230 mm
3.5 mm
-
Valve 2 connection e
-> Lower right-hand analysis cuvette (air)
G
Red
220 mm
3.0 mm
-
Digestion solution B
-> Valve 1 connection d
H
Orange
220 mm
3.0 mm
-
Distilled water
-> Valve 2 connection b
J
Blue
250 mm
3.0 mm
Black/purple/
gray
Valve 2 connection c
-> T-piece -\> Pump 4 -\> Lower analysis
cuvette
-> T-piece -\> Waste bottle
-> Valve 1 connection c
WA R N I N G
Possible risk of injury due to the sample needle.
Make sure that the system is only installed by qualified and trained personnel.