Identification, Installation, Mechanical drawing – eLine Technology PRO3 Effio P & S User Manual
Page 9: Installation information, Accessories
15
16
NOTE: Make sure you don’t have any missing parts before you make the installation.
Incorrect installation could void the warranty if instructions are not followed correctly.
Please call technical for assistance if you are unsure about any procedures.
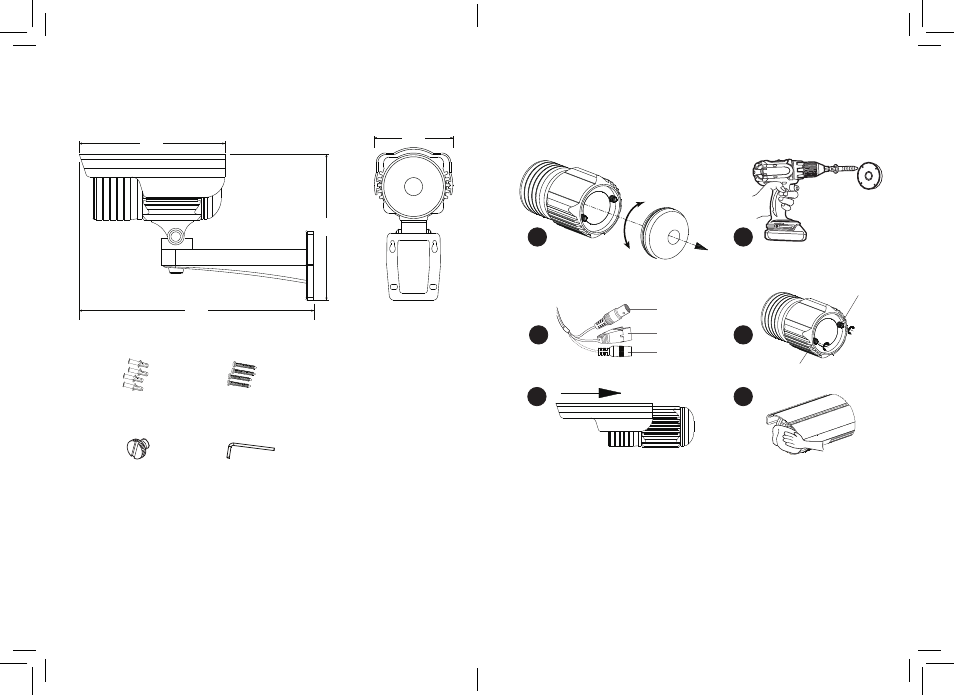
Identification
Mechanical Drawing
Installation
Installation information
(General overview)
1
Remove the rear part of camera this is just to make it easier to adjust later.
2
Line up camera to surface to drill, using bracket holes with pencil mark to guide you
3
With camera attached you can now power connect. use type as fitted.
4
Adjust zoom focus and position of camera to requirements. re-attach rear tightly.
5
Now slide the sunvisor on, carefull not to scratch the camera, pull sides out to help.
6
Carefully clean the dome surface with a soft lint free cloth.
7
Check IR LEDs are working by covering the photocell of camera with
your thumb, the IR LEDs will give a faint red glow.
(Don’t look at IR LEDs for long periods of time, as you could damage your eyes)
Accessories
1
4
3
2
5
6
298 mm
11 1/2"
185 mm
7 1/2"
100 mm
4"
185 mm
7 1/2"
Focus adjustment
View Angle adjustment
전원
커넥터
비디오
커넥터
Power connector
Type B
Type A
Video connector
(D) Allen Key
47x17mm
(B) Fitting Screws
PA4 x 35mm 4pcs
(A) Wall Plugs
S8 x 30mm 4pcs
(C) Sunshield Screw
M5 Thread