Sharpening the drill bit, Problem – Drill Doctor XP User Manual
Page 7
www.drilldoctor.com
11
10
www.drilldoctor.com
Sharpening the Drill Bit
Before sharpening you should know:
•
Keep the Cam in contact with the Cam Guide as you
sharpen—push the Chuck straight into the port.
•
Only light pressure is required.
•
You will hear a grinding noise (
z
z
z
z
z
z
z
z
z
) as you
complete each half-turn and each side of the bit face is
ground.
•
The Chuck will rock as you turn it and the Cam rides
on the Cam Guide.
•
It will be easier to sharpen bits standing up
The number of turns needed to sharpen the bit
depends on the size.
•
Turn the Chuck an even number of half-turns with
light, inward pressure:
3/32 inch bits
—use 2 to 4 half-turns,
1/8 inch bits
—use 4 to 6 half-turns,
3/8 inch bits
—use 16 to 20 half-turns.
Identifying Correctly Sharpened Drill Bits
(and what to do with those that aren’t!)
Correctly Sharpened Bits
Incorrectly Sharpened Bits
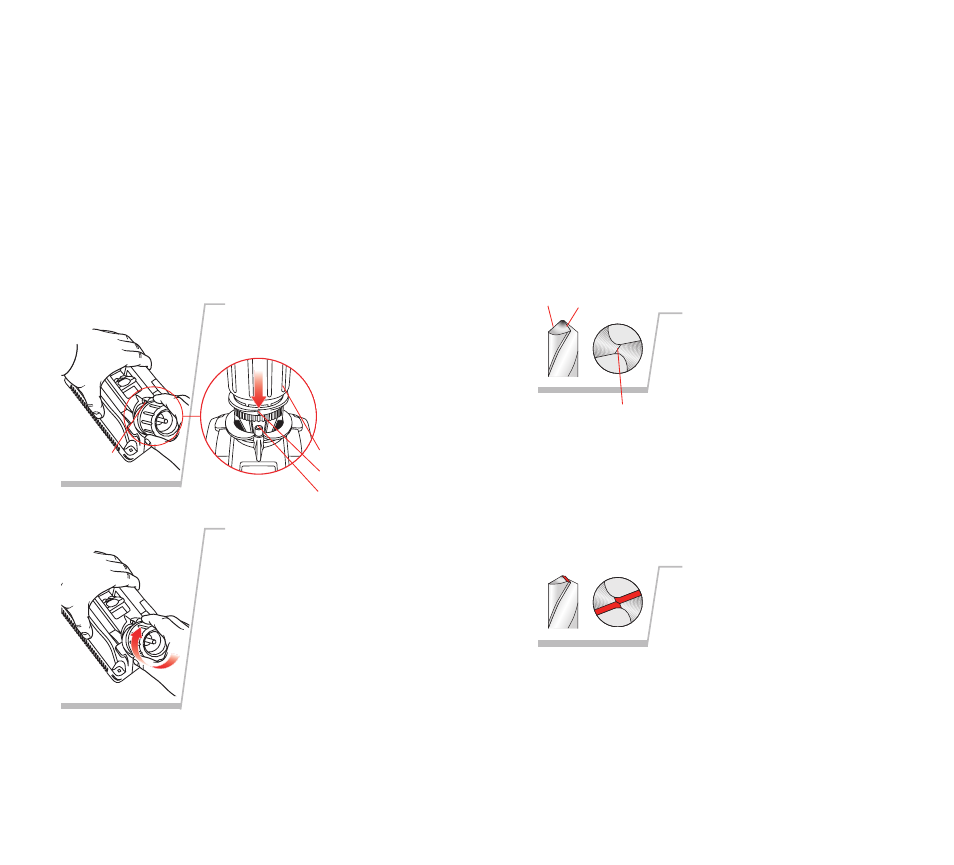
1.
Align Guides
Turn the Drill Doctor on.
Align either of the Sharpening
Guides with the
Cam Guide on the
machine. Insert
Chuck in Align-
ment Port.
2.
Insert Chuck and turn
until sharp
Insert the Chuck in the
Sharpening Port. Making
sure you keep the cam
against the cam guide, rotate
the Chuck one half-turn in a
clockwise direction—from
Sharpening Guide to Sharp-
ening Guide — an even num-
ber of times. Your motion
should be smooth and even.
To sharpen both sides of the
bit evenly, always use an
even number of half-turns.
Cam
Cam Guide
Heel
Chisel Edge
Cutting Edge
Sharpening Guide
Sharpening
Guide
The entire surface from the Cut-
ting Edge to the Heel will have a
finely ground surface without
ridges or indentations. The Heel
will always be lower than the
Cutting Edge (positive relief.)
The Chisel Edge will be clean and
straight.
Cause
Chuck Jaws did not grip drill bit
properly in the aligning process
(Page 8).
Solution
Realign the bit by carefully fol-
lowing steps 1 through 5 on
Pages 8 to 9.
Problem
The Chisel Edge is
ground flat.