Drill Doctor XP User Manual
Page 6
www.drilldoctor.com
9
8
www.drilldoctor.com
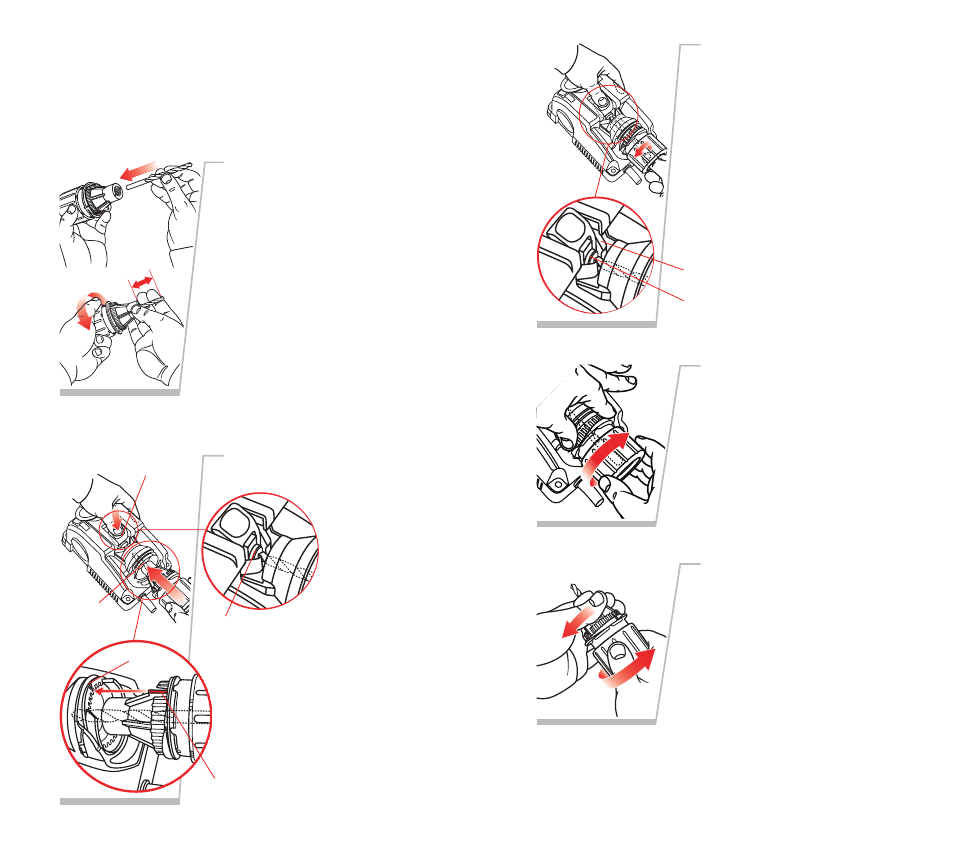
Aligning the Drill Bit
This makes sure that the Drill Doctor creates the right
geometry. And, it sets the bit so that only a small amount
of the tip is taken off.
(See page 17 to align and sharpen a Masonry drill bit.)
Insert bit in Chuck
and tighten
Insert the bit into the Chuck
Jaws and close the Jaws just to
the point where the bit slides in
and out. Do not over tighten the
Chuck; the bit needs to be able
to move in and out until Step 4.
Note: A good test to see if the
Chuck is tightened the correct
amount is to make sure it
moves when you pull on it with
your fingers, but will not fall
out when you turn the Chuck
upside down.
2.
Insert Chuck into
Alignment Port
Press the Align-
ment Button
down and hold
it. Match the
either of the
A l i g n m e n t
Guides on the
Chuck with the 118°
Notch on the Alignment
Port. Insert the Chuck.
While holding the button
down, slide the drill bit for-
ward until it touches the Drill
Stop and the Chuck is pullsed
all the way into the Align-
ment Port. Release the
Alignment Button.
1.
3.
Adjust Bit Position
Look at your bit and make
sure the Bit Clamp Arms are
in the bit’s narrowest spot. If
they aren’t, turn the bit in the
chuck so that it is held by the
Bit Clamp Arms at its narrow-
est width. This is important
because this setting deter-
mines the angle at which your
bit will be sharpened.
Tighten Chuck
Hold onto the Chuck and
tighten the Chuck Knob.
(Avoid over-tightening the
Chuck in the Alignment Port.
This could damage the Chuck
and Port.)
Remove and re-tighten
Press the Alignment Button
and remove the chuck from
the Alignment Port. Tighten
the Chuck once more to
ensure the bit won’t move
when you sharpen it.
You are now ready to sharpen
the drill bit.
1"
Alignment Button
Drill Stop
Alignment
Port
Alignment
Guide
Bit Clamp Arms
Drill Stop
118˚
5.
4.