Output setup, Input setup, How t o adjust a source – Analog Way Smart Edge FX User Manual
Page 2
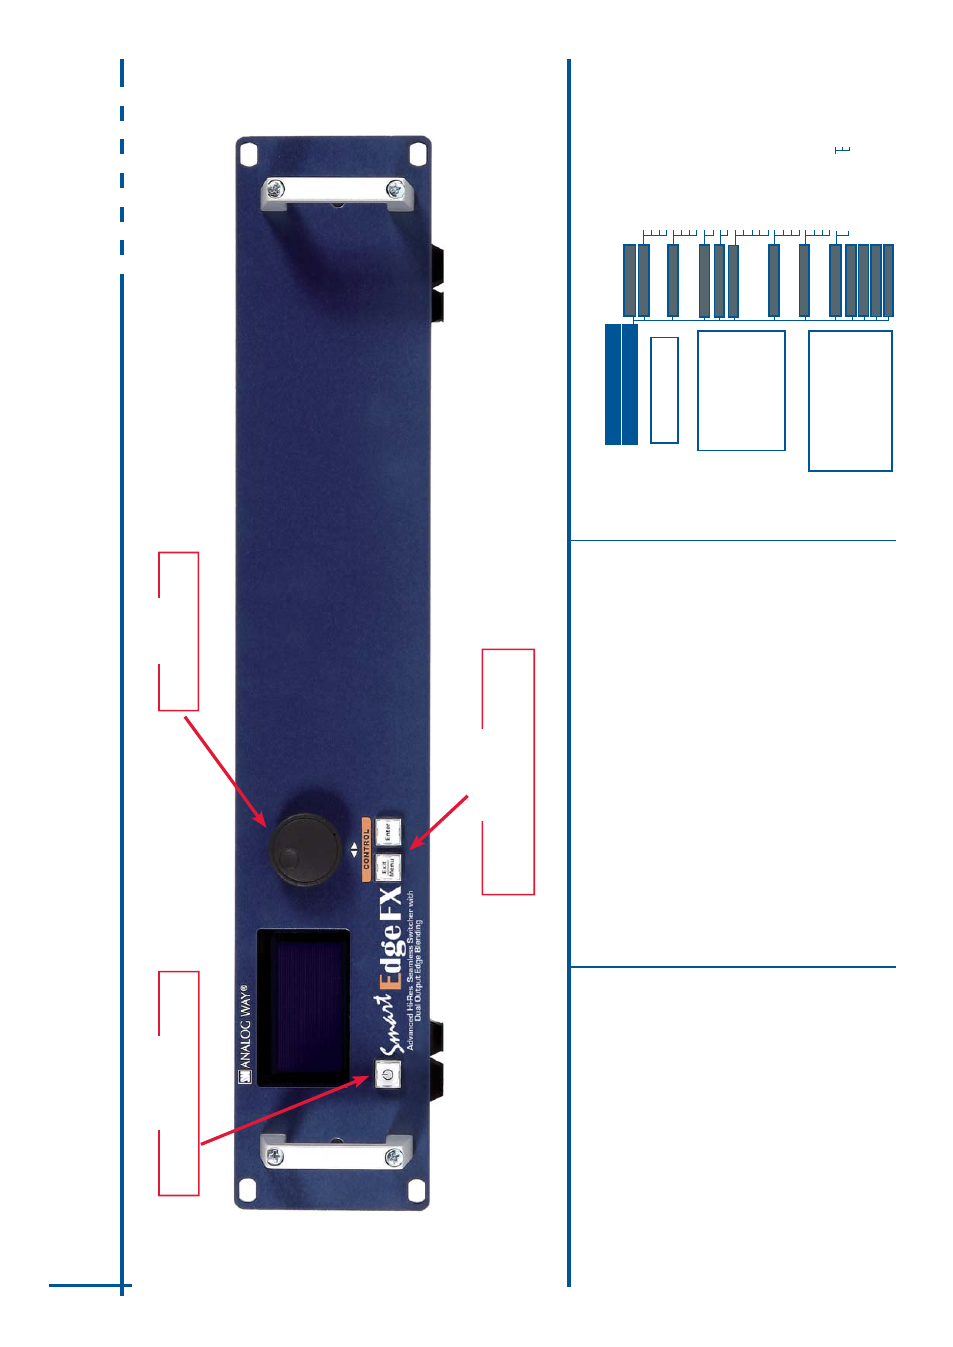
Smart Edge FX - Ref. STE200 Front Panel Description
EXIT/MENU:
Home Menu or back one level
ENTER:
V
a
lidates the menu or command
Hold for 3 seconds for stand-by Mode
Menu scroll knob
CONTROL
ST
AND-BY
KNOB
OUTPUT SETUP
1
-
Press the
EXIT/MENU
button from the Home menu
>DOOIXQFWLRQVPXVWEHFRQ¿UPHGE\WKH
ENTER
button]
2
-
Press [
Output
]
3
-
Press [
Output format
]
4
-
On Format line, select the display’
s
native resolution
5
-
Control or adjust your display device
6
-
If necessary
, select [
T
est Pattern
] in the Output menu
INPUT SETUP
1
-
Press the
EXIT/MENU
button from the Home menu [all functions must be
FRQ¿UPHGE\WKH
ENTER
button]
2
-
Press [
Input
] and [
Autoset ALL
]
3
-
If the acquisition has failed, check all connections and perform a manual setup
4
-
For a comprehensive Input Setup, please refer to user
’s
Manual
5
-
For a manual input setup, press the
EXIT/MENU
button:
a)
Press [
Input
],
b)
Select the right input from Input #1 up to SDI #4, then
c)
Select [
Ty
p
e
].
NOTE: T
o
adjust input Size or Pos, use the [Layer] Menus.
T
o
adjust Blanking, use the
Auto-Centering or Blanking adjustments in the
Image menu.
HOW
T
O
ADJUST A
SOURCE?
IMAGE
(A3)
HOME MENU (extract)
Auto Centering
(R1)
Blanking Adjust
(R2)
Cropping
(R2)
Optimize
(R1)
Under/Over
(R3)
Aspect IN
Aspect OUT
Colorimetry
Advanced
(R2)
2:2 Pulldown
(R7)
3:2 Pulldown
(R8)
Reset settings
Force 4:3
(R9)
H position
H position
V position
V position
H size
H size
Phase
Underscan
Native
LetterBox_2_35
Centered
Contrast
Red Level
(R5)
Component
Level
(R2)
Pillar Box
1_1
Hue
(R6)
Blue Level
(R5)
Motion Correct.
(R1
1
)
*
V size...
V size...
H
T
o
tal
Overscan
LetterBox_1_78
Full screen
Brightness
Anamorphic
Cropped
Color
Green Level
(R5)
(A3) displayed when an
input is active
(R1)
Analog Computer Input
(R2)
Analog Input
(R3) V
ideo Input
(R4) EDTV/HDTV Input
(R5) RGB or
YUV or
YC or CV
(R6) NTSC Input
(R7) Interlaced 50 Hz
(R8) Interlaced 60 Hz
(R9) SDTV
The Menu allows to improve the thres-
KROGRIWKHFRPE¿OWHU
0% means no adjustments and 100%
is the max.
The setting is manual with
a visual correction.
The result is the removal of the alia-
sing in the moving picture.
* Motion Correction