Working with the smart vu – Analog Way Smart Vu User Manual
Page 2
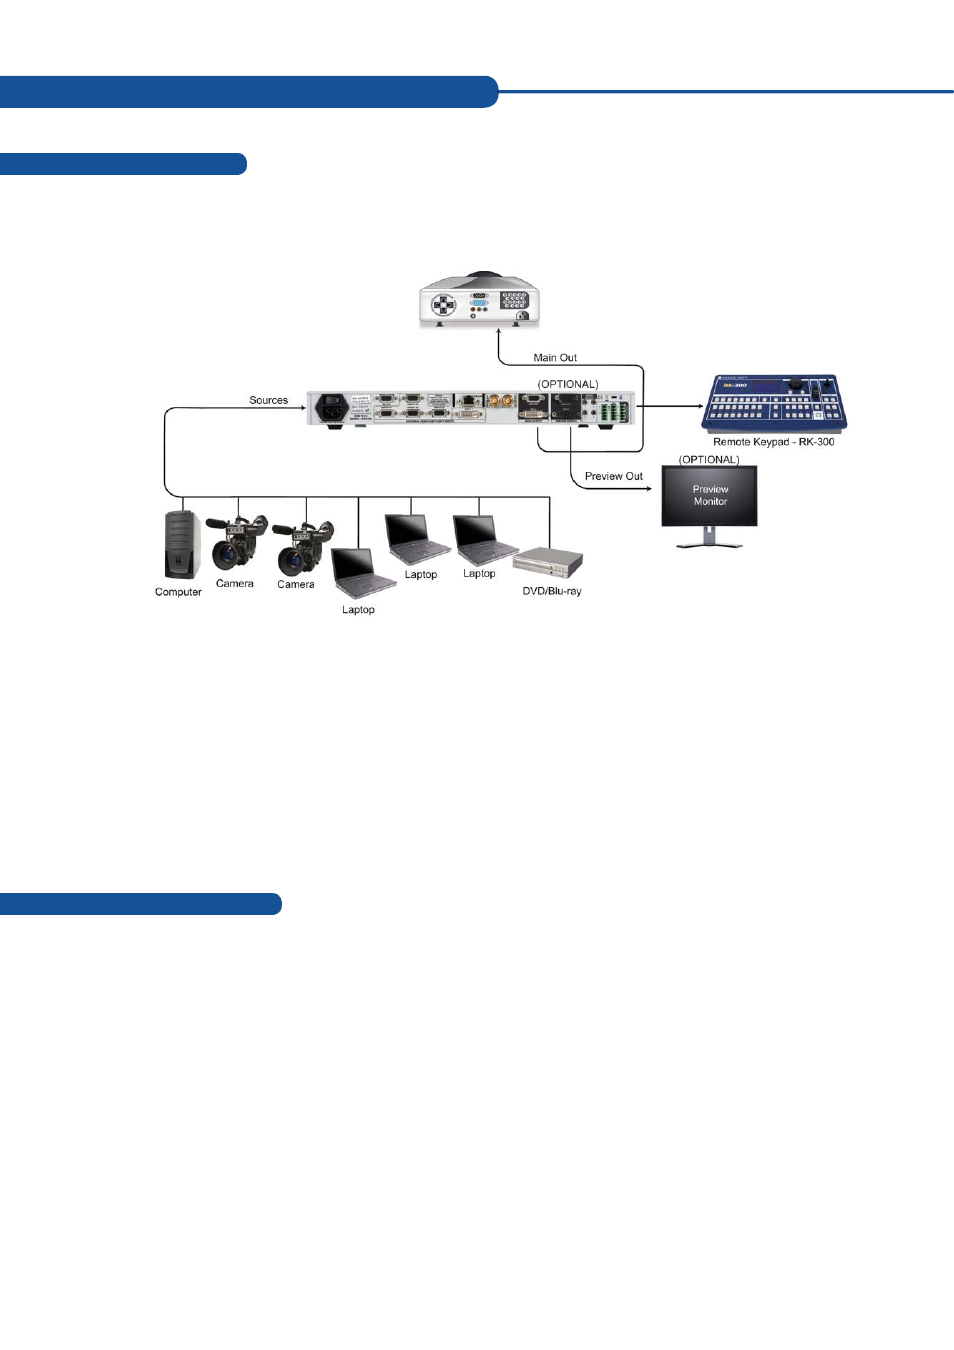
Setting up the Smart Vu
WORKING WITH THE SMART VU
Connect all of your sources (PC, video camera, streaming server, DVD player...) to the appropriate input
connectors at the rear of the unit (see “The SmartVu rear panel” p.22 of the User Manual).
Connect your main output to the video projector for audience viewing, and your preview output (Optional) to
a monitor for preview purposes (see “Connecting the SmartVu”, p.21 of the User Manual). Turn all input and
output devices on.
Connect the supplied AC power cord to the unit, then connect the other end of the cord to a grounded AC
outlet. Power up the
Smart Vu
by pressing the I/0 button at the rear of the unit, and wait for the menu to run its
startup sequence. The unit is on and ready to function when the System Menu appears on your VFD screen.
The following setup is an example of a typical
Smart Vu
configuration for an event or roadshow, but can of
course be modified according to your specific needs:
Input & Output configuration
1/ In the menu section, press the EXIT/MENU button and select Input in the menu by rotating the selection
knob and press the ENTER button to enter the Input sub-menu.
2/ Select Auto Setting and press enter to automatically configure the inputs plugged into the
Smart Vu
. The
device will set all input resolutions and frequencies to match the input sources plugged to the device.
3/ Alternatively, you can configure all inputs of the
Smart Vu
individually, by navigating to the Input menu and
setting each input accordingly.
Once your inputs have all been configured, the output settings of the
Smart Vu
must be set according to the
machines plugged on your
Smart Vu
Main and Preview outputs (video projector, preview monitor...).
1/ In the menu section, press the EXIT/MENU button and select Output in the menu by rotating the selection
knob. Enter the Output sub-menu and select the output type, resolution and frequency, so that they match
the viewing hardware plugged into the unit.
2/ Press the ENTER button to enter each of the desired output parameters.
Your
Smart Vu
is now set up and ready to work with.