Multi-gard, Pvc – repairs – Carlon PVC Multi-Gard - Low Res User Manual
Page 4
www.carlonsales.com
9
Multi-Gard
®
PVC – Repairs
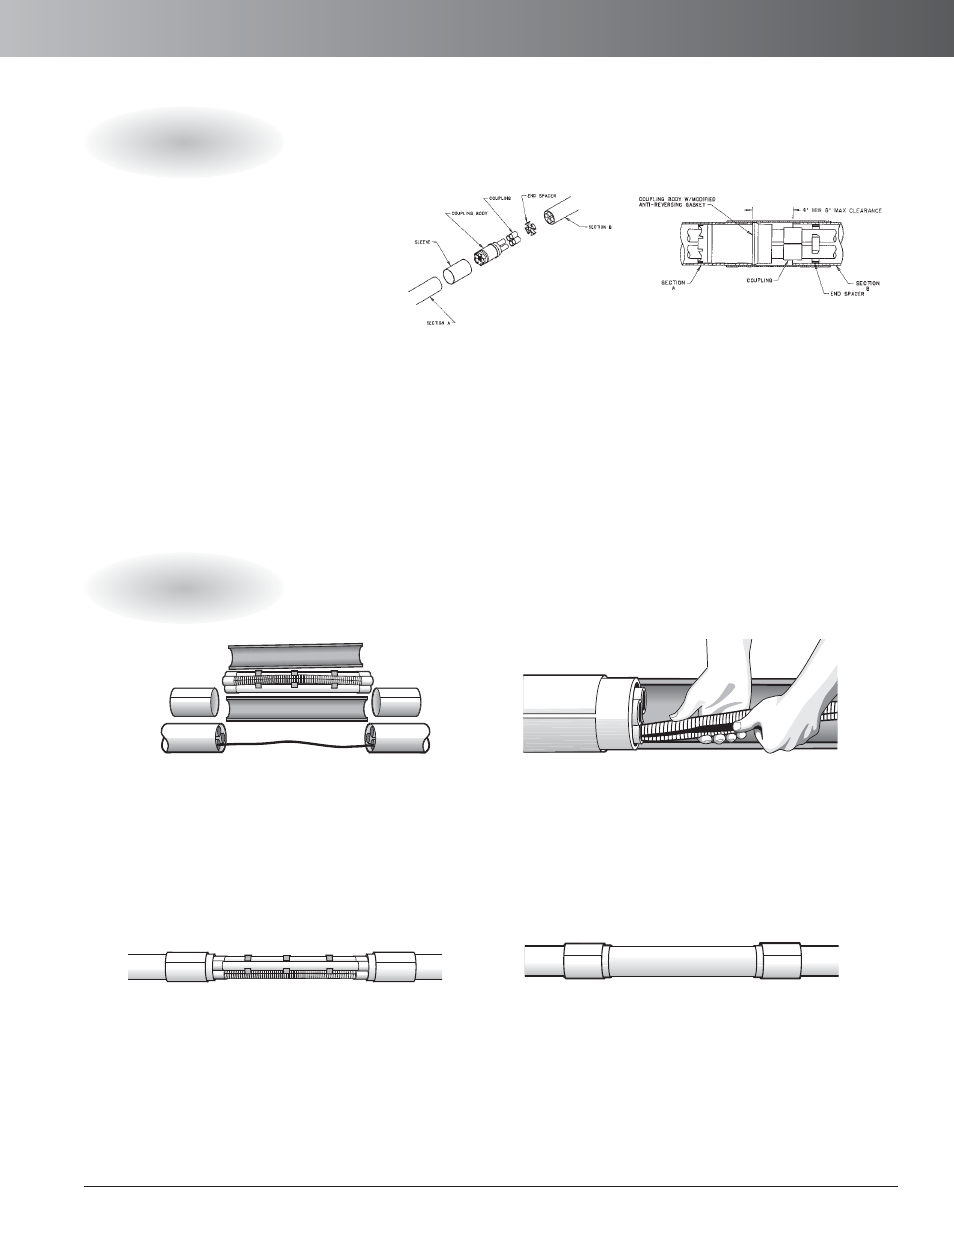
Repairing Vacant Multi-Gard
Repairing Multi-Gard Containing Cable(s)
1. Cut out the damaged section
and insert a belled short section
(4" shorter than damaged
section) of Multi-Gard onto
either one of the ends (section A).
2. Apply 2" of cement on ends
of spigots of coupling body,
press couplings onto spigots.
3. Slide innerduct sleeve over
Multi-Gard plain end (section A).
Insert end spacer into Multi-
Gard plain end (section B).
1.
Carefully cut out damaged section up to 10
feet. Larger sections can be accommodated
using multiple repair kits.
3. Install corrugated innerduct and remaining
smooth innerduct into couplings by raising in
the center and guiding them into their respec-
tive openings. Install the spacers to evenly
support the innerduct.
4. Lay one piece of split duct under the
repaired section. Install the other piece of split
duct onto the first piece and strap or tape in
place. Apply cement onto each end and slide
the slip sleeves until centered on both sections.
Backfill according to job specifications.
2. Install the 4" split sleeve couplings over
the existing Multi-Gard. Slide the smaller split
couplings onto the individual innerduct, fitting
the cable into the split coupling. Repeat this
process on opposite side. Carefully insert the
cable(s) into the split corrugated innerduct.
4. Insert female end of slip coupling
into Multi-Gard plain end (section A).
Align sections A and B. Apply cement
to couplings. Slide slip coupling back
onto innerducts in Multi-Gard
(section B) until seated.
5. Apply cement to both
plain ends of Multi-Gard
and slide sleeve until
centered on both sections.
M SC4
–
Slip Coupling
Gross Automation (877) 268-3700 · www.carlonsales.com · [email protected]