American Expedition Vehicles Moab/Call of Duty Rear Bumper Water Tanks with Pump Kit User Manual
Page 9
Page 9 of 20
D. INSTALL THE WHEEL MOUNT TO THE TIRE CARRIER
1. Install the wheel mount into the tire carrier.
2. Measure the distance from the wheel mounting surface in the wheel to the bulge in the
tire sidewall (not wheel backspacing). Subtract 0.
25” (6mm) from this measurement to
get a default setting.
3.
There are two ½” fine thread bolts included, use the 3” long bolt for backspacing ranging
from
5” to 6”. Use the 4” long bolt for backspacing ranging from 6” to 7”. Use Anti-Seize
compound on the bolt. While these bolts will accept 99% of the wheel and tire
combinations used on JK’s, it might be necessary to source a 1/2x20 bolt of a different
length for some applications.
4. When doing the final tire install, be sure to tighten the ½-20 bolt so that the tubes of the
TIRE CARRIER are all contacting the tire and there is about ¼” of “squish” in the tire
sidewall.
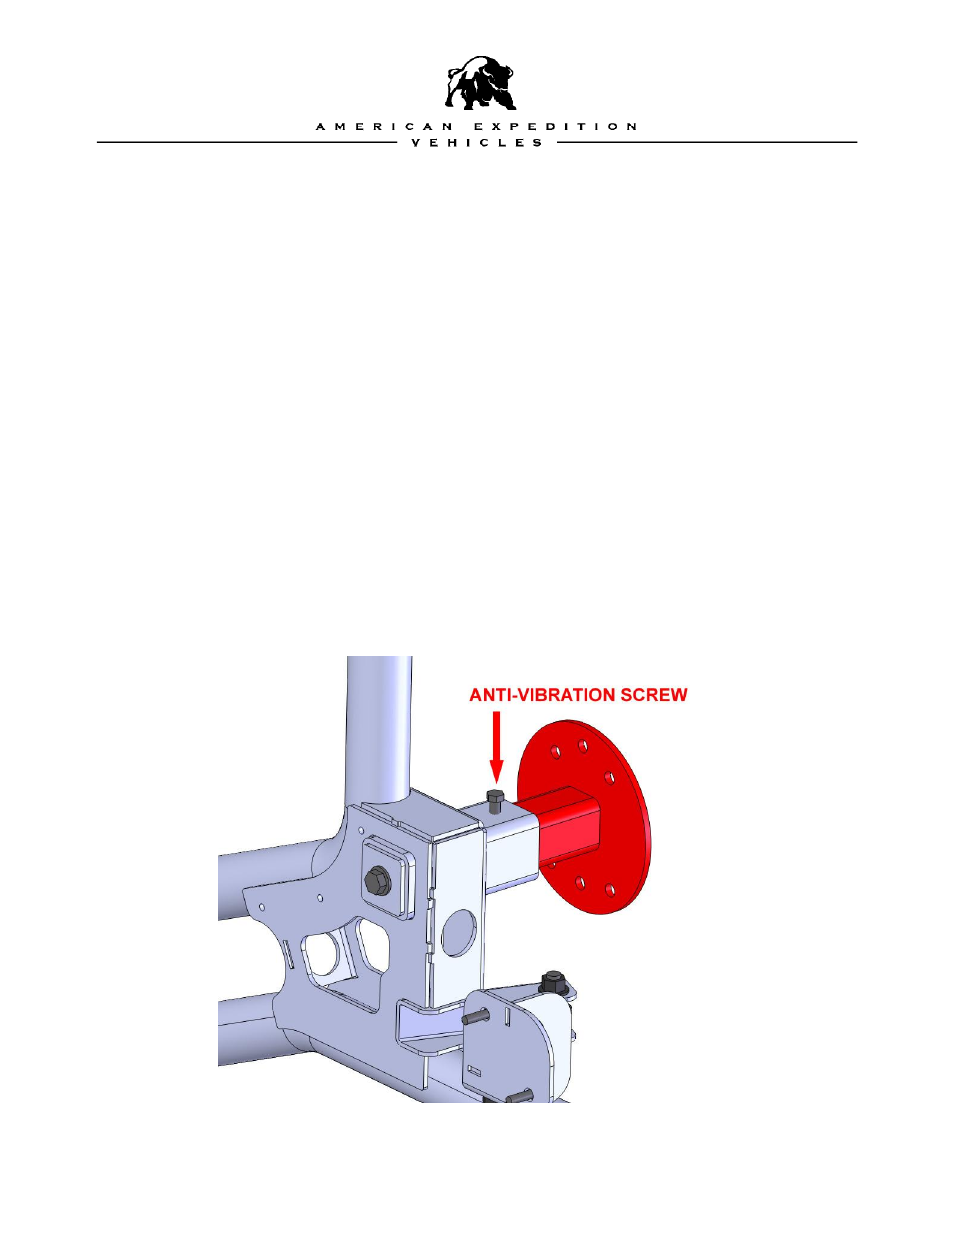
5. Temporarily install the
3/8”x3/4” anti-vibration bolt into the Tire Carrier. Tighten it a bit to
prevent the ½” bolt from sliding rearward when the tire is initially installed so that it cannot
damage the tailgate. Tighten this bolt fully after the tire is on for the first time and after
the ½” bolt has been adjusted.
6.
The wheel mount has studs pressed in for a 5 on 5” bolt pattern, if custom axles are used
with a 5 on 5.5” bolt pattern, the studs will need to be pressed out and pressed into the
holes provided.