Plank wall mount, Step 7 step 8 top view after step 8 – Alera Lighting PLKWM User Manual
Page 4
© 2009 Alera Lighting, a division of Hubbell Lighting, Inc. Because of continuing product improvement programs, Alera Lighting reserves the right to change specifications
without notice. 701 Millennium Blvd. Greenville, SC 29607 / Tel 864.678.1000 / Tech Support 864.678.1580 / Website www.aleralighting.com
Page 4/6 Rev. 12/21/09
BeAMS / PLK WM TID
Plank Wall Mount
Technical Installation Data
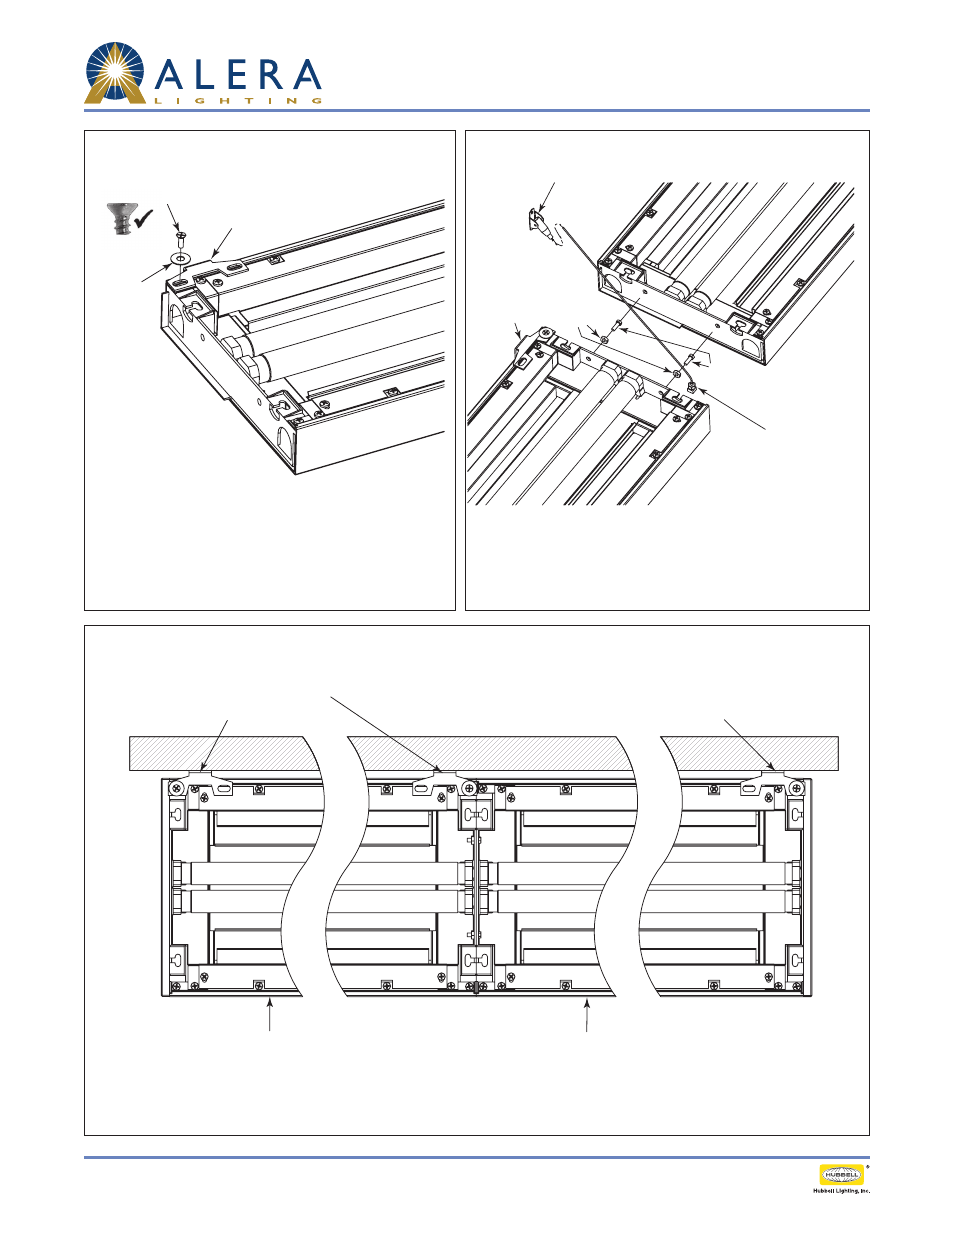
Install washer and flat-head screw supplied with kit.
Only one (1) screw can be used per bracket. Verify that
the attachment screw goes into the casting. This screw
should be left loose until after leveling fixture.
Connect row mounted fixtures using the two (2) #8-32
machine screws and nuts provided. Install optional aircraft
cable, if provided, as shown above. Cable should be on same
fixture as the Wall Bracket
Flat-Head Screw
Wall Bracket
Washer
Wall clevis for cable
option (not required)
#8-32 Screw
Optional
aircraft cable
Wall
Bracket #8-32 Screw
Use two (2) brackets
at start of row
Remaining fixtures use
one (1) bracket each
First Fixture in Row
(can be on opposite end of row)
Other Fixtures in Row
Step 7
Step 8
Top View After Step 8
Each Bracket Connects To
One Fixture Only