Plank wall mount, Step 1 step 2 step 3, Technical installation data – Alera Lighting PLKWM User Manual
Page 2
© 2009 Alera Lighting, a division of Hubbell Lighting, Inc. Because of continuing product improvement programs, Alera Lighting reserves the right to change specifications
without notice. 701 Millennium Blvd. Greenville, SC 29607 / Tel 864.678.1000 / Tech Support 864.678.1580 / Website www.aleralighting.com
Page 2/6 Rev. 12/21/09
BeAMS / PLK WM TID
Plank Wall Mount
Technical Installation Data
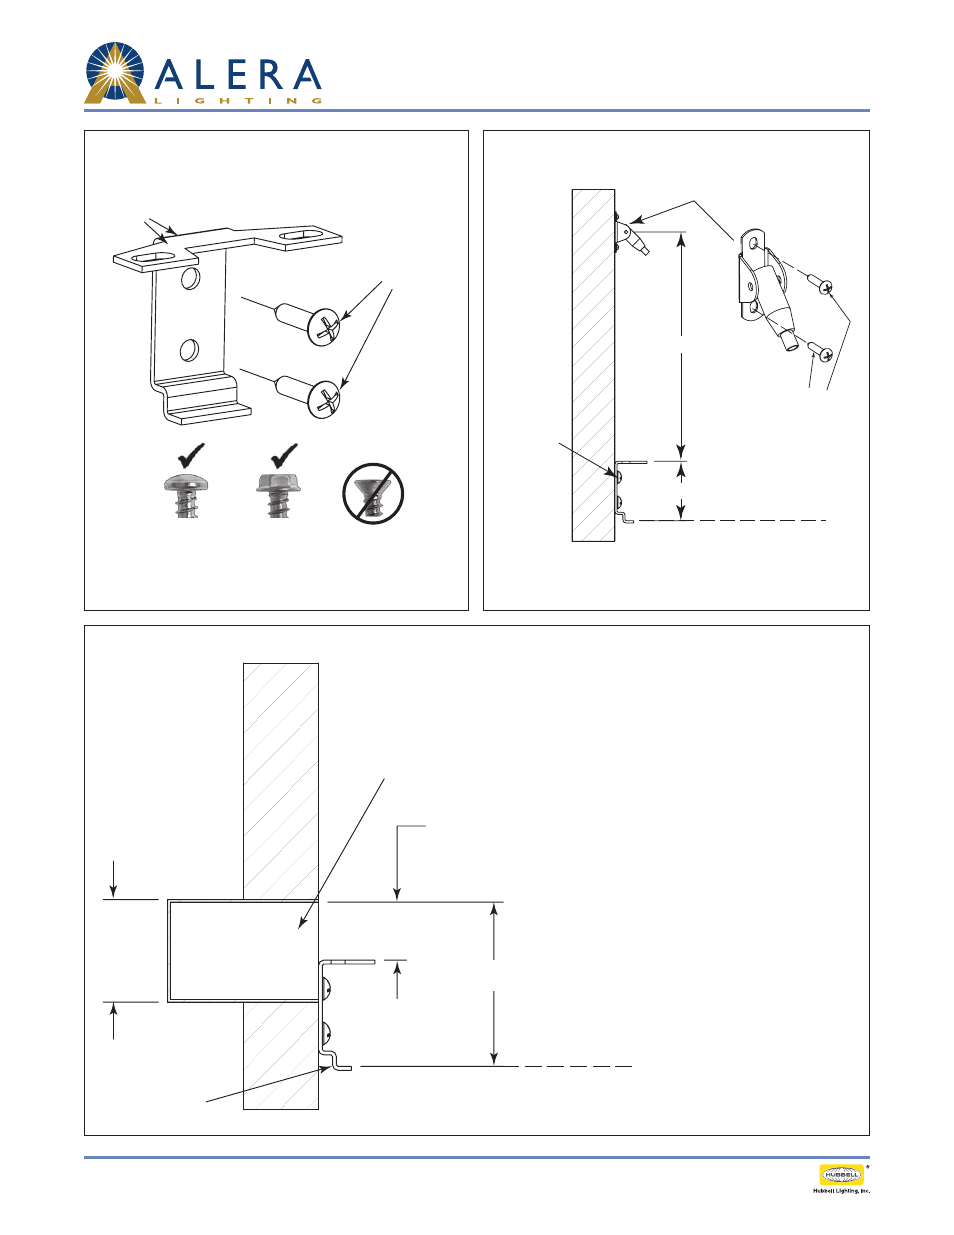
Install wall brackets at the desired elevation and at intervals
per Page 1. Only use screws with flat contact faces. Taper-head
screws will cause brackets to shift during installation. Bracket
elevation should be accurately controlled to ensure level rows.
#12 or #14 Screws
(Supplied by others)
Wall Bracket
Wall Bracket
Desired fixture height
#6 or #8 Screws
(supplied by others)
Wall cleat for cable option
Install J-Boxes so that the top of the openings are 3 1/4"
to 3 1/2" above the intended height of the fixture. This
will give a J-Box opening of 1 1/8" to 1 3/8" above the top
of the wall bracket/fixture.
Step 1
Step 2
Step 3
2"× 4" J-Box
(Supplied by others)
Desired Fixture Height
3 1/2"
3 1/4"
Wall Bracket
2"
1 3/8"
1 1/8"
Install optional wall cleats, if provided, using two (2) #4 screws
(supplied by others) at the height shown above and at the
intervals per Page 1.