Plank wall mount, Step 5 step 6 step 4 – Alera Lighting PLKWM User Manual
Page 3
© 2009 Alera Lighting, a division of Hubbell Lighting, Inc. Because of continuing product improvement programs, Alera Lighting reserves the right to change specifications
without notice. 701 Millennium Blvd. Greenville, SC 29607 / Tel 864.678.1000 / Tech Support 864.678.1580 / Website www.aleralighting.com
Page 3/6 Rev. 12/21/09
BeAMS / PLK WM TID
Plank Wall Mount
Technical Installation Data
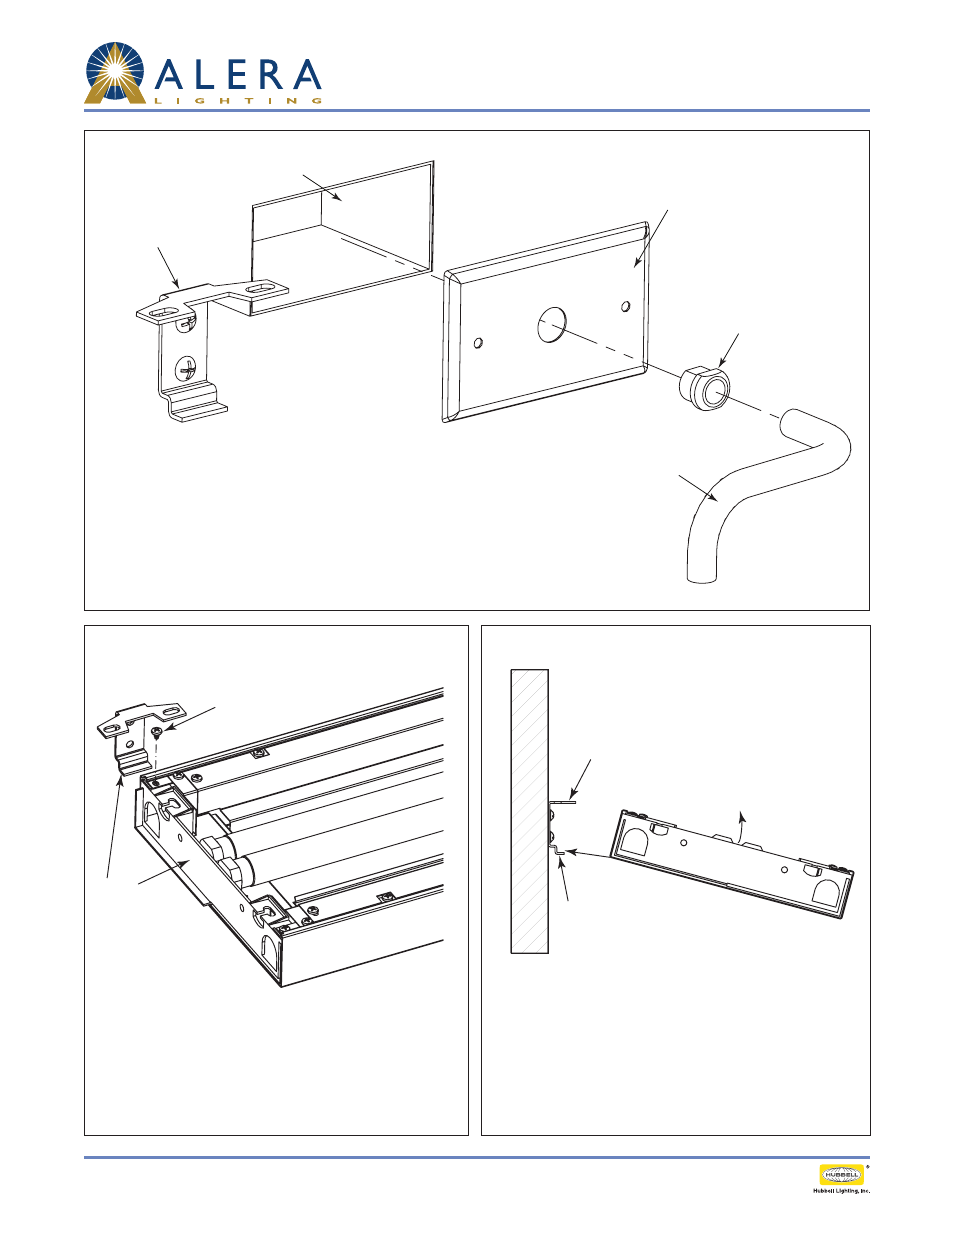
Make electrical connections within J-Box per local and
national electric code, and assemble components as
shown. Let feed cord hang until luminaires are installed.
Feed Cord
Strain-Relief Bushing
Wall Plate with 5/8" dia. hole (supplied by others)
2" or 4" J-Box or Switch Box
Wall Bracket
Remove existing
8# screw
End of fixture
with wall
bracket
Remove existing screw that holds casting at end of
fixture. This screw is on the WALL side at the end where
the wall bracket will attach. Remove one (1) screw per
fixture, two (2) for fixtures at start of rows.
Roll fixture into place on wall as shown. Engage lower
tab of wall bracket first and then rotate fixture to
engage upper tab.
Lower Tab
Upper Tab
Step 5
Step 6
Step 4