X144 e-flowmeter, Quick start installation & removal instructions – Cla-Val X144 Quick Manual User Manual
Page 4
X144 e-FlowMeter
Quick Start Installation & Removal Instructions
Before
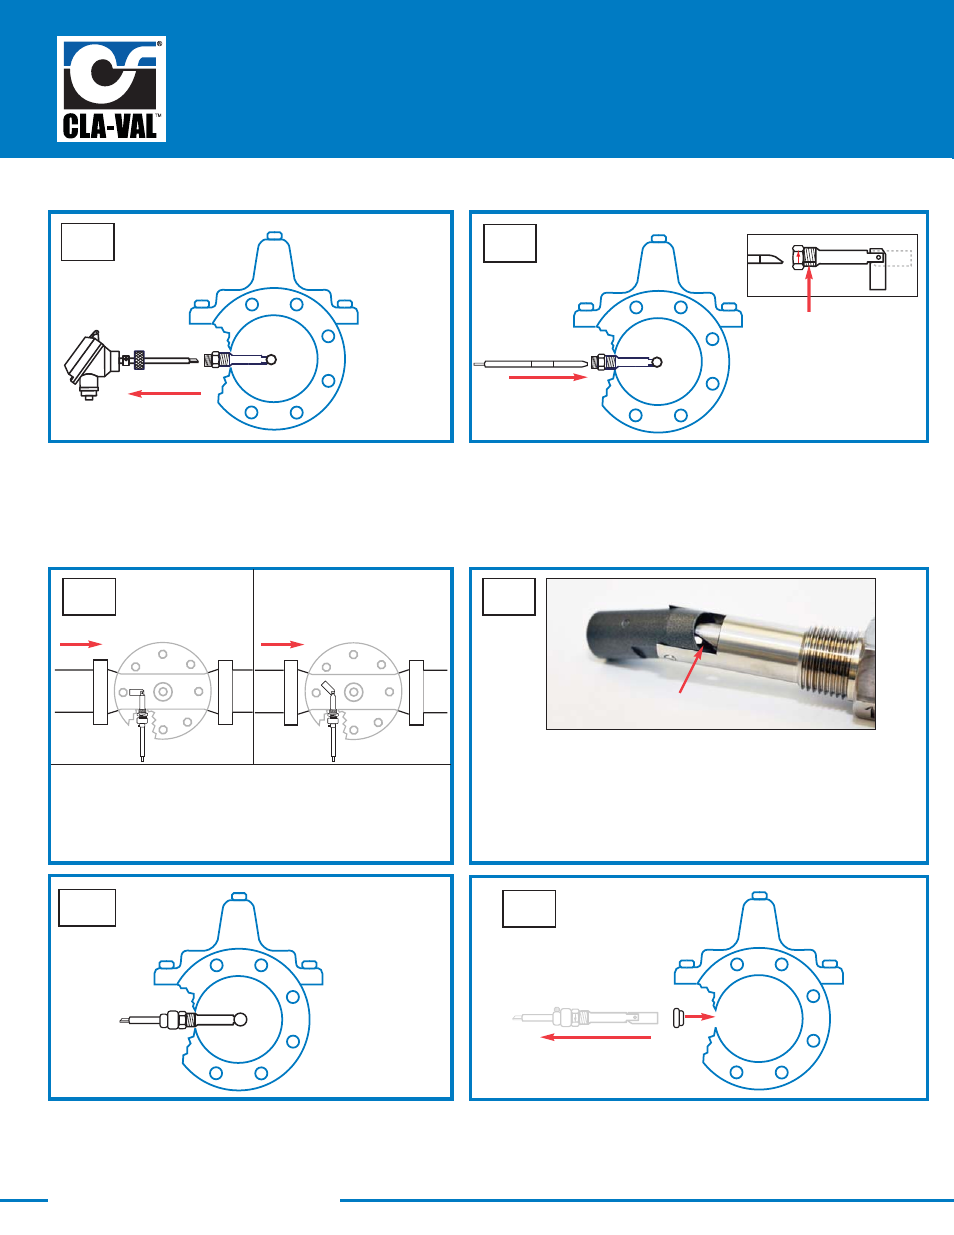
3
Step 3:
• Remove the e-FlowMeter Sensor/Head Assembly by
pulling straight outward, being careful not to hit the
sensor tip on the Threaded Swivel Insert tube
• Set Sensor/Head Assembly aside, taking care to
protect the sensor tip
4
Step 4:
•
Orient the Installation Tool so that the bevel is
facing downstream, away from the centering
groove as shown in detail drawing, and insert into
the Threaded Swivel Insert
Step-By-Step X144 e-FlowMeter Removal Instructions (continued)
centering groove
5
Step 5:
• Once inserted into the Threaded Swivel Insert tube,
the Installation Tool will engage the top face of the
Measurement Cylinder and force it to the 45° position,
as shown above
top view
After
6
Step 7:
• Once engaged, use light force to straighten the
measurement cylinder, and then secure the Installation
Tool in place with Locking Collar in locked position
Step 6:
• Slide Installation Tool straight out, then rotate 180° so that
the bevel is facing upstream of the valve, which is now
facing the same direction of the centering groove, see above
• The lip of the Installation Tool will engage the inside of the
Measurement Cylinder as shown in photo
Installation Tool lip
7
Step 8:
• Remove Threaded Swivel Insert from the valve tapping with
the Measurement Cylinder straightened
• Insert body plug into tapping while servicing the e-FlowMeter
8
top view
N-X144 Quick Start, Removal & Wiring (R-04-2013)
flow
flow