Infinity Drain TD Series Installation Instructions User Manual
Page 5
5
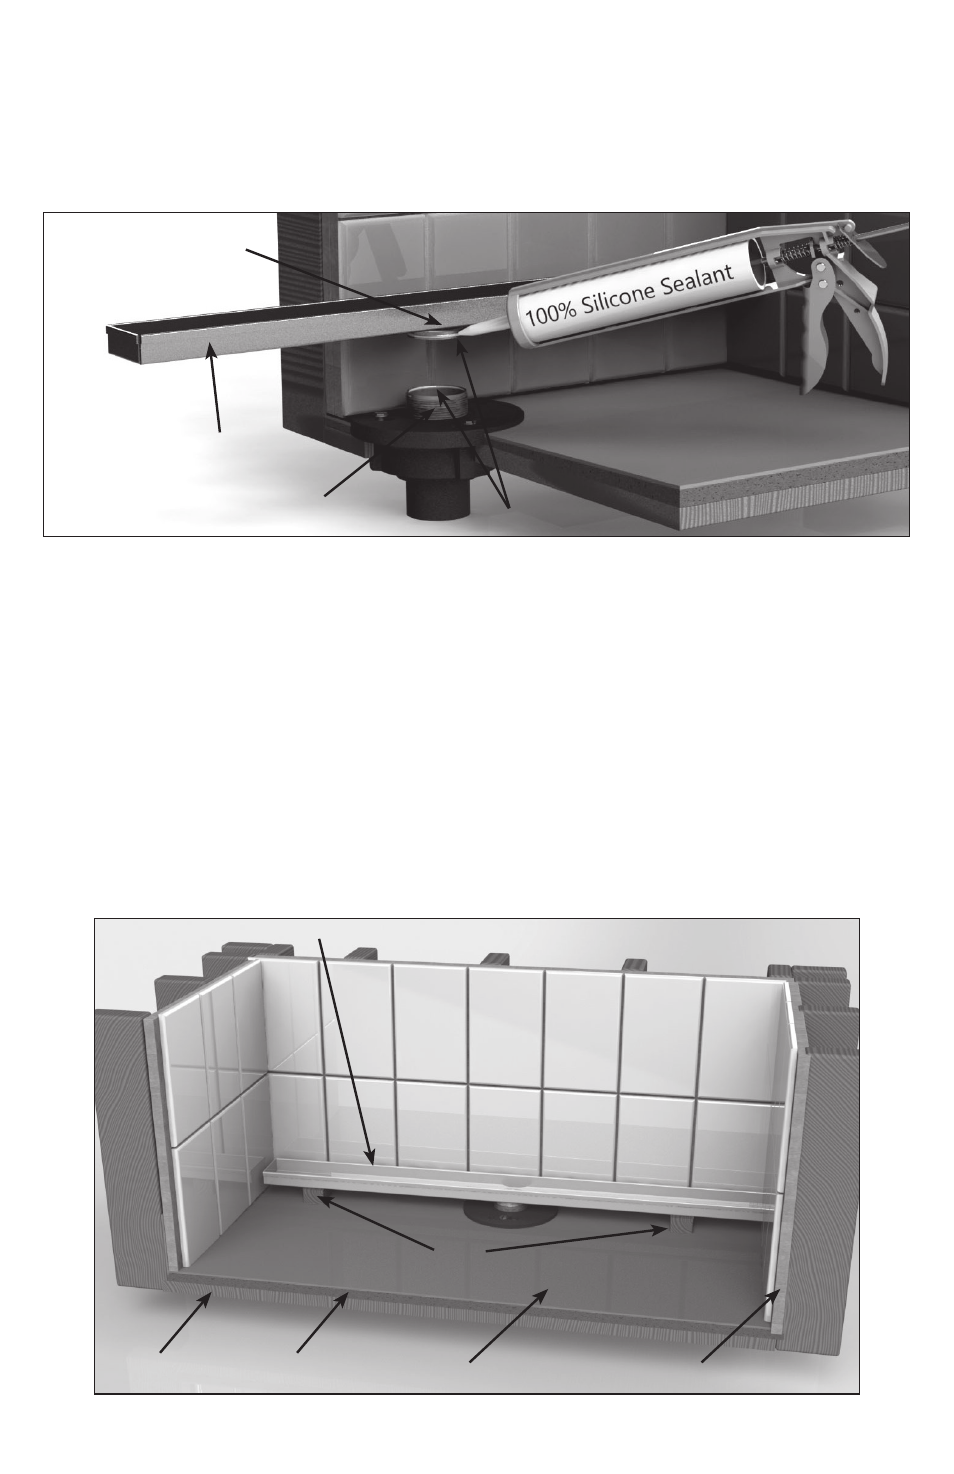
Channel Outlet
(C) Threaded Nipple
TNAS/TN4A
(B) Bottom Channel –
XC65/IC65/XC125
100% Silicone Bead
5. Reattach the top clamp down plate (D1)
to the clamp down drain body (D2) over
the waterproofing layer using bolts. Screw
threaded nipple (C) into top clamp down plate
(D1). Adjust to the desired height. Turn clock-
wise to lower, counter-clockwise to raise.
5. Vuelva a colocar la placa de sujeción de arriba
del drenaje (D2) sobre las capas de imperme-
abilización utilizando tornillo. Enrosca el niple
roscado(C) adentro de la placa del drenaje (D1).
Adaptarla a la altura que desea. Gire hacia la
derecha para bajar, hacia la izquierda para subir.
6. Clean lip of the outlet hole using dena-
tured alcohol. Apply a bead of silicone caulk
around the outside of the outlet of the stain-
less steel channel (B). Press channel outlet
into the threaded nipple (C) to create a water
tight seal. Be sure to support the length of
the channel after setting.
7. Create a mortar bed the length of the
channel on the waterproofing membrane and
backfill the underside of the stainless steel
channel and level. Use necessary amount of
mortar to adequately support the channel.
6. Limpie el reborde de la salida del agujero en la
parte baja del canal de PVC usando alcohol des-
naturalizado. Aplicar un cordón de sellador de
silicona alrededor del exterior del canal de acero
inoxidable (B). Presione el agujero del canal
hacia el interior del niple roscado(C) para crear
un sello hermético. Asegure que la longitud este
compatible al canal después de establecer.
7. Crear un base de mortero de la longitud del
canal en la membrana de impermeabilización y
rellene la parte de inferior del canal de acero inox-
idable y nivélelo. Utilice la cantidad necesaria de
mortero para soportar adecuadamente el canal.
Waterproofing Membrane
Backer Board
Motar Bed
Shims
Subfloor
(B) Bottom Channel