Vesa mounting (optional), Configuring the tlp 700tv (initial setup), Setup menu – Extron Electronics TLP 700TV Setup Guide User Manual
Page 3: Calibration menu, Reset modes
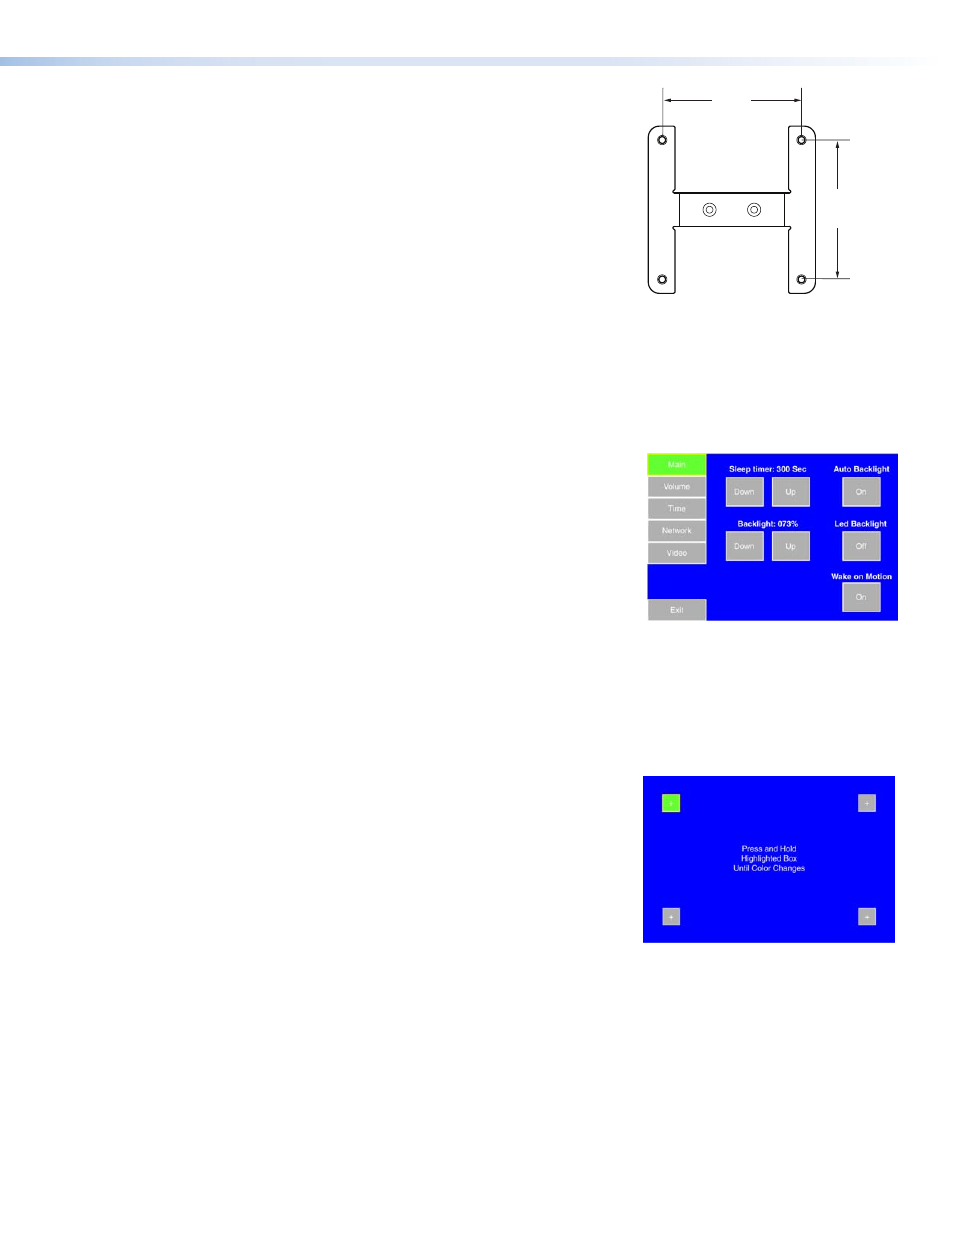
VESA Mounting (optional)
The stand for the TLP 700TV can be removed and replaced with the Extron
VM 700T kit (part #70‑692‑01). This bracket (see figure 7) fits into any third-party
VESA Type D 75 mm wall mount system. For more information, see the instructions
that come with the VM 700T kit.
Configuring the TLP 700TV (Initial Setup)
Before using the TLP 700TV, configure it, using the on screen menus. Five different screens (Main, Volume, Time, Network,
and Video) can be selected by pressing the appropriate button at the left side of the screen. An Exit button in the bottom
left corner closes the menus.
Setup Menu
1.
Use a paper clip to press the recessed menu button (
h
), as shown in figure 1.
This opens the setup menu at the Main Setup Page (see figure 8).
2.
Touch an area of the screen to bring it into focus and use the up and down
buttons or the volume control knob to adjust the value. Some options have a
single button and toggle between Off and On when pressed.
Use the different screen menus to adjust the following options. For more details,
see the Reference Manual, which is available online at
www.extron.com
.
Main (shown at right) — This screen is used to adjust the Sleep timer, Backlight,
Auto Backlight, LED Backlight, and Wake on Motion functions.
Volume — This screen is used to adjust the Master, Click, Sounds, and Line In
volume settings.
Time — This screen is used to set up the correct time and date.
Network — This screen is used to set the IP Address, the Subnet Mask, and to enable or disable Dynamic Host Configuration
Protocol (DHCP).
Video — This screen provides a small video preview window and the controls to set up the video Contrast, Color, Brightness,
and Tint.
Calibration Menu
1.
From the Setup menus, press the menu button a second time (
h
), as shown
in the front panel diagram on page 2. This opens the Calibration Screen.
For more details, see the Reference Manual. Once all four points have been
calibrated, the screen returns to the Setup Menu.
2.
Press Exit to close the on screen menus.
Reset Modes
The TLP 700 TV has four reset modes that can be initiated by using a paperclip to
press the Reset button (
i
) in the front panel diagram on page 1.
Factory Firmware mode: Hold the Reset button while applying power to reset the
unit back to the base firmware shipped with the unit.
Run/Stop Events mode: Hold the Reset button until the reset LED blinks once (3 seconds), then release and press Reset
momentarily (less than 1 second) within 1 second. This mode turns events either On or Off.
Reset All IP Settings mode: Hold the Reset button until the reset LED blinks twice (6 seconds), then release and press Reset
momentarily (less than 1 second) within 1 second. This mode resets the IP address, subnet, gateway, port mapping, and
DHCP settings back to factory defaults. The reset LED blinks 4 times in quick succession, confirming the reset and turning
events off. If necessary, reset the IP address, using ARP and the MAC address.
Reset Factory Defaults mode: Hold the Reset button until the reset LED blinks three times (9 seconds), then release and
press Reset momentarily (less than 1 second) within 1 second. This mode causes a complete reset to the factory defaults
(except firmware).
Figure 8.
Setup Screen
Figure 7.
VESA Mounting Kit
75mm
2.95”
75mm
2.95”
Figure 9.
Calibration Screen