Installation, Installation, cont’d, Rack mounting the switcher – Extron Electronics Matrix 50 Series User Manual
Page 16: Cabling and rear panel views, Matrix 50 series switchers • installation 2-2
Installation, cont’d
Matrix 50 Series Switchers • Installation
2-2
Installation
Rack Mounting the Switcher
The Matrix 50 Series Switchers are housed in rack-mountable, 2U high, 19” wide
metal enclosures. The appropriate rack mount kit is included with each switcher.
Rack mount the switcher as follows:
1
.
Insert the switcher into the rack, align the holes in the mounting bracket with
those of the rack.
2
.
Secure the switcher to the rack using the supplied machine screws.
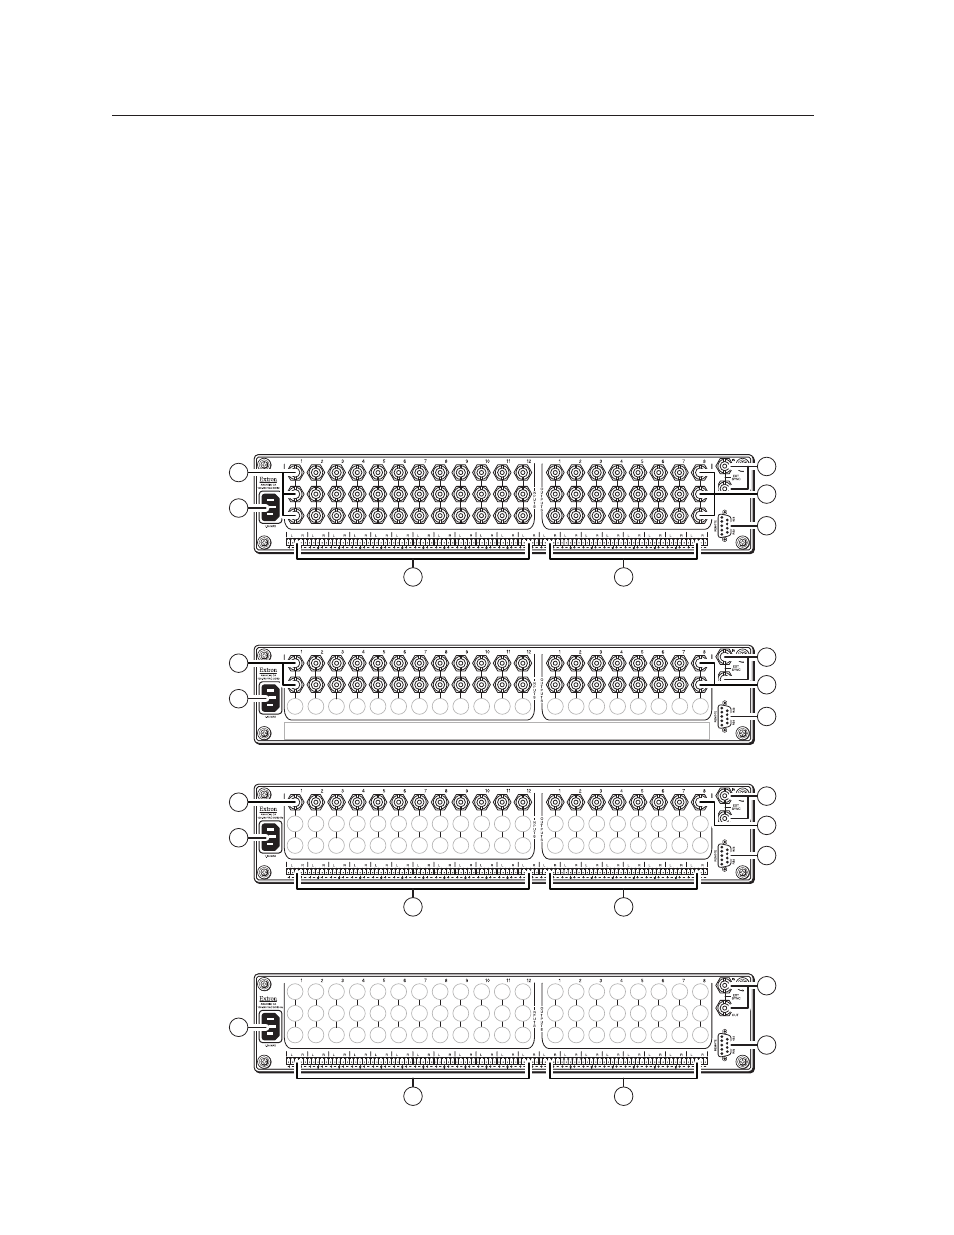
Cabling and Rear Panel Views
All connectors are on the rear panel. Figure 2-1 shows a 12x8 Matrix 50 component
video and audio switcher. Figure 2-2 shows a 12x8 Matrix 50 S-video switcher
without an audio module. Figure 2-3 shows a 12x8 Matrix 50 composite video and
audio switcher. Figure 2-4 shows a 12x8 Matrix 50 audio switcher. The 8x4, 8x8,
and 12x4 matrixes are housed in the same 2U enclosure, but have fewer input and/
or output connectors to accommodate the different matrix sizes each provides.
1
2
3
4
5
6
7
8
9
10
11
12
1
2
3
4
5
6
7
8
1
6
7
4
5
3
2
Figure 2-1 — Rear panel connectors, Matrix 50 component video and
audio switcher
1
6
7
3
2
Figure 2-2 — Rear panel connectors, Matrix 50 S-video switcher
1
2
3
4
5
6
7
8
9
10
11
12
1
2
3
4
5
6
7
8
1
6
7
4
5
3
2
Figure 2-3 — Rear panel connectors, Matrix 50 composite video and
audio switcher
1
2
3
4
5
6
7
8
9
10
11
12
1
2
3
4
5
6
7
8
1
6
7
4
5
Figure 2-4 — Rear panel connectors, Matrix 50 audio switcher