Installation and configuration, Installation overview – Extron Electronics EDID 101H User Guide User Manual
Page 9
EDID 101H • Installation
3
Installation and
Configuration
This section describes the installation, and configuration of the EDID 101H, including:
•
•
•
Rear Panel Features and Cabling
•
•
Installation Overview
POWER
12V
0.3A MAX
EDID
STORE
A B
A B
C
OUTPUT
INPUT
EDID
HPD
0
1
2
3 4 5 6 7
8
9
A
B
C
D
E
F
ON
1 2 3
1
2
3
4
5
6
9
7 8
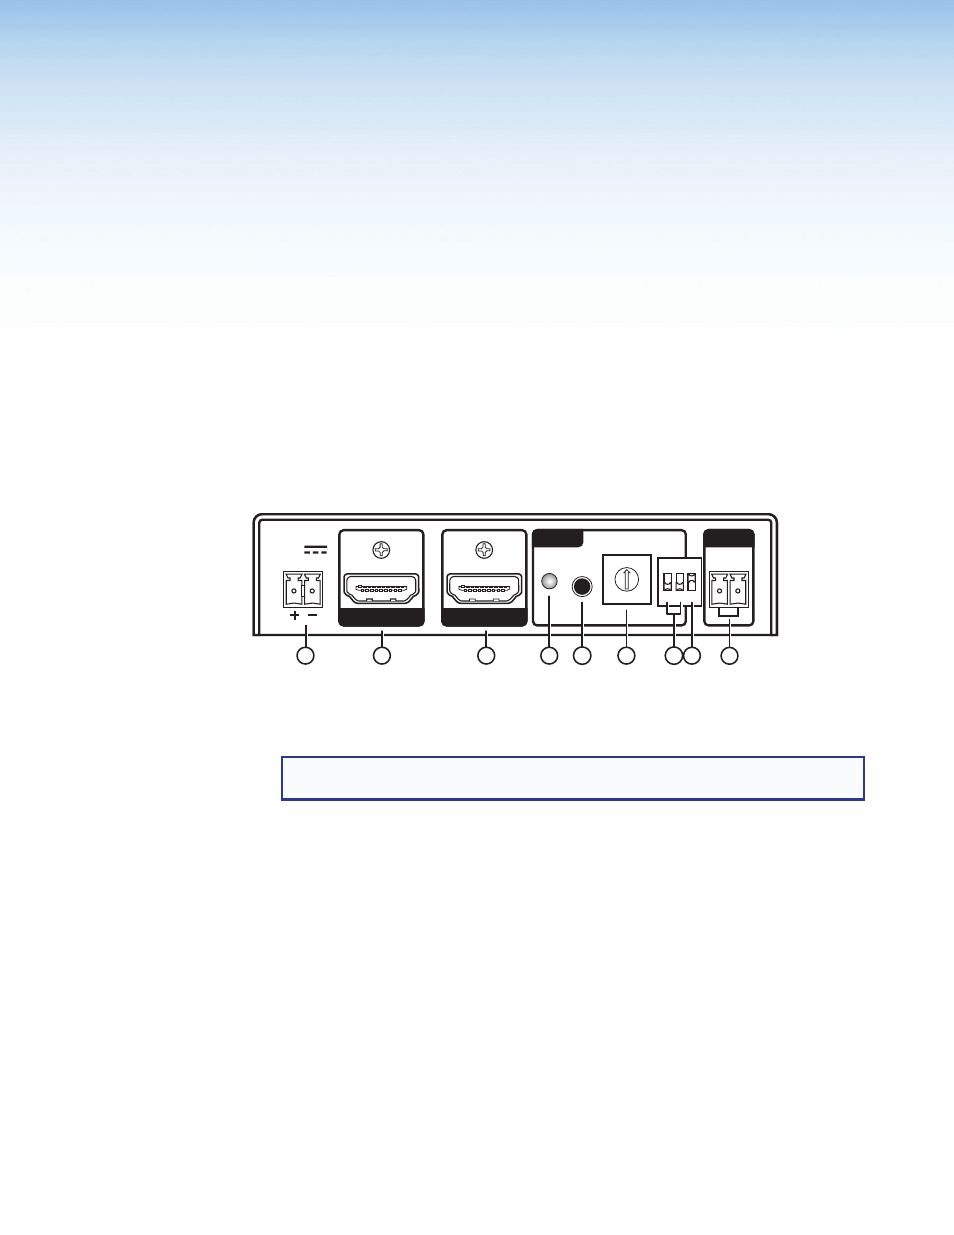
Figure 2.
EDID 101H Rear Panel
1.
on page 15). Do not connect
power to the source, the display, or the EDID 101H at this time.
TIP: If access to the EDID 101H is restricted after mounting or installation,
configure the EDID 101H prior to the installation.
3.
Configure the EDID 101H (see
4.
Connect an HDMI cable from the source to the Input (
b
).
5.
Connect an HDMI cable from the Output (
c
) to the video display or distribution system
input.
6.
Connect power and turn on the video display or distribution system.
7.
Apply power to the EDID 101H (
a
). The power LED lights green.
8.
Turn on the video source.
The video source reads the EDID from the EDID 101H.