Cabling the cc 100c – Extron Electronics CC 100C User Manual
Page 3
3
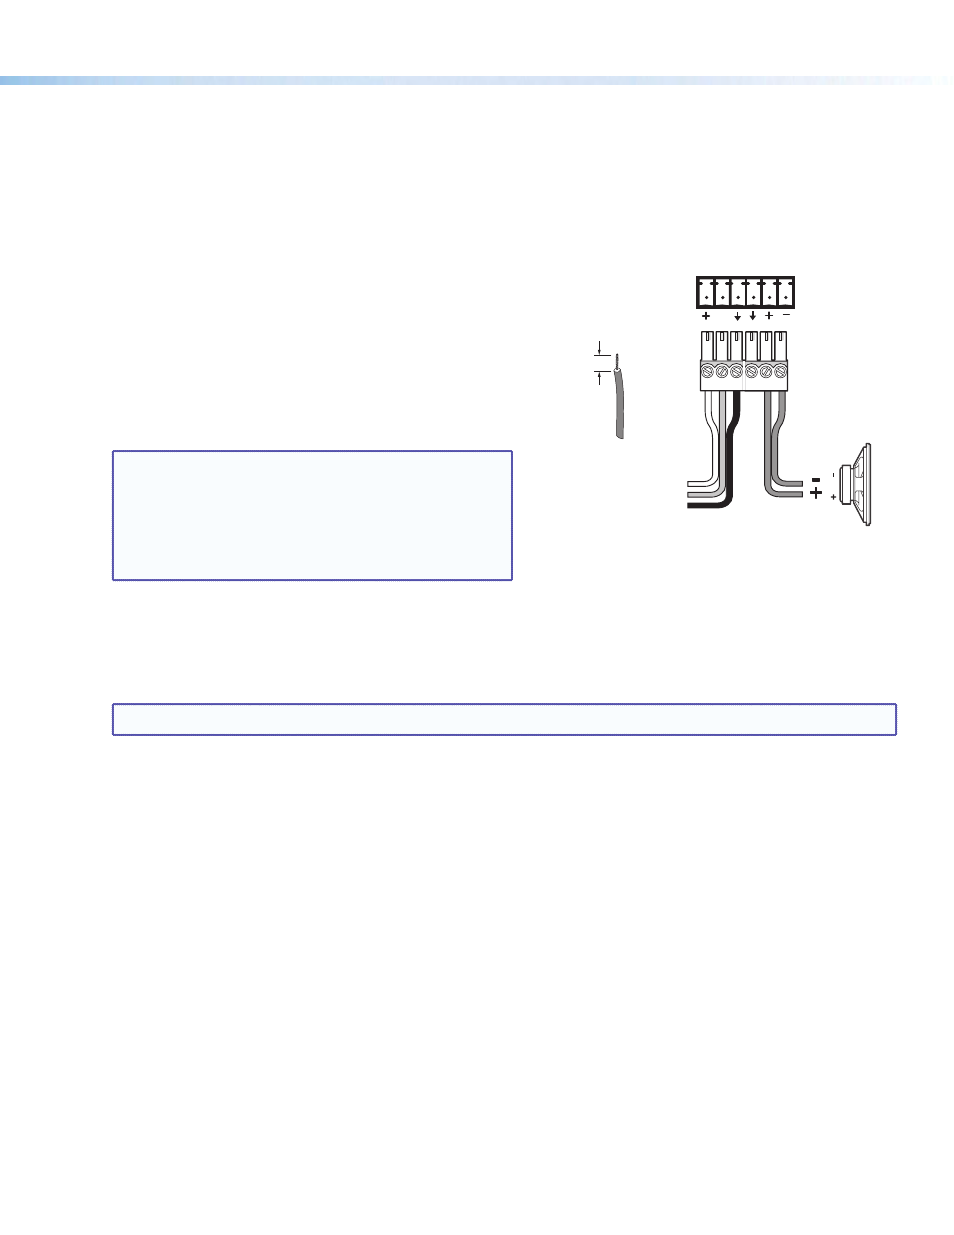
V
MIC SPKR
Microphone level input
Mic power
Ground
CC 100C
Rear Panel
Mono
Speaker
Strip wires
to 3/16"
(5 mm)
Max.
Cabling the CC 100C
Connect the cables to the device as described below.
Step 1 — Connect the LAN Cable
m
LAN/PoE — Using a CAT 5e straight through network cable connect to a network. The LEDs light green for link status
and blink amber during activity.
Step 2 — Connect the Mic Input and Speakers
h
Mic input — Using a 6-pin captive screw connector, wire a
microphone audio input for insertion into the 3 poles labeled as
MIC.
i
Speaker — Using a 6-pin screw block terminal, wire a mono
speaker for insertion into the speaker outputs
(+ and -) labeled as SPKR. Wire both connectors as shown in
figure 4.
Alternatively, a mono line out connection is also available on the
front panel
f
.
NOTE:
The length of the exposed wires in the stripping
process is critical. The ideal length is 3/16 inches (5 mm).
Any longer and the exposed wires may touch, causing a
short circuit between them. Any shorter and the wires can
be easily pulled out even if tightly fastened by the captive
screws. Do not tin the wires. Tinned wire does not hold its
shape and can become loose over time.
Step 3 — Connect the Power
n
or
o
Power input — Noting the correct polarity, wire a power cable to a 2-pole connector and insert into this 2-pole
captive screw port
n
.
Alternatively, insert a power cable into the DC input jack
o
.
NOTE:
Both of these are connected internally so one can be used as a power output for other devices.
Step 4 — Address the Unit
The CC 100C is now ready to acquire an IP address and announce it over the speaker output. If no DHCP server is available this
can take up to 5 minutes.
If audio outputs were not connected in step 2 above, use the ARP command procedure below. Ensure that the Ethernet address
(MAC) matches the CC 100C device (see label on the bottom of the device). Now that the IP address is known, the CC 100C is
ready to be configured.
Setting a temporary IP address using the ARP command
This procedure will work only in a local network. After this procedure the temporary IP is active only until a restart or reboot. After
a restart the procedure has to be repeated.
1. Either use a network cable to link the CC 100C and the PC directly, or connect the CC 100C to the PC via your network
switch and power the device. Make sure that you have a valid static IP address configured on your PC (for example
192.168.0.2).
2. Windows: Click on
Start, then type Run in the program search field, and click on Run Porgram. In the Open field type cmd.
Click
OK. A command window opens.
OSX / Linux: Open a terminal window.
3. If you linked the PC directly to the device in step 1, proceed to step 4.
To ensure that you use a free IP address (not already used by another device in the network) use the ping command. To verify
availability in this example we assume the PC to have the IP address
192.168.0.2 and want to check if 192.168.0.6
address is available.
Type
ping 192.168.0.6 and press
"pinged" IP is available.
Figure 4.
Wiring the Rear Panel MIC Input and
Speaker Output