6 mounting the spark to a scope – Armasight NSGSPARK01CCIC1 Spark-G Night Vision Goggles User Manual
Page 20
20
3. To uninstall the Spark from the weapon mount adapter, push down on the lever (C) and remove the
unit.
4. If necessary, you can change the height of the Spark using an additional plate (D).
3.1.5 MOUNTING THE SPARK TO A WEAPON WITH A qUICK-RELEASE
PICATINNY MOUNT ADAPTER
To mount the Spark to a weapon using an optional quick-release Picatinny mount adapter(QRM), per-
form the following:
1. While pushing down on the lever holder (C), turn the lever (B) backwards to loosen the QRM clamp-
ing device (A).
2. Install the QRM on the weapon rail by inserting the stop (not shown in Figure 3-5) into one of trans-
verse slots of the weapon rail.
3. To secure the QRM onto the weapon rail, turn the lever (B) forward. Secure the clamping device (A)
tightly to the weapon rail. To adjust the force of the lever clamp, loosen or tighten the nut (D) as neces-
sary:
- When the clamping device (A) unlocked, push the lever holder (C) so that the nut (D) gets out of
its hollow.
- To tighten/loosen clamping device, turn the nut (D) CW/CCW, respectively, by one-two increments
(the eight-sided nuts of the AIM clamping devices fit their hollows only if turned in one of the dis-
crete positions), when the holder (C) pushed. Just as the holder (C) released, backmoving springs
makes the nut (D) get back into its hollow.
- Check to ensure the clamping device holds weapon/NVM rail firmly.
4. While pushing down on the lever holder (F), turn the lever (E) forward.
5. Install the Spark on the QRM rail by inserting the stop (G) into the transverse slot of the unit rail.
6. Attach the Spark to the QRM rail by turning the lever (E) backwards. Secure the QRM clamping device
(H tightly to the Spark rail. To adjust the force of the lever clamp, loosen or tighten the nut (I) as neces-
sary.
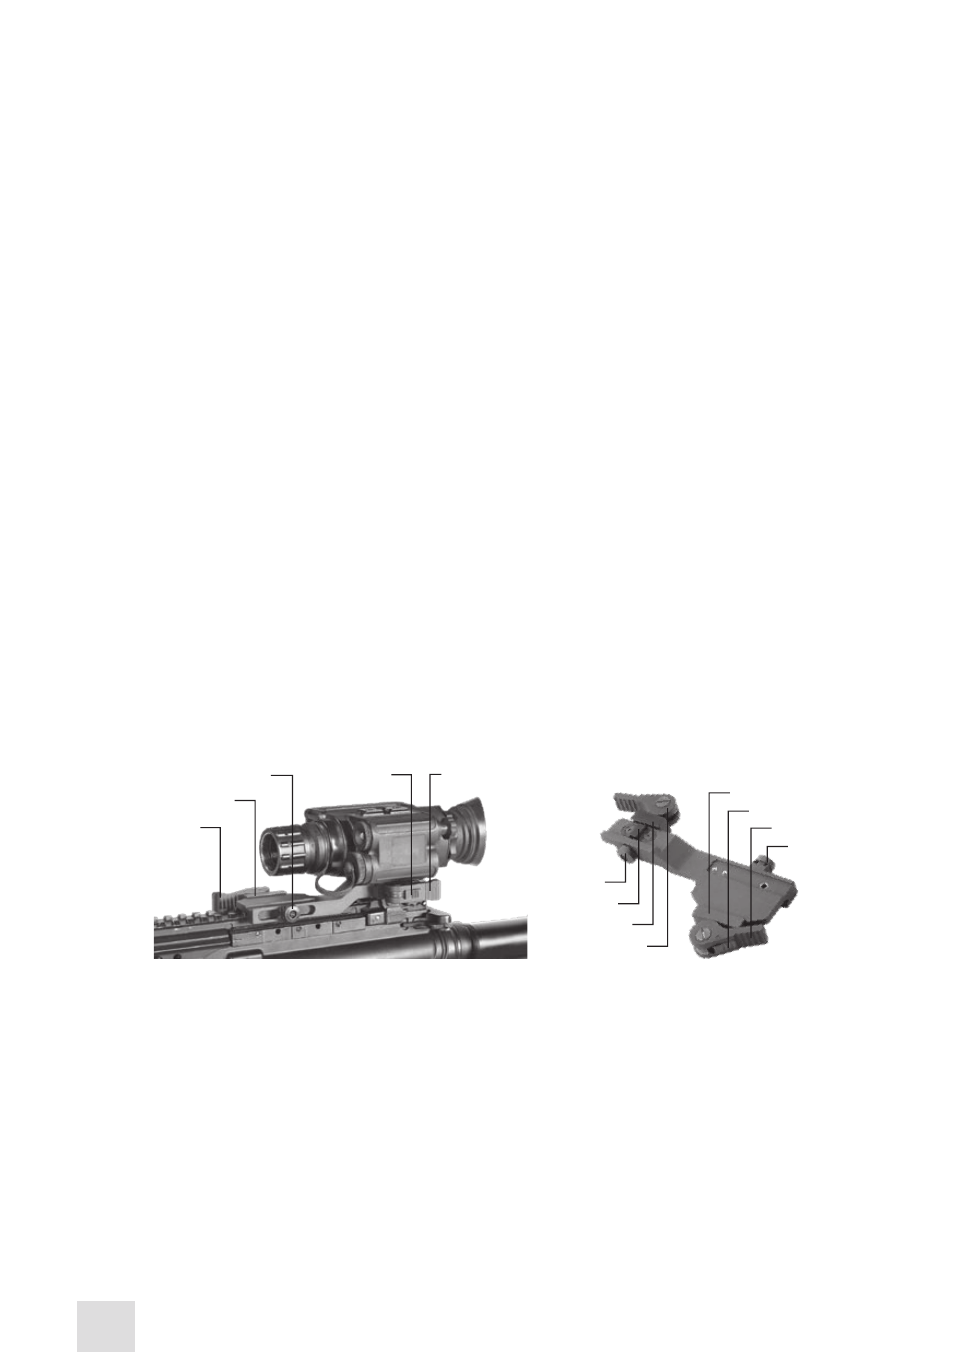
A
B
F
d
B
A
FIGURE 3-5. MOUNTING THE SPARK TO A WEAPON WITH A qUICK-RELEASE PICATINNY
MOUNT ADAPTER
E
C
d
G
I
H
E
3.1.6 MOUNTING THE SPARK TO A SCOPE
To mount the Spark to a daytime scope using an optional flip-up scope adapter, perform the follow-
ing:
1. Loosen the adapter’s fixing screw (A).
2. Install the insert into the adapter (Armasight supplies inserts of different sizes for coupling with 38-
43mm eyepieces).
3. To attach the Spark to the adapter bracket (B), push down on the button (C), loosen the fixing screw
(D), and insert the unit rail into the bracket guide. Tighten the screw (D) to secure the Spark to the
bracket.