Diagram #4, Diagram #3, Diagram #5 – Derale Performance Tornado Electric Fan & Thermostat Kit User Manual
Page 2
(Continues on Page 3)
Derale Performance, Los Angeles, CA
800.421.6288 www.derale.com
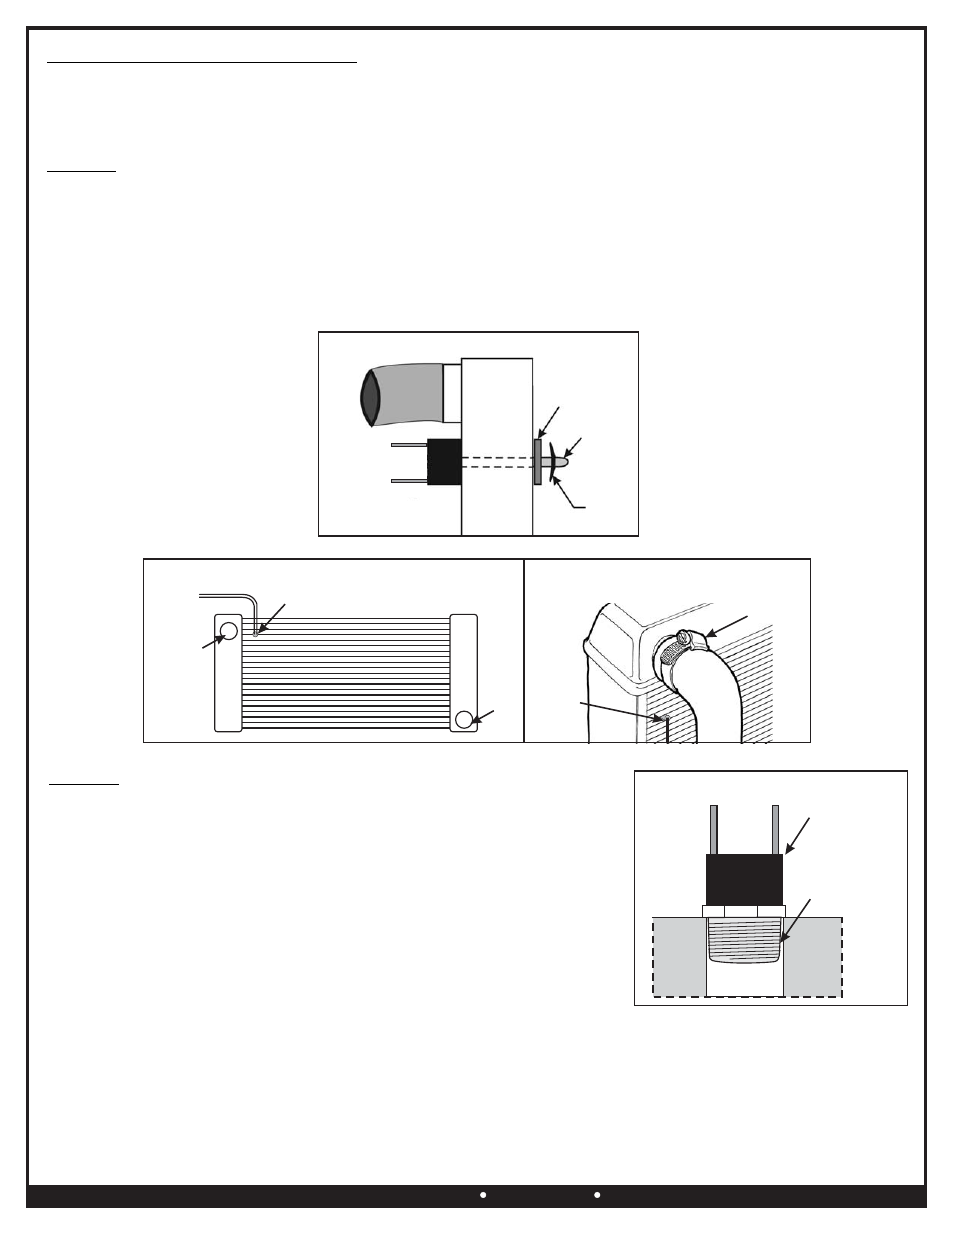
THERMOSTAT PROBE INSTALLATION
Option 1
This kit includes two thermostat probe options.
Choose the option that best fits your application.
(See Diagram #3)
(See Diagram #5)
For best results we recommend installing the Push-in Probe as close as possible to the water inlet of the radiator.
(See Diagram #4)
1.
Take the Push-in Probe and thread it clockwise onto the Thermostat Switch.
2.
Carefully insert the probe/thermostat assembly into the fins of the radiator until Thermostat Switch is flush with radiator.
3.
Install the 1 x 1 foam pad onto the Push-in Probe.
4.
Install Retaining Clip onto the Push-in Probe until tight. (See Diagram #3)
Option 1 - Push-in Radiator Probe
Option 2 - Thread-in Radiator Probe
Placement:
Installation:
Push-in
Radiator
Probe
Down-flow Radiator
Option 2
Placement:
Installation:
Note:
Locate a 3/8” NPT port either on the radiator, waterneck, intake
manifold or cylinder heads.
1.
Using Teflon tape or suitable sealant install the probe into the
on the vehicle.
2.
Using a 3/4” wrench tighten the probe.
3.
Carefully thread the Thermostat Switch clockwise into the Push-in Probe now
installed on the vehicle. Sealant such as Loctite can be used for permanent
installation. (See Diagram #5)
DO NOT TIGHTEN THERMOSTAT WITH A WRENCH, HAND TIGHTEN ONLY.
3/8” NPT
Thread-in Probe
Diagram #4
Push-in
Radiator Probe
Water
Inlet
Water
Outlet
Cross-flow Radiator
Water
Inlet
Radiator
Foam Pad
Retaining
Clip
Push-in
Probe
Diagram #3
Thermostat
Switch
Thermostat
Switch
3/8” NPT
Thread-in Probe
Diagram #5
Water
Jacket
Water
Jacket