Ingalls 93304 User Manual
Page 2
Ingalls Engineering Co., Inc. ● 2011 Cherry Street, Suite 104 ● Louisville CO 80027
(800) 641-9795 ● (303) 665-7800 ● Fax: (303) 665-7810 ● www.ingallseng.com
rather complicated, which may require the assistance of a qualified interior trim and panel service
professional. A stereo installation specialist performs this type of task daily.
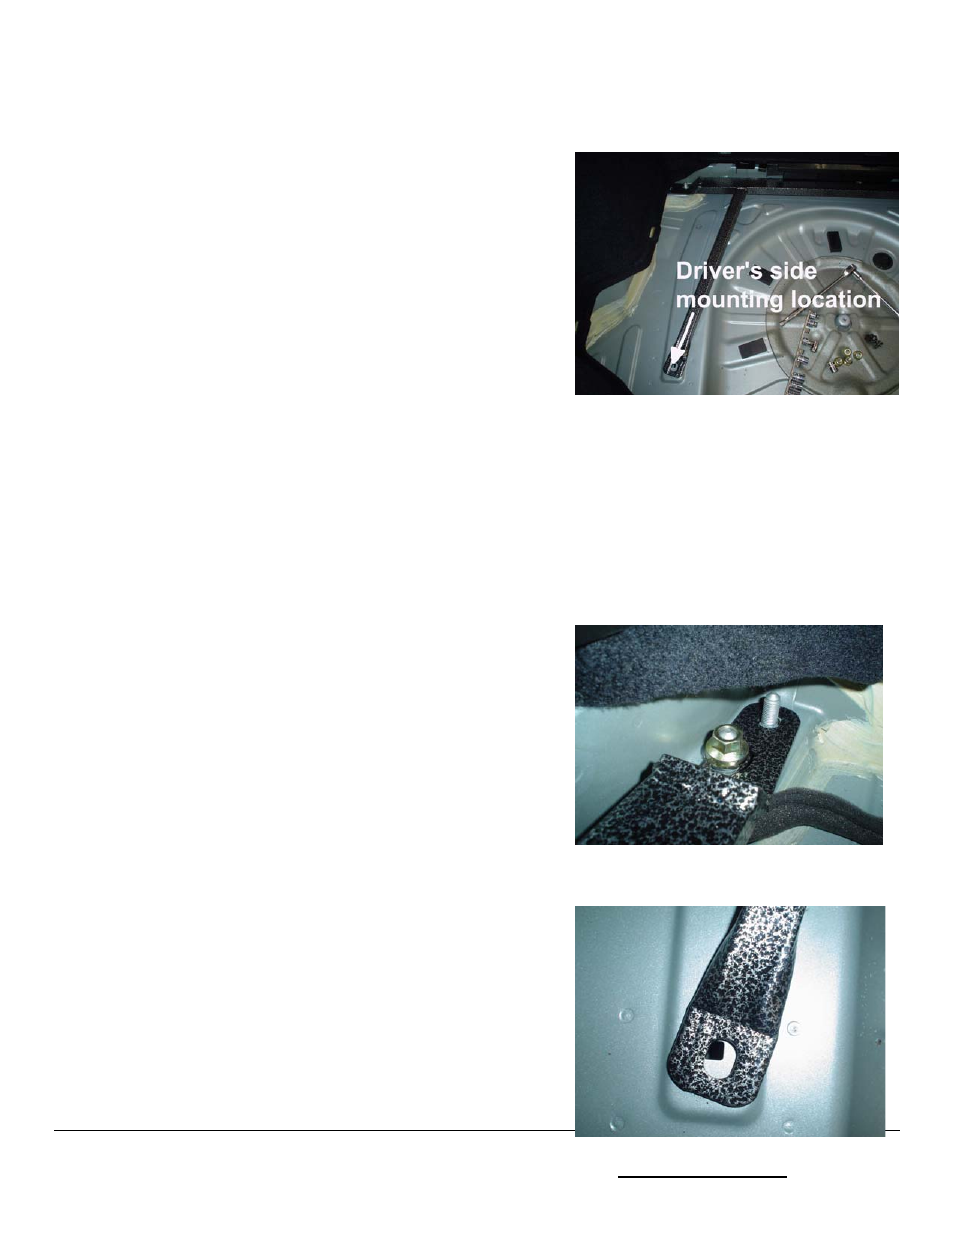
Step 2: Locate the mounting holes just above the rear
frame rails on each side of the car as shown in the
illustration. On the opposite, under side of the frame rail on
the driver’s side of the car there is a nut plate welded onto
the frame rail directly under the mounting hole. This nut
plate is the same specification as the bolt that will be used
during installation, however manufacturing inconsistency
most likely will not allow for the bolt to be threaded through
the nut plate. This will require the nut plate to be drilled out using a 11mm or 7/16 “drill bit or slightly
larger SAE drill bit. There are two nut plates on the frame rail, so make sure you have the correct one
before drilling. This operation is not required on the passenger’s side of the car.
Step 3: Next, drill out the square hole on each side of the frame rail from inside the trunk area using
a 10mm or slightly larger drill bit. You do not want the holes to be too big.
Step 4: Remove the two exposed nuts on top of each rear
shock tower with a 17mm socket or wrench. Place the
Heavy-Duty Rear Shock Tower Brace onto the threaded
studs that protrude through the rear shock towers. You can
replace the nuts, but do not torque them all the way, which
will allow for some slight movement to make fitment of the
rear legs easier.
Step 5: Insert the supplied 10mm bolts with washer,
through the holes on the rear legs of the brace making sure
that the bolt goes completely through the frame rail.
Note:
Due to manufacturing inconsistency the holes on the brace
may not line-up perfectly with the holes in the chassis. This
is the reality of manufacturing and is common with
automobiles and aftermarket components. The holes should