Daystar KG04501BK User Manual
Page 6
6
Body Measurement
Prior to installing your new Daystar Body Lift you will need to take body to
frame, bed to frame rail measurements and measure the gap between the body and
bed. These measurements are what you will need to adjust your body and bed
back to after installing your Body Lift.
When measuring the body you will want to measure down the drivers side and
passenger side in three different locations.
13. In front of the tire
14. Middle of the vehicle (at the front door and rear door seam)
15. The back of the body (where the bed and body separate)
We recommend you take the body measurements from the lowest point on the
body and the outside of the frame rail. (If you choose to use different locations for
measuring be sure that you use the same reference points on both sides)
The bed will require two measurements down the drive side and passenger side as
well. You will want to measure at the front of the bed where the bed and body
separate and at the back of the bed just behind the drive tires. You should use the
same measuring points as you did on the body.
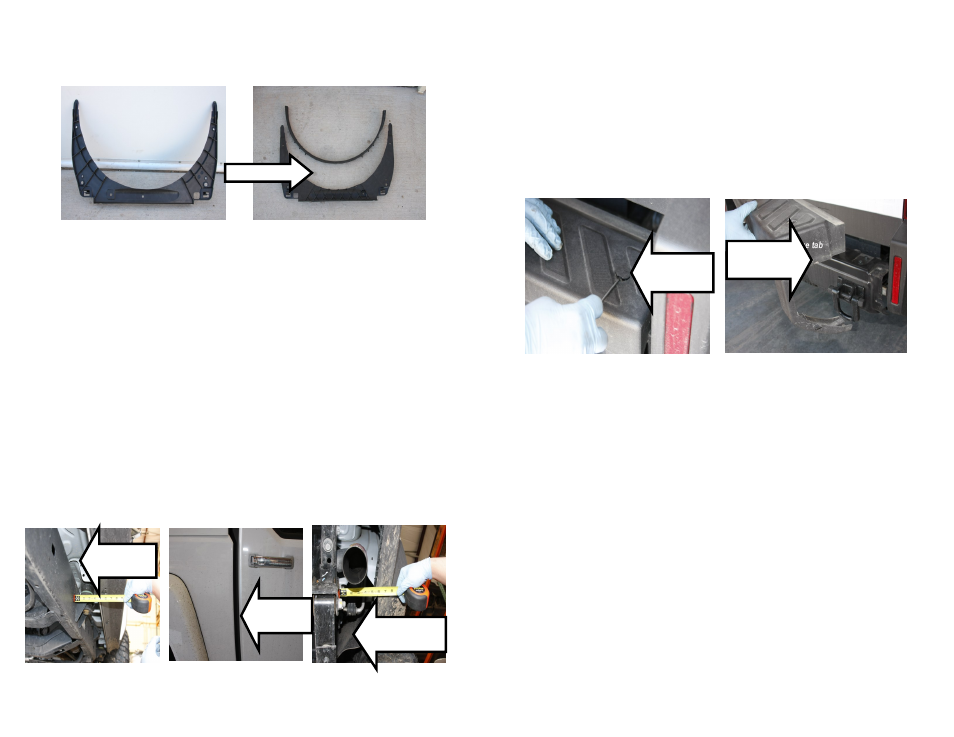
Measure
Trim off 1/4”
Measure
Measure rear
7
Bumper Cap
The Rear Bumper Cap will require removal and trimming of the two triangle tabs
on top side of the bumper cap. To remove the cap simply pop the two plug caps at
the top and remove the screw using a Phillips head screw driver. You will then
want to go underneath of the bump cap and remove the torx head screws, once
loose locate the push style clips on the back side of the bumper cap, depress and
slightly pry up on the bumper cap.
Once the bumper cap is removed trim the triangle tabs on the top side, and debur.
Simply reverse these instructions to re-install the bumper cap.
Body Lift Install
When installing your new Body Lift Spacers be sure to only do one side at a time.
You will want to loosen the opposite side that you are working on just enough so
that you can raise the side you are working on up to slide in your new spacers.
Drive / Passenger Side Installation
You want to raise the driver side with caution so that you do not over extend the
steering shaft!
Remove cap
and screw
Trim off
triangle tab