Daystar KG04501BK User Manual
Page 4
4
!Warning: Always work with appropriate personal safety
gear including safety glasses, gloves and hearing protection if
using air powered tools.
Begin by inspecting the components & hardware for dam-
age. Then compare components & hardware to the bill of materi-
als for completeness. If anything is missing/damaged, do not pro-
ceed with the installation. Please, call Daystar Products (800-595-
7659) and we will send you the missing of damaged components
free of charge.
!Caution: Vehicle body must be raised to install Body lift kit.
Using a hydraulic chassis lift will greatly ease installation. If
another jack is used, assure vehicle is level on a firm surface,
in park (1st gear), rear wheels blocked and jack stands in
place to support vehicle in case jack or vehicle shifts.
H3T 1” DAYSTAR BODY LIFT and 2” TORSION KEY KIT with 37” TIERS
9
NOTICE: Double check all of the installation,
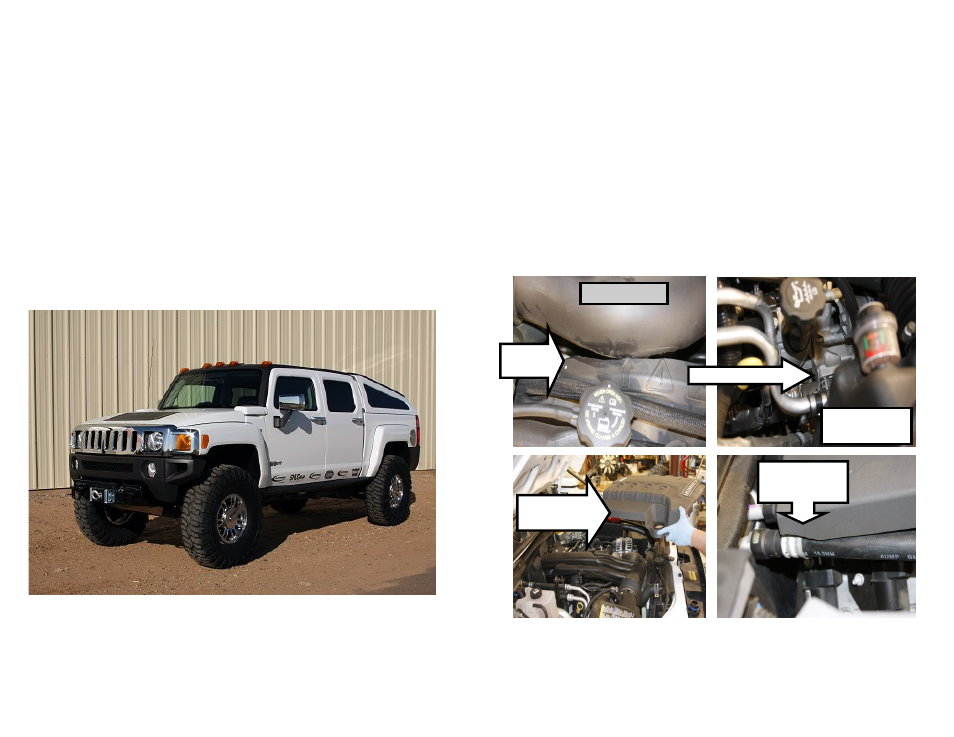
Top of Fan Shroud
The top of the fan shroud will also need to be trimmed so that air intake tube does
not rub. Trim the section where the air intake tube is touching on top of fan
shroud. Trim just enough so it clears.
Back of engine cover
The back of the engine cover is going to need trimming so there is no contact
from the heater hose that are running into the firewall. You will want to make
small cuts to the engine cover until you have clearance.
The heater core hoses run from the front of the motor to the fire wall. Locate the
bracket that is on the passenger side cylinder head, loosen and adjust the bracket
counter clockwise approximately 1.5” this will give you additional clearance
from the fan shroud.
Prior to Starting or driving your Hummer you will want to check all of the brake
lines, parking brake cables, and hoses underneath of the vehicle. You will want
to make sure they are not pulled out, bond up, kinked, or too tight. This must be
Trim fan
Air intake tube
Trim RT corner
of engine cover
Heater hose bracket
Passenger side
Remove