Daystar KJ04508BK User Manual
Page 4
5. Loosen body mount bolts on one side of vehicle and remove bolts
from opposite side using a 5/8” socket for positions 1,5 and 6
( body mount location chart ) and a ¾” socket for positions 2, 3
and 4. Use a long extension to remove mounts next to gas tank.
Place 2x4 between jack and body to spread out load and jack up
body on the side you have removed the bolts from just far enough
to remove mounts. The bolts on the opposite side will help ensure
that the body does not shift. CAUTION: Open Hood while jacking
up the body to make sure that the fan doesn’t hit the shroud. Also,
watch that hoses and wires are not stretched. The dip-stick head
can be pinched so remove dipstick while doing installation. When
lifting the side of the vehicle that the fuel filler is on keep a close
eye not to stretch, tear or pull too far on the hose connection.)
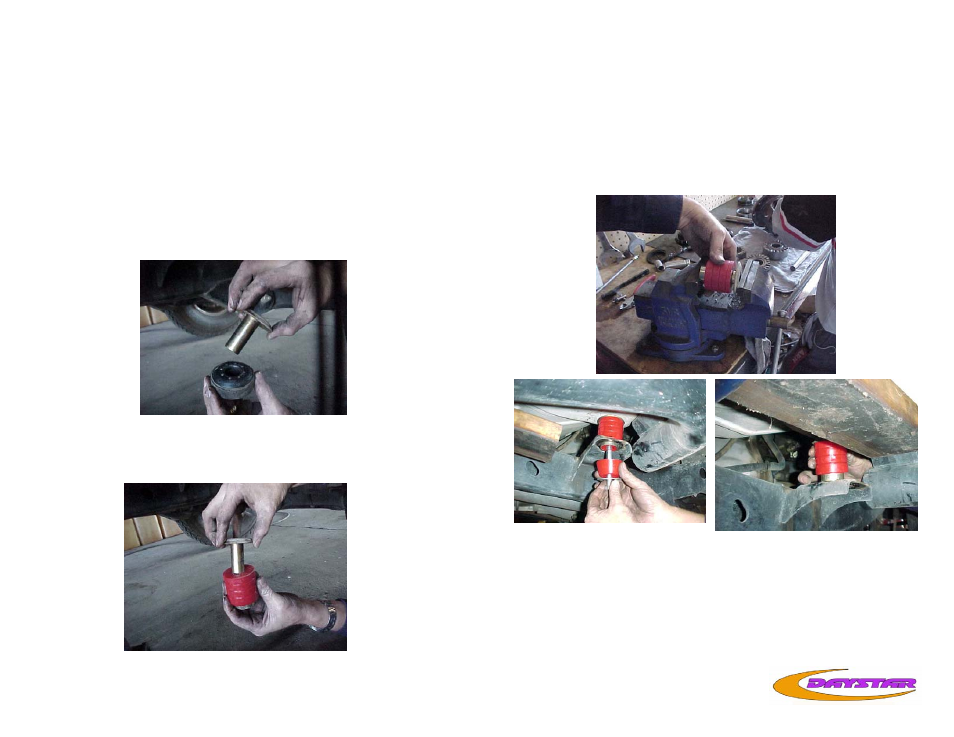
6. Remove factory mounts 1 at a time and remove stock steel insert.
7. Insert stock steel inserts inside top portion of body lift spacer (Note:
It fits tight, you may have to use a vise.)
8. Insert 7/8” OD x 1” Long tube (Part No S10281 Included in kit)
into lower portion of body lift spacer. (This tube is a crush sleeve
to eliminate over-torque of polyurethane mounts)
9. Jack up the body using a 2x4 under one side of the body for sup-
port just high enough to insert new body lift spacers. If the steel
collar on new mounts will not insert in frame holes, you may have
to file out frame mount hole slightly to install spacer. Repeat on
opposite side.