Rough Country 740.20 User Manual
Page 2
1. Prior to installing this kit, with the vehicle on the ground, measure the heights of your vehicle. This measurement can
be recorded from the center of the wheel straight up to the top of the inner fender lip. Record the measurements.
LF:__________ ,RF:___________, LR:_________, RR:____________
2. Place vehicle in park. Raise the front of the vehicle with a jack and secure a jack stand beneath each frame rail, be-
hind the front trailing arms. Ease the frame down onto the stands, place transmission in low gear or park, and chock
tires.
3. Remove the front tires/wheels.
4.
Disconnect the sway bar end links. Retain for reuse.
5. Remove the nut and the cotter pin on the upper ball joint and separate the upper ball joint from the spindle, using the
ball joint separator. Save factory hardware for reuse.
6. Remove the upper strut nuts on the strut tower (3) that holds the strut assembly to the frame mount. Save hardware
for reuse.
7. Remove the lower strut bolt from the lower control arm and save hardware for reuse. Remove the strut assembly
from the vehicle. Note the direction of the bolt for reinstallation.
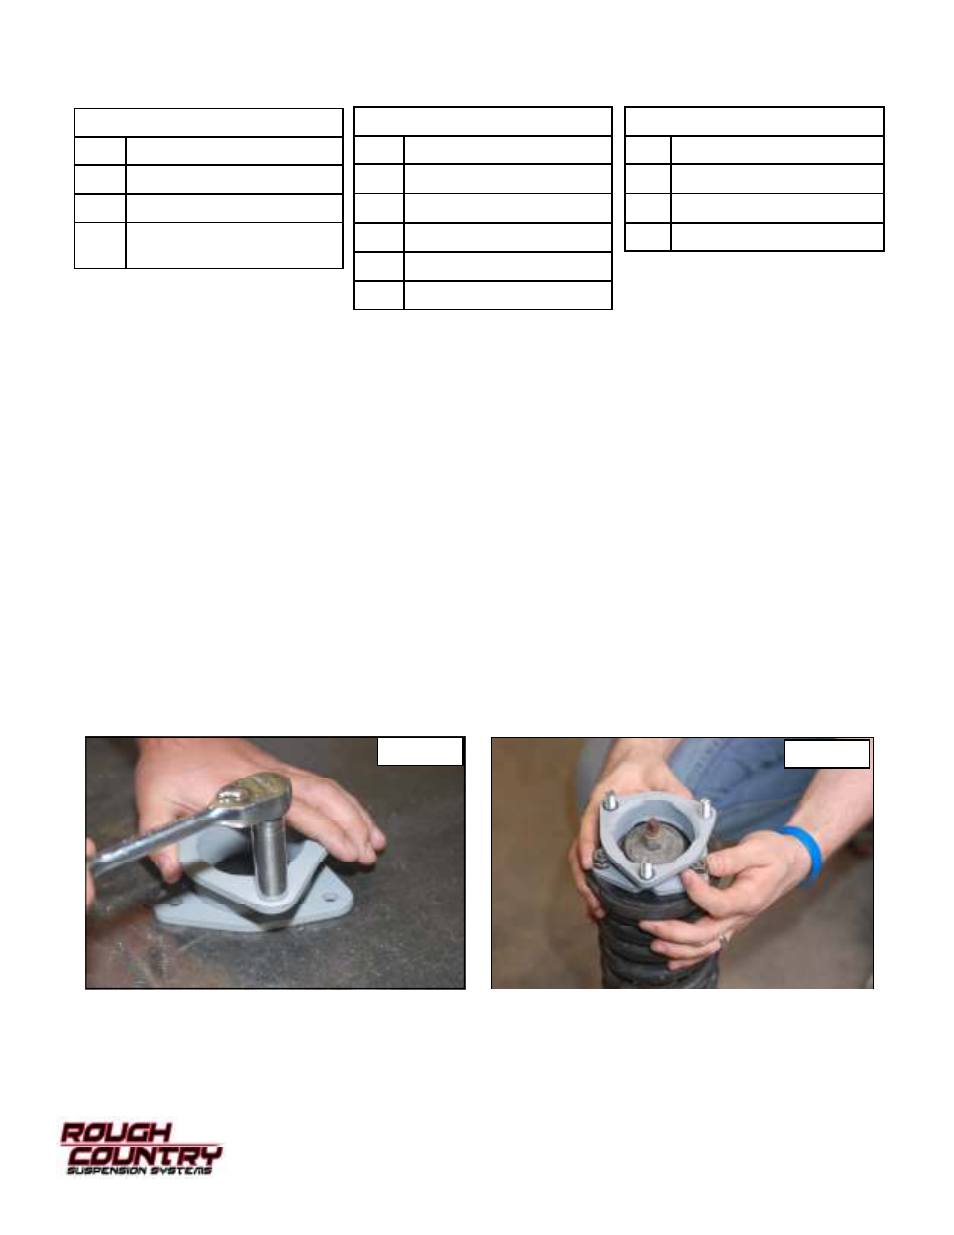
8. Install the studs in the new spacer as shown in Photo 1 with the supplied 3/8” nuts using a 9/16” socket. Torque to
35-45 ft-lbs. Do not over-torque the nut.
9. Place the new spacer on the strut . Install the stock hardware to secure the spacer to the strut. See Photo 2.
Front Installation Instructions
Parts List
740S
Qty
Description
4
Tacoma Rear Shackle Plates
2
Tacoma Strut Extension
2
Rear Shocks w/ mounting
hardware
1740BAG1
Qty
Description
4
14mm X 110MM Bolts
4
14mm Lock nut
2
18mm x 140mm Bolt
2
18mm Lock nut
2
Shackle Sleeves
Photo 1
Photo 2
3/8” STUD BAG
Qty
Description
6
3/8” Studs
6
3/8” Lockwashers
6
3/8” nuts