Rough Country 1079 User Manual
Page 2
POST INSTALLATION
1. Check all fasteners for proper torque. Check to ensure there is adequate clearance between all rotating, mobile,
fixed and heated members. Check steering for interference and proper working order.
2. Re torque all fasteners after 500 miles. Visually inspect components and re torque fasteners during routine vehicle
service.
Thank you for purchasing a Rough Country Suspension Lift Kit.
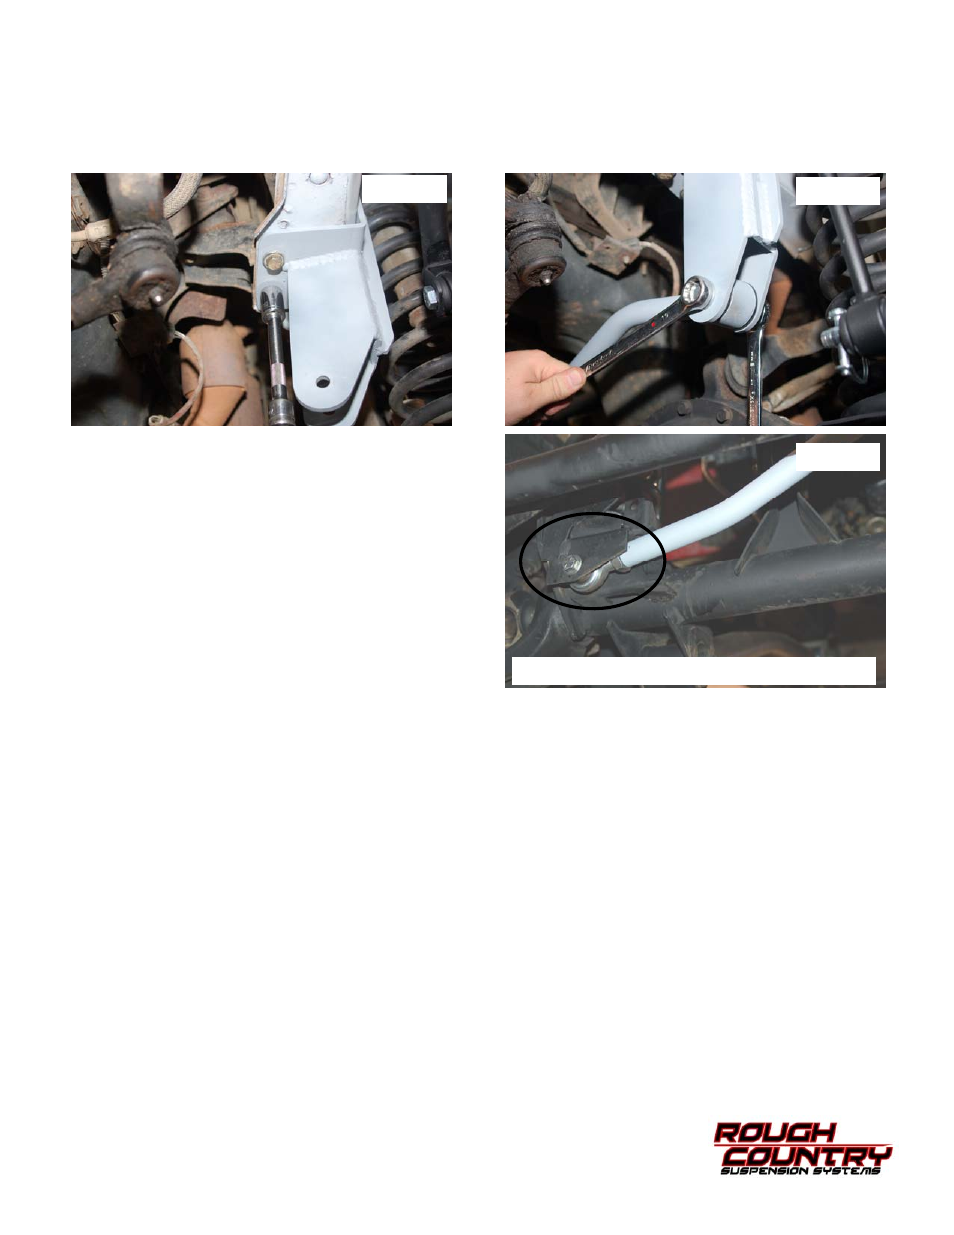
5. Secure the bracket on the frame rail with the stock bolts on the bottom as shown in Photo 3. Tighten using a 15mm
wrench / socket.
6. Lubricate the bushings with a lithium grease and assemble them in the track rod body with the supplied 7/16’ sleeve
in the end. Install the heim joint in the threaded end with supplied jam nut.
7. Install the track rod on the frame bracket with the supplied 7/16” x 2 3/4” bolts, washers & nut. See Photo 4. Do not
tighten at this time.
8. Make sure the body is centered over the axle and install
the passenger side of the track rod on the axle with the
supplied heim spacers, 7/16” x 2 3/4” bolt, washers & nut.
If axle is centered, remove from the axle and tighten jam
nut to track rod body using 1 1/8” wrench. See Photo 5.
9. Tighten the axle and frame end using a 15mm wrench /
socket as shown.
PHOTO 3
PHOTO 4
Please visit our website @ www.roughcountry.com for your off road vehicle needs
PHOTO 5
INSTALL 7/16” X 2 3/4” BOLT, WASHER & NUT