Rough Country 876 User Manual
Page 2
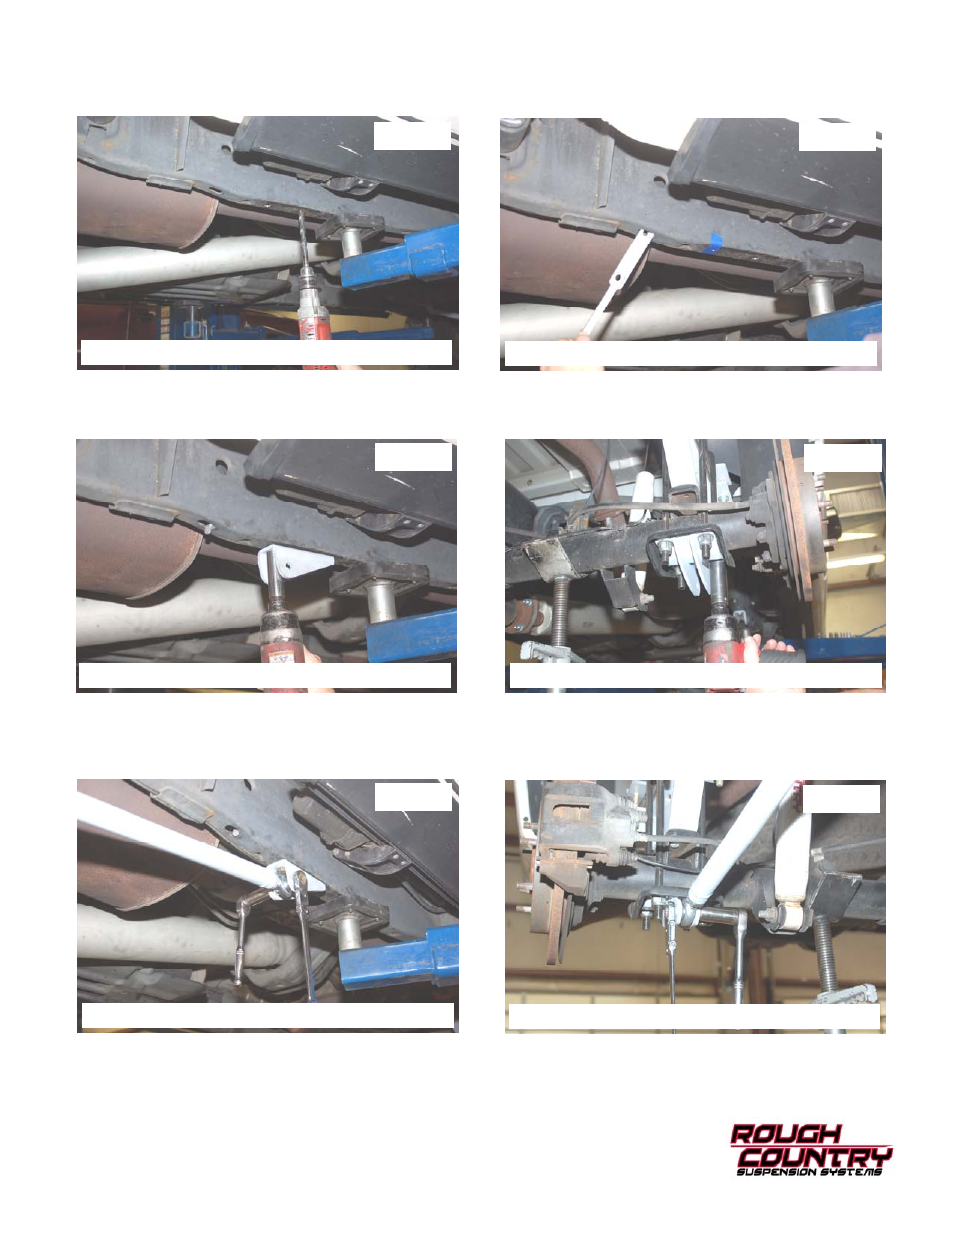
3. Drill pilot hole on marks in frame then drill to 17/32”. See Photo 3.
4. Insert the supplied flag nut in the frame as shown in Photo 4 making sure the holes and flag nut line up. If needed
the holes may be slightly enlarged.
5. Install traction bar bracket using the supplied 1/2” x 1 1/2” bolts and tighten bolts using 19mm socket. See Photo 5.
6. With rear end supported remove nuts from the u-bolts and install lower traction bar bracket as shown in Photo 6
under the u-bolt plate. Tighten all u-bolts nuts using 22mm socket.
7. Install the supplied joints into traction bars and install on the brackets. The joint on the axle will have a 3/4” x 1/2
“x .875 long sleeve and the frame end will install with the two 1/2” standoff sleeves. Use the supplied 12mm x 75mm
bolt for front and a 12mm x 55mm bolt for rear. Tighten bolts using 19mm wrench and socket. See Photo 7 & 8.
8. Tighten jam nuts on traction bar using a 1”1/8 wrench.
POST INSTALLATION INSTRUCTIONS
1. Check all fasteners for proper torque. Check to ensure for adequate clearance between all components.
2. Check and retighten wheels at 50 miles and again at 500 miles. Periodically check all hardware for tightness.
3. Install “Warning to Driver” decal on sun visor.
Photo 3
Photo 4
Photo 5
Photo 6
Photo 7
Photo 8
Drill using a 17/32” bit
Insert the flag nut in the frame
Secure with 1/2” x 1 1/2” bolts
Install the axle bracket with u-bolt hardware
Install the bar on the frame bracket
Install the bar on the axle bracket