Rough Country 272N2 User Manual
Page 5
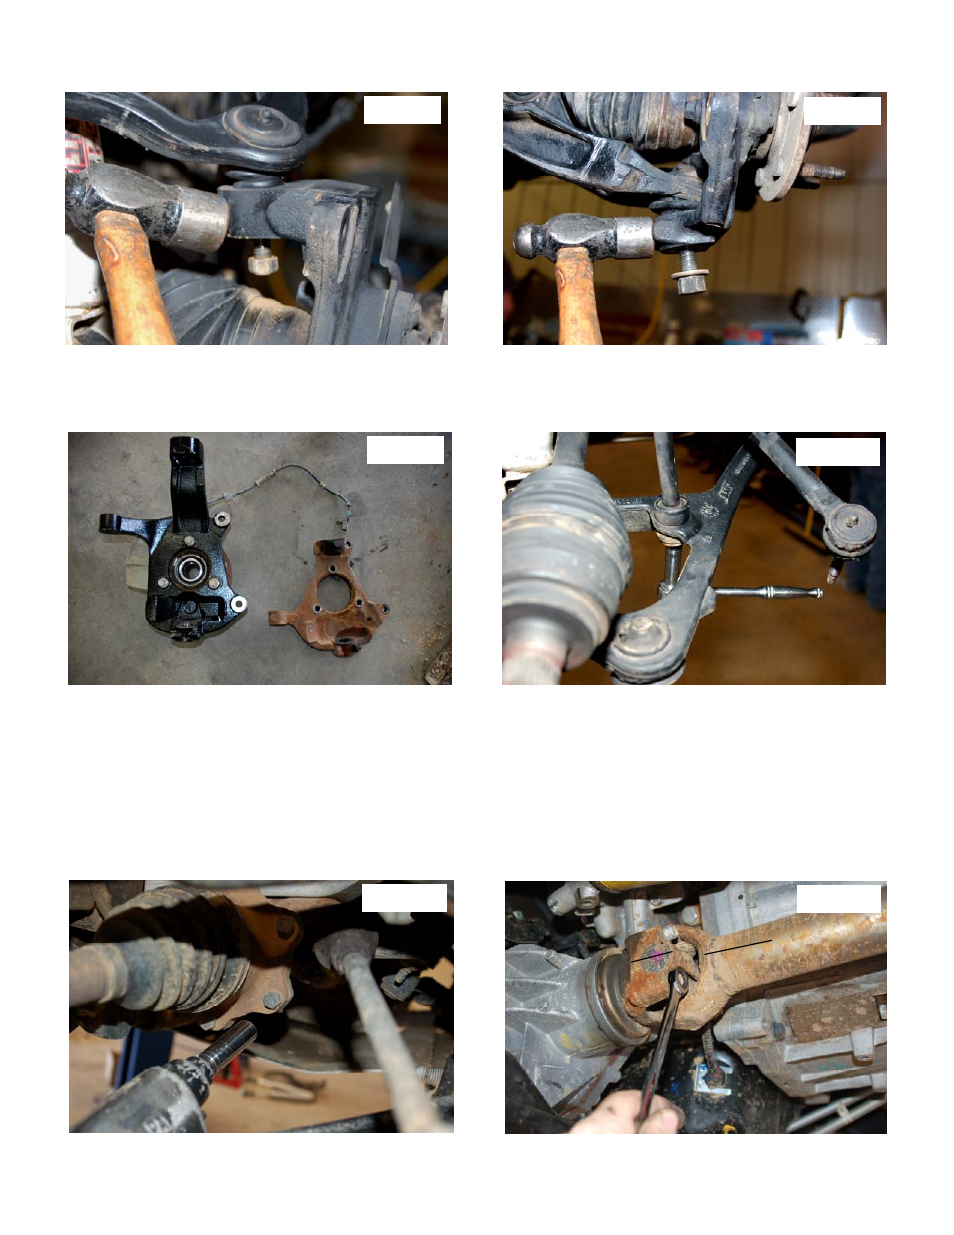
8. Using a 18mm wrench for the upper ball joint and a 24 mm deep well socket for the lower, remove the ball joint nuts.
Using a hammer hit the knuckle as shown until the ball joint is free. See Photo 7 & 8. Remove the knuckle.
9. Remove the three factory bolts that hold the wheel bearing to the stock knuckle. Remove the wheel bearing and
dust cover using a 15mm socket. Locate the new knuckles supplied with the kit and using Loc-Tite; install the bear-
ing with the factory hardware on the new knuckle. Tighten to 133 ft.lbs. See Photo 9.
10. Using a 13mm deep well socket remove the sway bar link from the lower control arm and sway bar. See Photo 10.
11. Using a 15 mm wrench remove the upper shock nut. Using a 21 mm socket and 21 mm wrench remove the lower
shock bolt. Remove the shock. Retain the hardware for reuse.
12. Using a 15mm socket remove the 6 inner CV bolts. See Photo 11. Set CV half shaft aside for reuse.
13. Using a 18mm wrench and a 24 mm socket remove the lower control arm hardware and remove the lower control
arm. Retain the hardware for reuse. Repeat steps 5 through 13 on passenger side.
14. Support the differential with a floor jack and remove the two nuts on the passenger side that secures the differential
to the frame using a 21mm wrench. Remove the upper differential bolt that secures the driver side differential to the
frame using a 21mm wrench.
15. Mark the front driveshaft and yoke for reference and remove the front driveshaft from the differential using a 11mm
wrench. Secure driveshaft out of harms way. See Photo 12.
Photo 7
Photo 8
Photo 9
Photo 10
Photo 11
Photo 12