Rough Country 1157 User Manual
Page 3
9. Slowly lower the body onto the body mounts.
10. Proceed to opposite side and install the body lift blocks
as installed on the previous side.
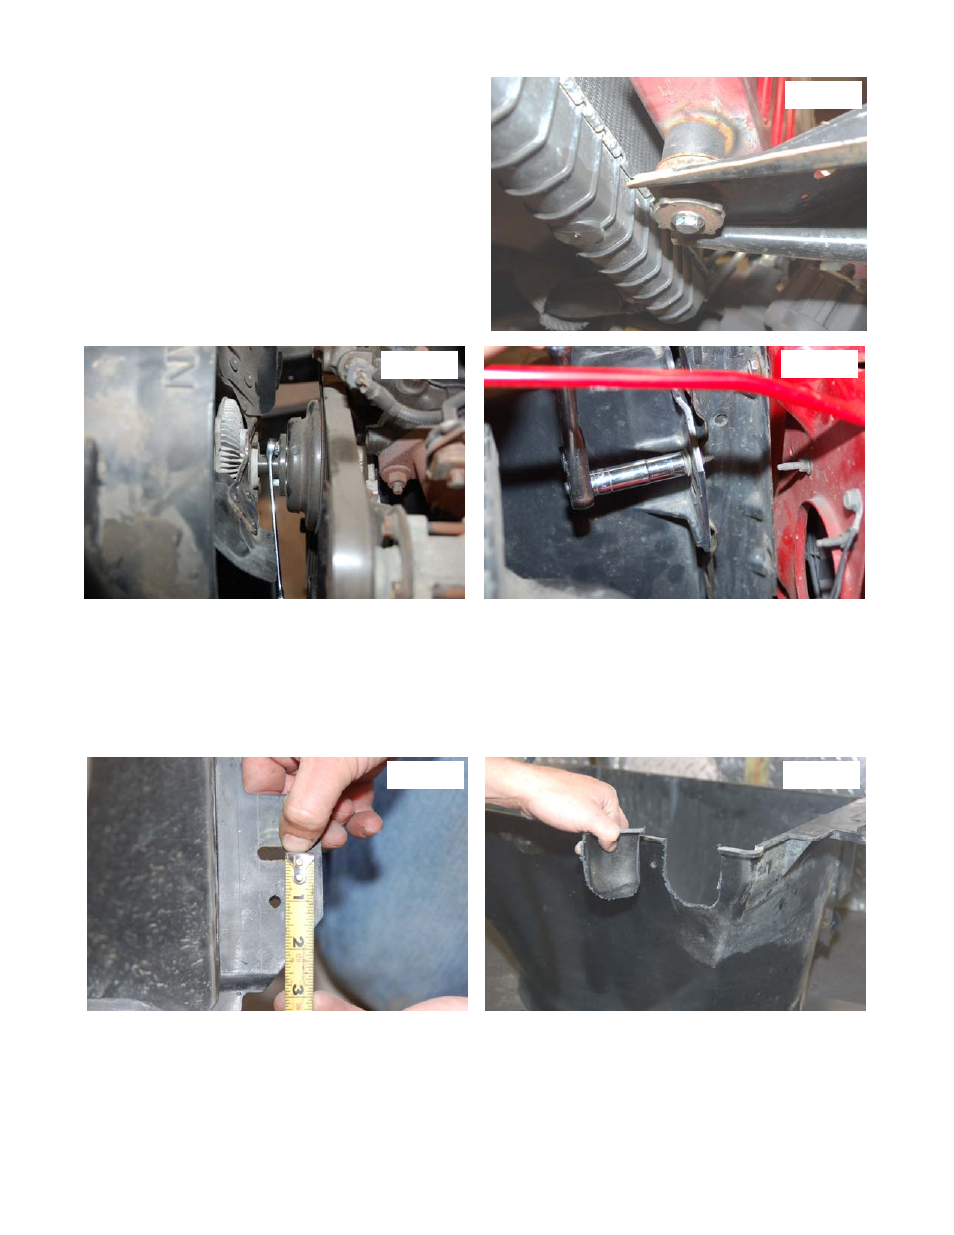
11. Install the front body spacer as shown in Photo 7.
Apply thread locker to the supplied 7/16 x 4” bolt and
install.
12. Tighten all body bolts to 30-35 ft/lbs. Do not over
tighten. Over tightening the body mount bolts could
crush the factory body mounts.
13. Remove the fan from the motor as shown in Photo 8
using a 1/2” wrench. Save the hardware for reuse.
14. Remove the power steering reservoir from the fan
shroud to allow it to be removed
15. Remove the fan shroud using a 7/16” wrench. See
Photo 9. Save the factory hardware for reuse.
16. Measure 1 1/4” up as shown in Photo 10 and drill the shroud using a 1/4” bit. The lower passenger side hole
will line up with an existing factory hole and will not require marking with a center punch. On 6 cylinder models,
it may be necessary to remove a small portion of the fan shroud webbing to allow the 1/4” hole to be drilled.
17. Test fit the fan shroud to the radiator by aligning with the new mounting holes and mark the location where the
lower radiator hose interferes with the fan shroud. Trim the fan shroud until it completely clears the radiator hose
when mounted to the radiator. Reinstall the fan with factory hardware using a 1/2” wrench and check for
interference between the fan shroud and fan blades, or any other objects, and trim the fan shroud accordingly.
18. Secure the shroud to the factory location with factory hardware using a 7/16” wrench. Tighten all hardware.
Photo 7
Photo 8
Photo 9
Photo 10
Photo 11