Rough Country 750S User Manual
Page 2
INSTALLATION INSTRUCTIONS
Completely read the instructions before beginning installation.
1. Jack up the front of the vehicle and secure the vehicle with jack stands on the frame rails. The front wheels will need
to be slightly off the ground.
2. Remove the front wheels / tires.
3. Disconnect the sway bar end links on the lower control arms. Retain hardware.
4. Remove the nut and the cotter pin on the upper ball joint and separate the upper ball joint from the spindle, using the
ball joint separator.
5. Remove the upper strut nuts on the strut tower (3) that holds the strut assembly to the upper frame mount. Retain
hardware for reuse.
6. Remove the lower strut bolt from the lower control arm and retain hardware for reuse. Remove the strut assembly
from the vehicle.
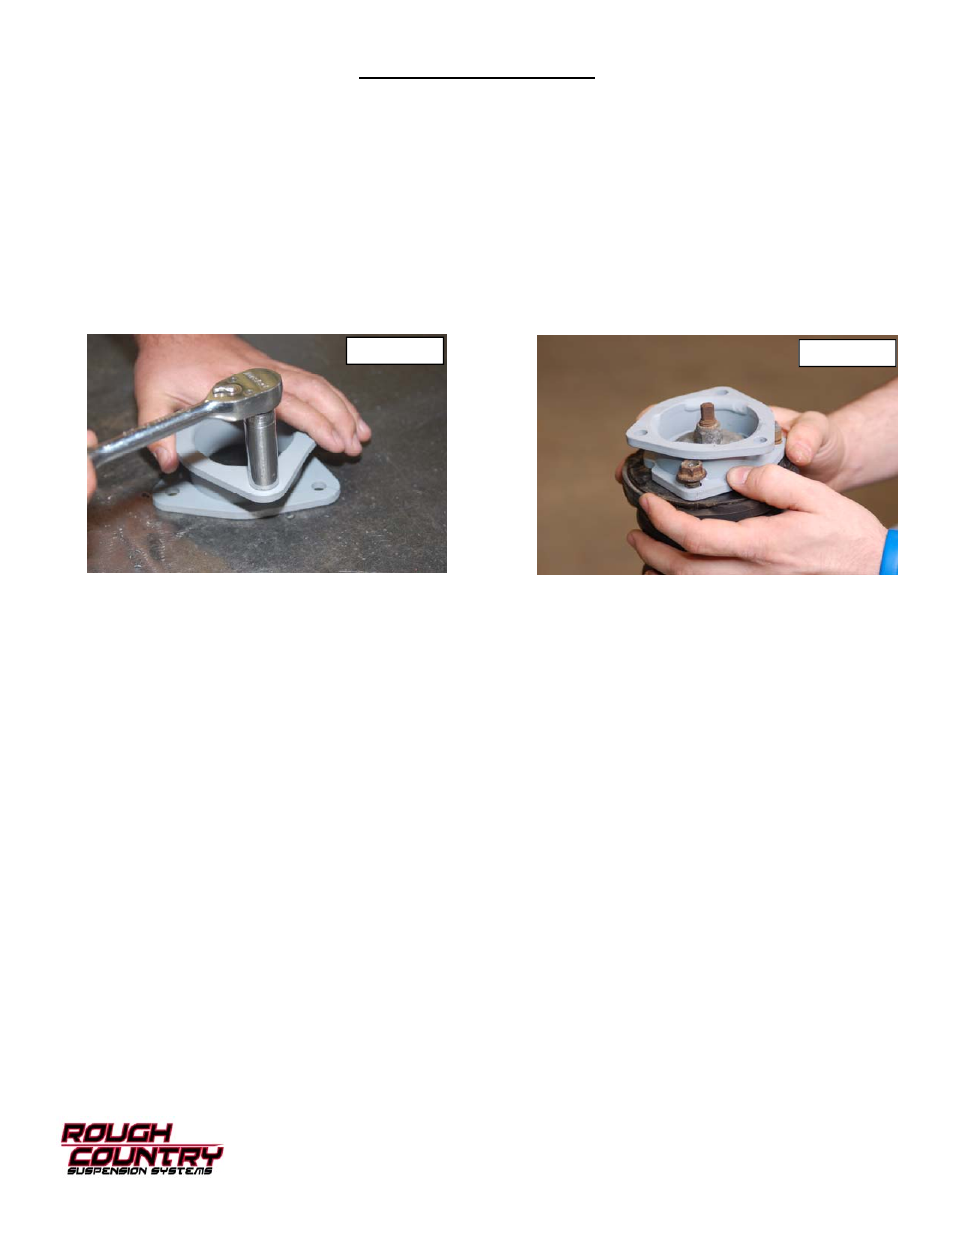
8. Locate the supplied 3/8” stud extensions. Using a 9/16” socket snug self clinching stud in the new spacer as shown
in Photo 1. The stud should clinch with about 35-45 ft/lbs of torque. Do not over torque the nut.
9. Install the new spacer on the Strut and secure with factory hardware. See Photo 2.
10. Align the bottom mount and reinstall the strut assembly on the vehicle using factory hardware..
11. Install the lower strut bolt in the order that it was removed.
12. Using the floor jack, raise the lower control arm and connect the upper ball joint on the upper control arm to the spin-
dle. Tighten the ball joint nut per manufacturer specifications and install the cotter pin.
13. Repeat procedure for opposite side of the vehicle.
14. Reconnect the sway bar end links with factory hardware.
15. Install the front wheels / tires.
16. Jack up the vehicle to release the jack stands and remove the stands. Lower the vehicle to the ground and tighten
the upper strut tower nuts. 3 on each side.
PHOTO 2
PHOTO 1