Rough Country 771.20 User Manual
Page 4
It is the ultimate buyers responsibility to have all bolts/nuts checked for tightness after the first 500 miles and then every
1000 miles. Wheel alignment steering system, suspension and driveline systems must be inspected by a qualified pro-
fessional mechanic at least every 3000 miles.
MAINTENANCE INFORMATION
Thank you for purchasing a Rough Country Suspension System.
1. Jack up the rear of the vehicle and support the vehicle with jack stands, so that the rear tires are off the ground
2. Remove the rear tires/wheels. Using a 21mm deep well socket.
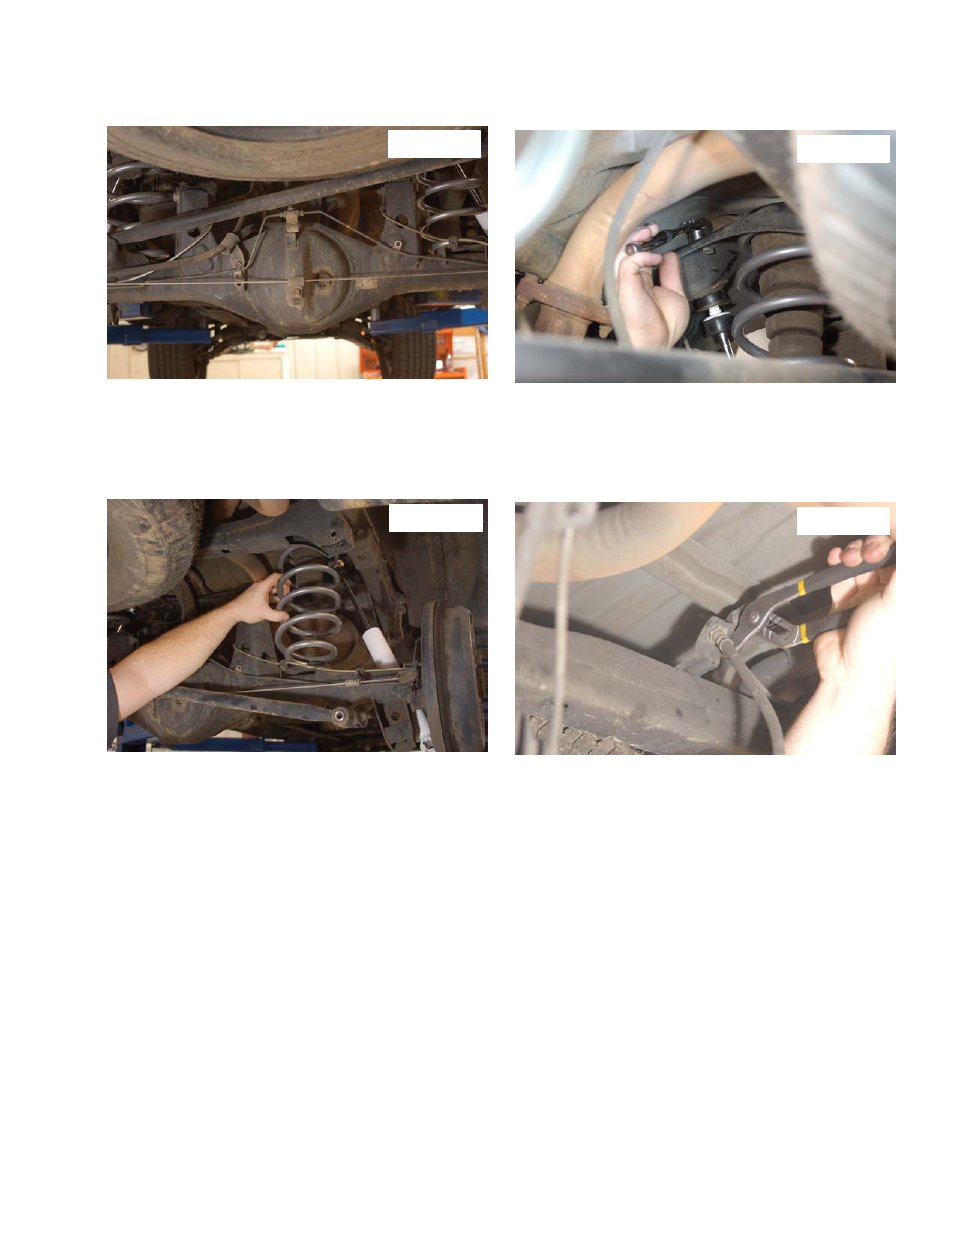
3. Using a 19mm socket and wrench remove the frame side factory track bar bolts. Save stock hardware for reuses.
4. Using a 12mm socket remove the factory bolts holding on the brake line mounts to the axle.
See Photo 9
5. Using a 17mm socket & wrench remove the rear shocks. Retain the lower shock hardware for reuse.
See Photo 10
6. Lower the axle and remove the factory coil spring.
7. Install new coil spring in the factory pocket, a coil spring compressor may be needed to facilitate the install of the
coil. Turn the coil until the end of the wrap hits the stop on the coil pocket.
See Photo 11.
8. Repeat steps 3-7 on the opposite side.
9. Using channel locks bend down the brake line mount, giving the brake lines extra length for the taller coils.
See
Photo 12
10. Using 17mm socket for the lower and and 14mm wrench for the upper, install new Rough Country shocks, using
new hardware for the top, and factory hardware for the lower mount. Torque upper shock mount nut to 18 ft. lbs.
Lower shock bolt torque to 72 ft. lbs.
11. Using a 12mm socket install the factory bolts holding the brake line mounts to the axle.
12. Install the factory track bar bolt in the frame side using a 19mm socket and wrench.
13. Reinstall tire/wheels. Using a 21mm socket. Torque to 82 ft. lbs. Jack up the rear of the vehicle and remove the jack
stands.
14. Lower the vehicle to the ground.
15. This vehicle must have a front-end alignment after installation of the suspension kit.
The
vehicle will be aligned to
factory specs.
Photo 10
Photo 9
Photo 11
Photo 12