Rough Country 771.20 User Manual
Page 3
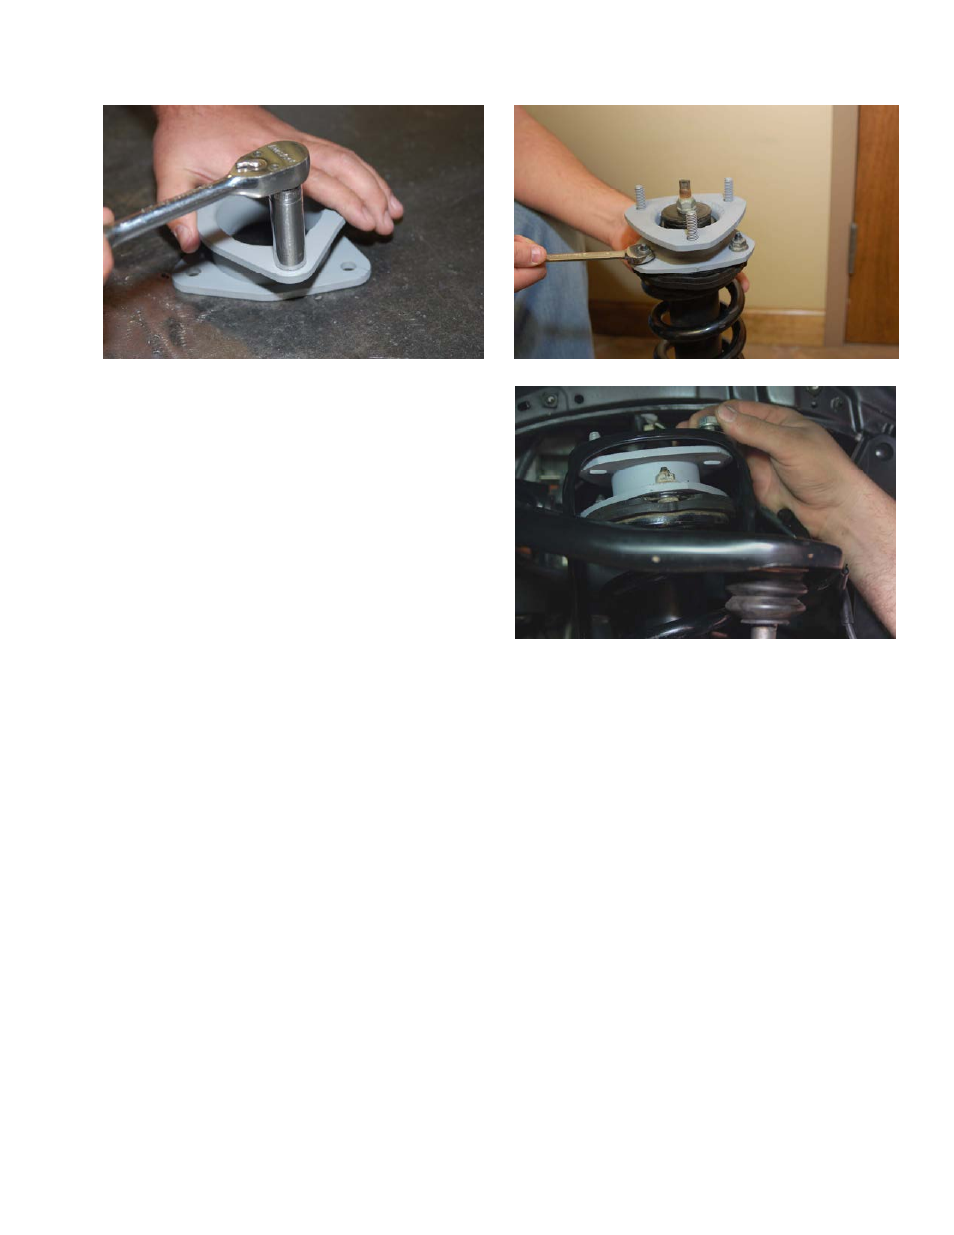
9. Locate the supplied 10mm stud extensions. Using a 17mm socket snug the stud in the new spacer as shown in
Photo 7. The stud should be about 35-45 ft/lbs of torque. Do not over torque the nut.
10. Install the new strut extension bracket. Align the holes on the strut extension with the bolts on top of the strut plate
and secure with factory hardware. Torque fasteners.
See Photo 8.
11. Install the strut assembly into the strut tower and start the
supplied 10mm nuts and lock washers. Using a 17mm
wrench torque to 47ft. lbs
See
Photo 9.
12. Position the strut assembly to reinstall the lower strut bolt
in its original position that it was removed. Using original
hardware and a 19mm socket torque to 100ft lbs.
13. Using a floor jack, raise the lower control arm and connect
the upper ball joint on the upper control arm to the spin-
dle. Using a original nut and a 19mm socket, torque to
40ft lbs.
14. Reinstall the tie rod end off steering linkage into knuckle
using original factory nut. Using a 19mm socket torque
nut to 65ft. Lbs. Install supplied new cotter pin
15. Reinstall the ABS wire on the knuckle with stock hardware
and tighten using a 12mm socket.
16. Repeat steps 3-14 on opposite side of vehicle.
17. Using 17 mm wrench reinstall sway bar links using factory hardware.
Torque to 52 ft. lbs.
18. Install the wheels / tires.
Using a 21mm socket. Torque to 85 ft. lbs
.
With vehicle on the ground, check the clearance
between the tire and upper control arm to make sure the arm does not rub the tire.
19. Jack up the vehicle and remove the jack stands. Lower the vehicle to the ground and re-check all bolts, to assure
they are tight.