Rough Country 1063 User Manual
Page 2
POST INSTALLATION
1. Check all fasteners for proper torque. Check to ensure there is adequate clearance between all rotating,
mobile, fixed and heated members. Check steering for interference and proper working order.
2. Re torque all fasteners after 500 miles. Visually inspect components and re torque fasteners during routine
vehicle service.
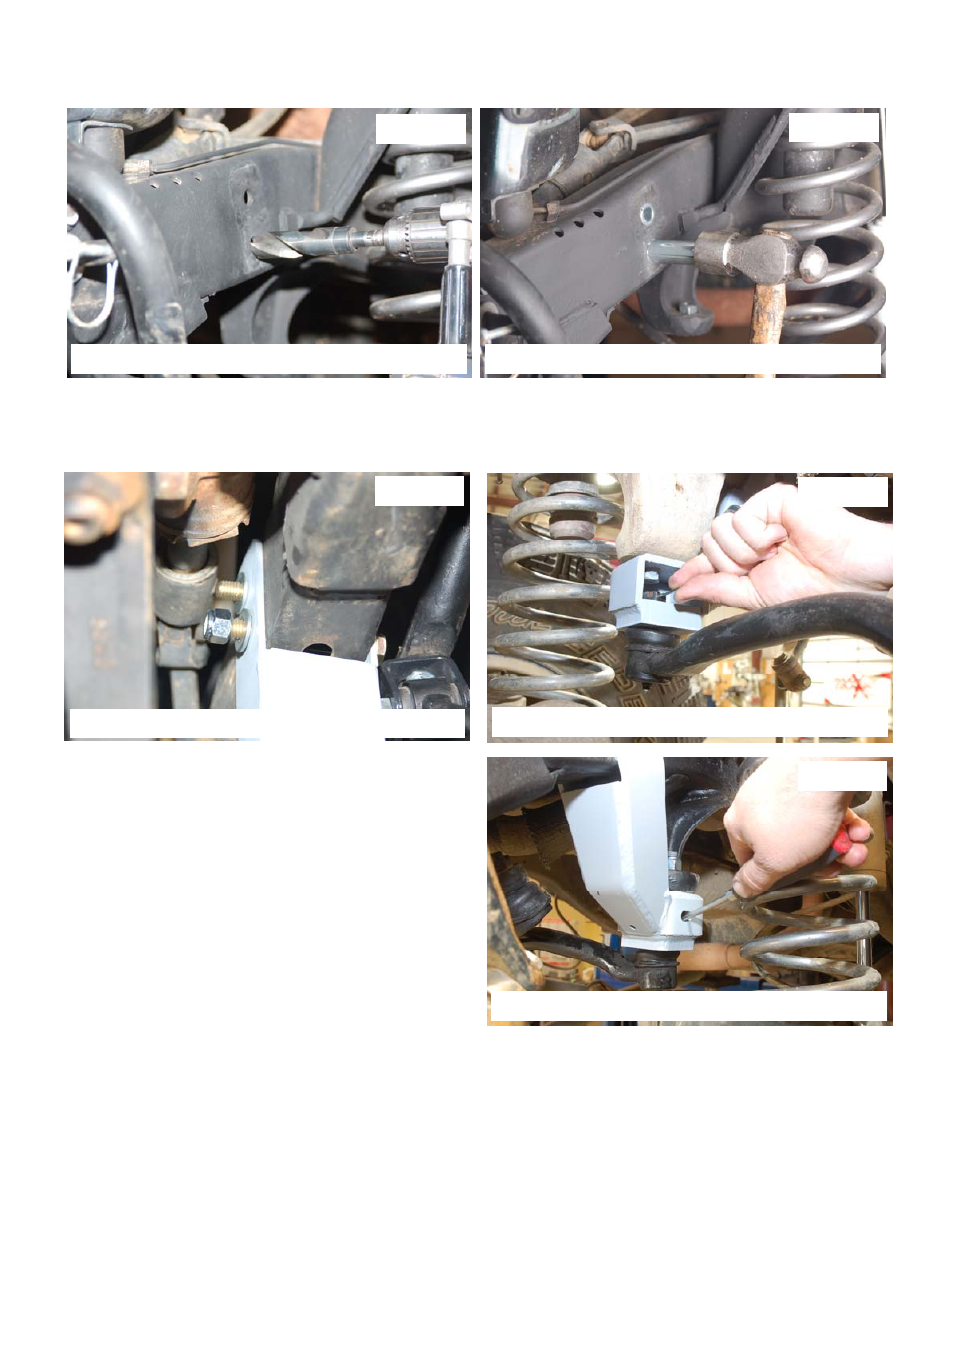
4. Remove the bracket and enlarge the outside holes using a 29/32” bit. . See Photo 3.
5. Install the supplied crush sleeves as shown in Photo 4 and reinstall the bracket.
6. Secure to the frame using the supplied 1/2” x 3 1/2” bolts, washers and nuts & 1/2” x 1 3/4” bolts, washers &
nuts. Tighten the 1/2” x 1 3/4” bolts to 65ft/lbs with a 19mm socket and the 1/2” x 2 3 1/2’ bolts using a
19mm wrench /socket to 80ft/lbs. See Photo 5.
7. Install the track rod in the new frame mount with the factory hardware. See Photo 6.
8. Bend the cotter pin to secure the tie rod nut in
mount. See Photo 7.
PHOTO 3
PHOTO 4
PHOTO 5
PHOTO 6
PHOTO 7
ENLARGE OUTSIDE HOLES USING A 29/32” BIT
INSERT SLEEVES IN FRAME
SECURE WITH SUPPLIED 1/2” X 3 1/2” BOLTS
INSTALL BAR AND INSTALL COTTER PIN
BEND COTTER PIN TO SECURE