Rough Country 277.20 User Manual
Page 3
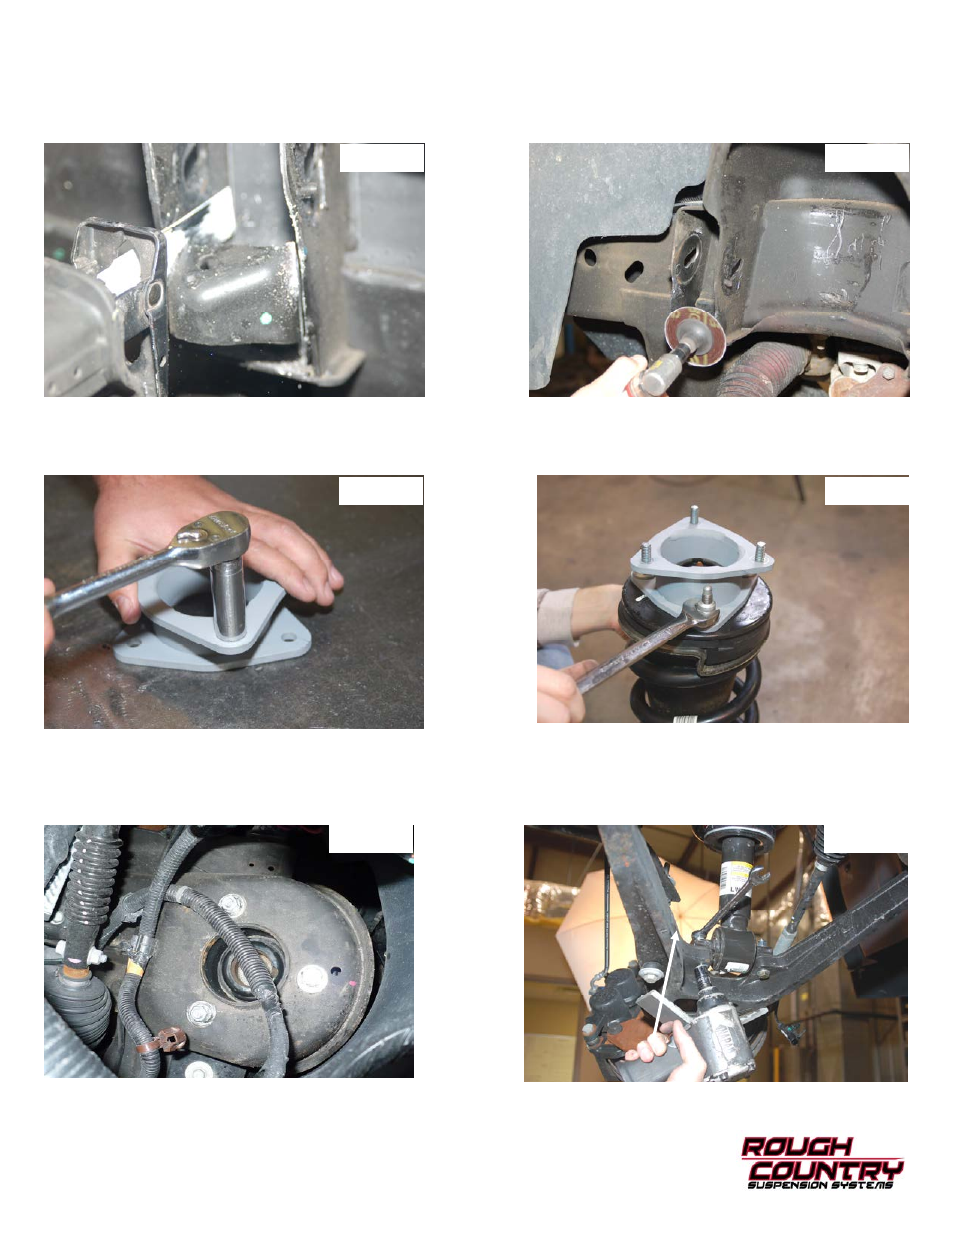
10. Cut the bump stop from the upper control arm mount on the passenger and driver side as shown in
Photo 7 using a
reciprocating saw.
Passenger side shown.
11. After the bump stop has been cut from the control arm mount, grind and apply paint to the cut surface to prevent rust-
ing.
See Photo 8. Reinstall the factory control arm in the factory location using the factory hardware. Tighten using a
21mm Socket / wrench. Be sure to use the marks made earlier for alignment reference.
12. Locate the supplied strut spacer and install the supplied 10mm stud extensions. Using a 17mm socket snug the stud in
the new spacer as shown in
Photo 9.
13. Install the strut spacer on the factory strut with factory hardware and using a 18mm wrench.
See Photo 10.
14. Install the strut assembly in the factory mount with the supplied 10mm nuts/washers & lock-washers on the upper
mount. Tighten using a 17mm wrench.
See Photo 11. Note: Flat washer must be installed on stud.
15. Install the strut in the lower control arm using the supplied 3/8
” 2 1/4” bolts /washers & nuts using a 9/16” wrench.
See
Photo 12. It may be necessary to jack up the lower control arm with a floor jack to align lower strut holes.
16. Reinstall the sway bar on the lower control arm using a15mm wrench
.
17. Install the factory control arm on the knuckle with the factory hardware
. Tighten using 3/4” wrench.
18. Reinstall the tie rod end into the knuckle with factory hardware and using a 21mm wench.
19. Reinstall the wheels/tires.
20. Jack up the vehicle and remove the jack stands and lower the vehicle to the ground.
Photo 10
Photo 9
Photo 11
Photo 12
Photo 7
Photo 8