Rough Country 277.20 User Manual
Page 2
FRONT INSTALLATION
1. Park the vehicle on a level surface and chock the rear wheels.
2. Jack up the front of the vehicle. Place jack stands under the frame rails and lower onto jack stands letting the front sus-
pension hang.
3. Remove the tires and wheels. Remove the upper and lower factory skid plates using a 15mm wrench. Retain factory
hardware and front skid plate for reuse.
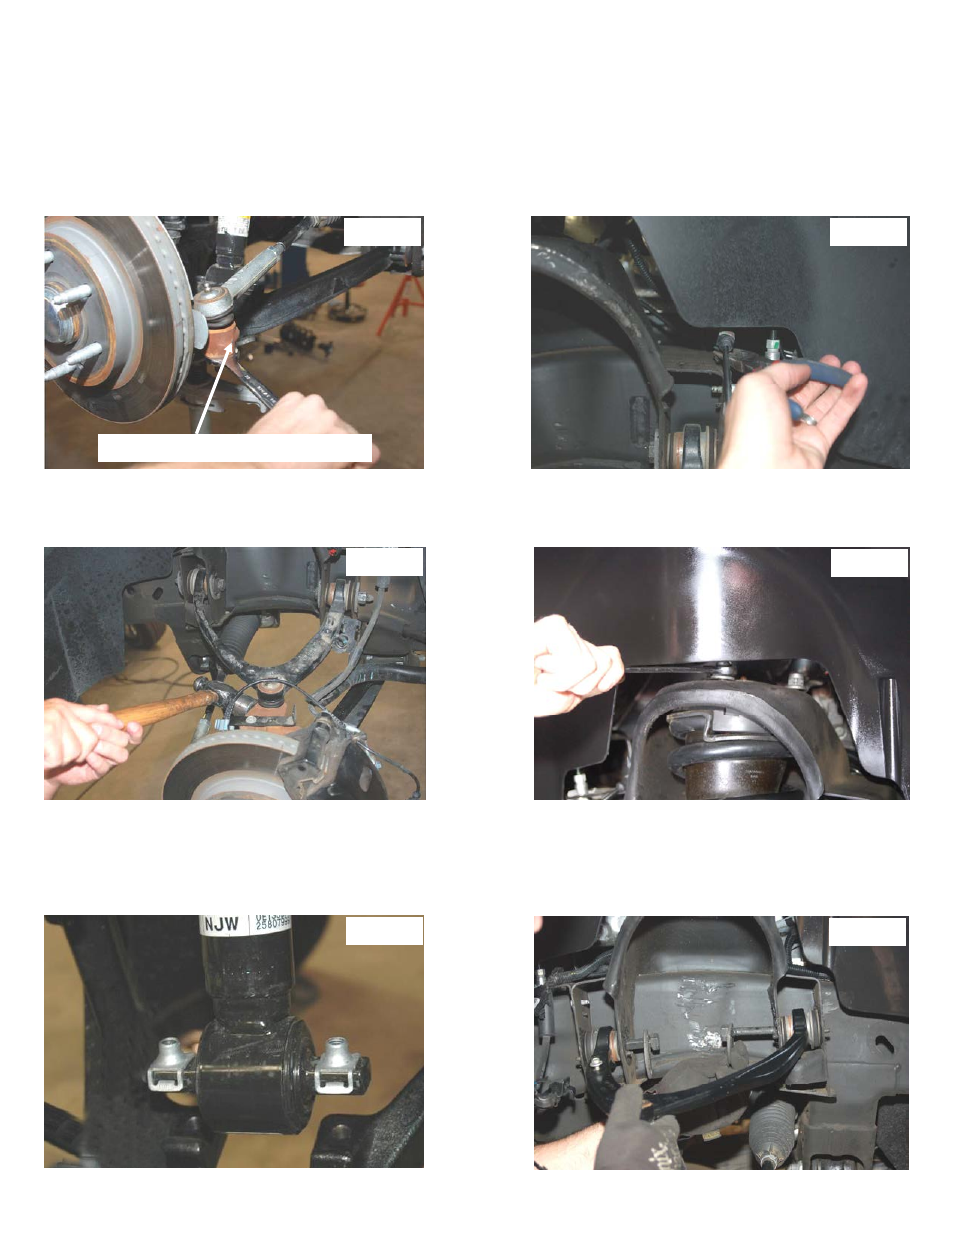
4. Using a 21mm wrench, remove the tie-rod nut as shown in
Photo 1. Strike the side of the mount to dislodge the tie rod
end. Remove from the knuckle.
5. Remove and unplug the ABS sensor wire from the frame as shown in
Photo 2.
6. Remove the upper ball joint nut using a 18mm wrench.
See Photo 3. Strike the knuckle as shown to dislodge the ball
joint. Separate the upper control arm from the knuckle.
7. Using a 18mm wrench, remove the upper strut nuts as shown in
Photo 4. Retain factory hardware for reuse.
8. Using a 15mm wrench, remove the 2 bolts securing the lower strut mount to the lower control arm and remove the strut
from the vehicle. Remove and discard the factory lower retainer clips. New hardware will be used.
See Photo 5.
9. Mark location of alignment cams on upper control arms for reference of reinstallation of factory arms. Using a 21mm
wrench and 21mm socket, remove the upper control arms from the vehicle.
See Photo 6. Retain the hardware for re-
use.
Photo 3
Photo 4
Photo 5
Photo 1
Photo 2
Strike here to dislodge tie rod end
Photo 6