Rough Country 658N2 User Manual
Page 4
Thank you for purchasing a Rough Country Suspension Lift Kit.
9. Jack up the axle to lightly compress the coil springs.
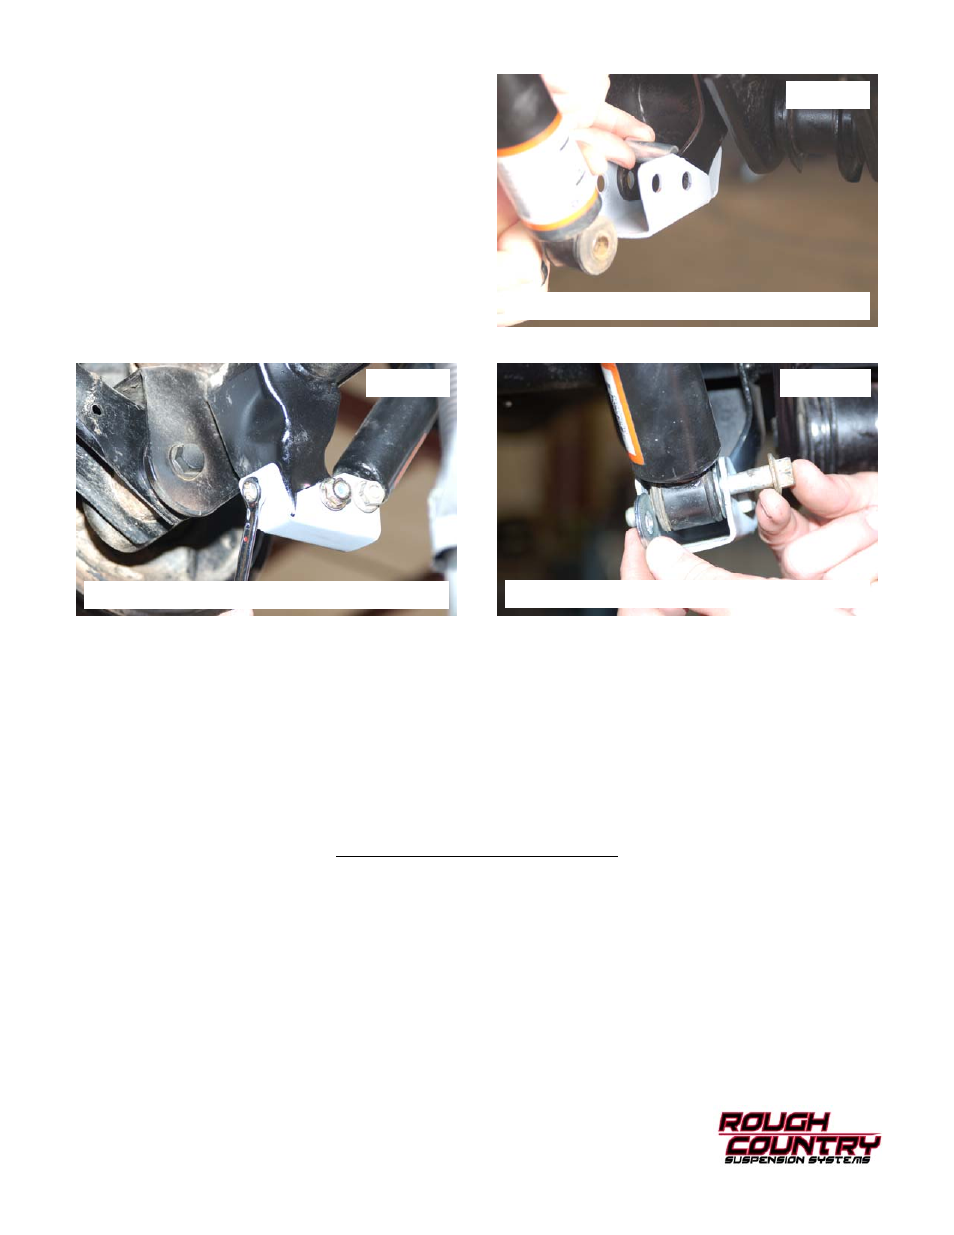
10. Install the lower shock bracket as shown in Photo 8 with
the supplied 12mm x 65mm bolts, flange locknuts with
supplied crush sleeves Do not tighten at this time.
11. Install the 5/16” x 3/4” bolts, washers & nuts as shown in
Photo 9. Tighten the 12mm bolts using a 19mm wrench
& 18mm socket. Tighten the 5/16” bolts using a 13mm
socket and wrench.
12. Install the wheels / tires and lower the vehicle to the
floor.
13. Install the rear shock absorber in the factory upper and
lower mounts with the factory upper / lower hardware
and the supplied flat washers. See Photo 10. Tighten
using a 15mm & 18mm wrench for the lower and a
13mm socket for the upper.
14. Reinstall the factory sway bar links with the factory hardware using a 15mm wrench and tighten.
PHOTO 8
PHOTO 9
PHOTO 10
Install bracket with crush sleeve
Install 5/16” hardware
Install shock with supplied flat washers
POST INSTALLATION INSTRUCTIONS
1. Check all fasteners for proper torque. Check to ensure for adequate clearance between all rotating, mobile, fixed,
and heated members. Verify clearance between exhaust and brake lines, fuel lines, fuel tank, floor boards and
wiring harness. Check steering gear for clearance. Test and inspect brake system.
2. Have a qualified alignment center align the vehicle immediately. Realign to factory specifications. Have head-
lights adjusted to proper settings.
6. Perform head light check and adjustment to proper settings.
7. Check and retighten wheels at 50 miles and again at 500 miles.
8. All kit components must be retightened at 500 miles and then every three thousand miles after installation. Peri-
odically check all hardware for tightness.
9. Install “Warning to Driver” decal on sun visor.
Note: Installation of larger tires will require speedometer recalibration.