Rough Country 658N2 User Manual
Page 3
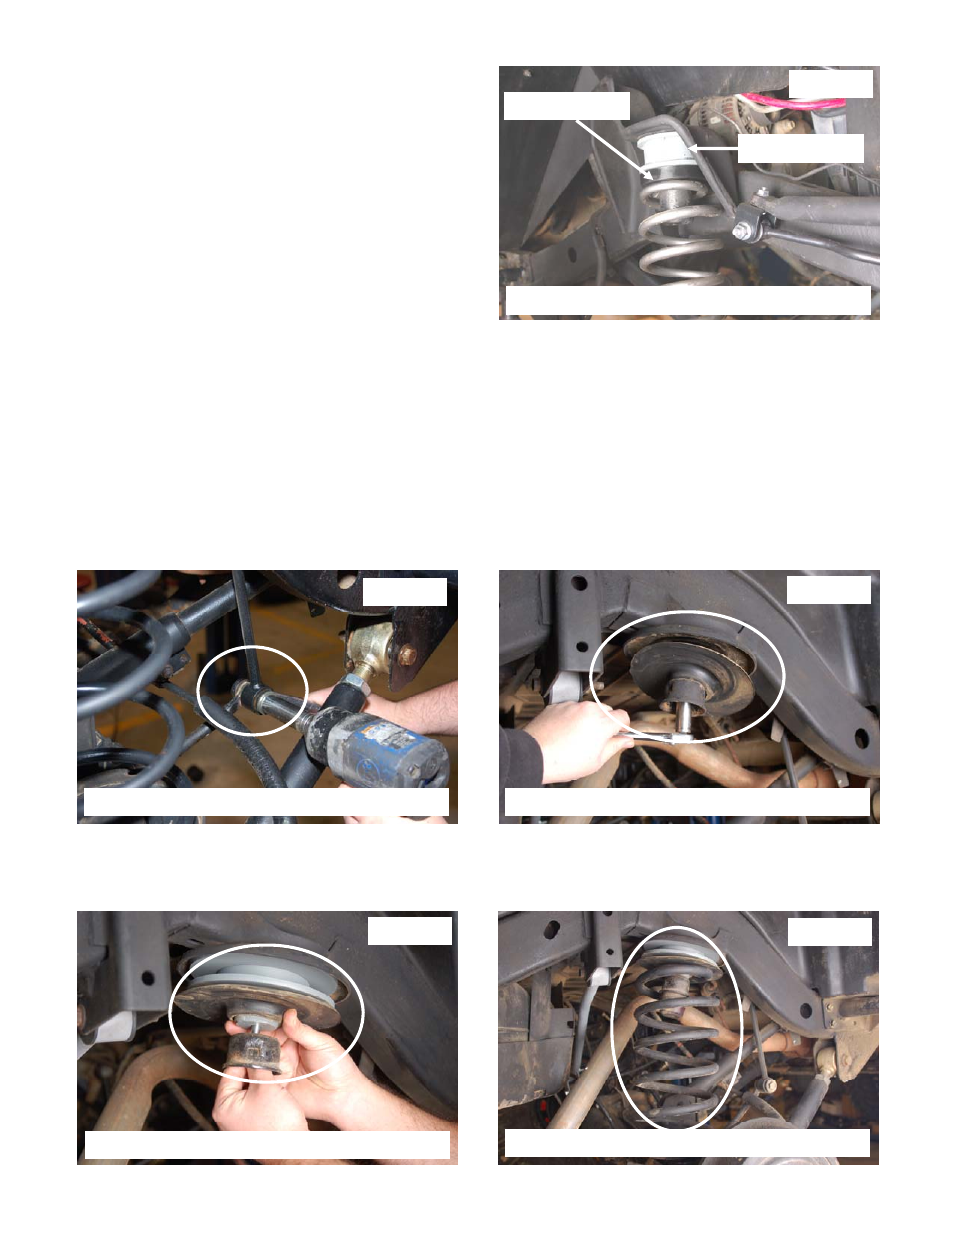
9. Reinstall the coil spring as shown in Photo 3 with the
stock spring isolator in between the stock coil and the
new spacer on top.
10. Reinstall the coil slip using a 13mm wrench on the driver
side.
11. Repeat installation on the opposite side of the vehicle.
12. Install the tires, wheels and lug nuts and tighten to fac-
tory specifications. Lower the vehicle to the ground.
13. Reinstall the shock absorbers using a 9/16” wrench on
the upper and a 13mm wrench on the lower mount.
14. Reinstall the sway bar links in the factory location with
factory hardware using a 18mm wrench and T55 torx
head bit.
PHOTO 3
Install the coil spacer with coil and isolator
Stock Isolator
New Spacer
REAR INSTALLATION INSTRUCTIONS
1. Chock the front wheels. Jack up the rear of the vehicle and remove the tires and wheels.
2. Place jack stands under the frame rail to support the vehicle. Place a floor jack under the differential to lightly
support the axle.
3. Remove the shock absorbers from the lower mount using a 18mm & 15mm wrench. Retain hardware for reuse.
4. Remove the lower sway bar links from the sway bar using a 15mm wrench. See Photo 4 . Retain the factory
hardware for re-installation.
5. Carefully lower the axle with the floor jack and remove the coil springs. NOTE: It may be necessary to use a coil
spring compressor to remove the stock coil springs. Be careful not to overextend the vent tube on the axle. It
may be necessary to disconnect the vent tube during installation and reroute the vent tube after installa-
tion to ensure the line does not get damaged.
6. Remove the bump stop from the bump stop mount and remove the bump stop cup as shown using a 15mm
socket. See Photo 5. Retain the stock hardware and upper coil isolator.
7. Install the spacer and bump stop cup on the upper coil mount with the supplied 10mm x 90mm bolts /washers.
See Photo 6. Tighten using a 17mm socket. Reinstall the bump stop in the bump stop cup.
8. Re-install the coil isolator on the spacer and install the spring on the mount. See Photo 7. It may be necessary to
use a coil spring or strut compressor to install the new coil springs.
PHOTO 4
PHOTO 5
PHOTO 6
PHOTO 7
Remove the sway bar from the sway bar link
Remove the bump stop from the frame
Install the spacer and bump stop cup
Install coil spring