Rough Country 388.22 User Manual
Page 5
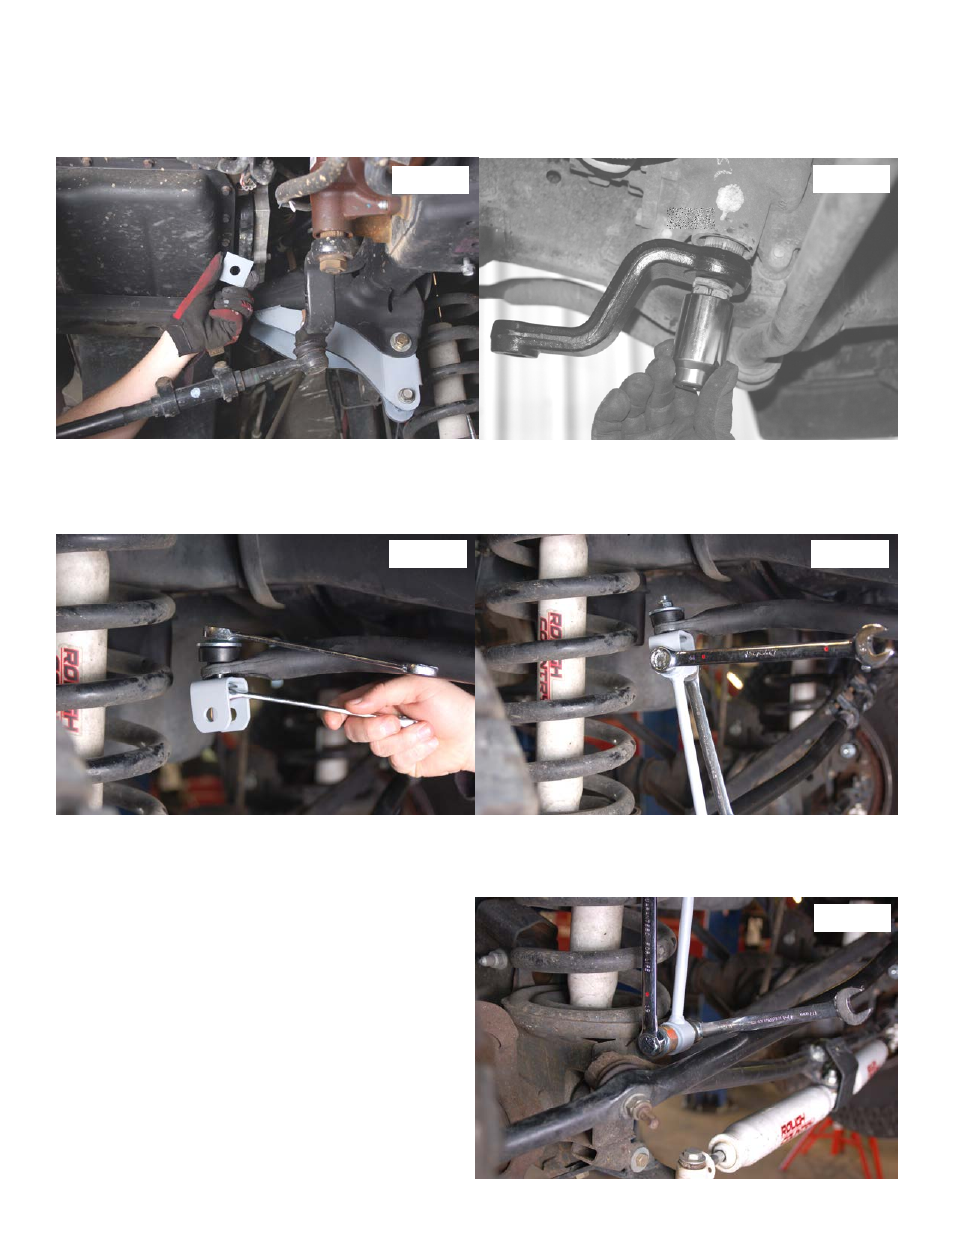
31. Install the 12mm x 3
” bolt through the bracket and slotted existing hole in the frame cross member.
See Photo 12.
The bolt should be installed from the bottom. Install the supplied square washer and lock nut. Tighten track bar hard-
ware. The track rod will be installed into the new mount after the vehicle is on the ground.
32. Install the new pitman arm into the stock location on the sector shaft, using stock hardware and torque nut to 185 ft.
lbs.
See Photo 13.
33. Reinstall the drag link onto the pitman arm using stock hardware.
34. Install the supplied sway bar link bracket as shown in
Photo 14 with the supplied 10mm x 55mm hardware.
35. Install the supplied bushings / sleeves in the new sway bar links and install in the new sway bar bracket as shown
Photo 15.
28. Install on the axle location with supplied 12mm x 65mm hardware.
See Photo 16. Tighten hardware.
29. Raise the front axle with a floor jack to slightly compress the coil springs.
30. Install the lower end of the shocks in the stock location and tighten using stock hardware.
31. Lower vehicle to the ground. Install the tires / wheels.
32. Torque the fasteners to the following specifications:
Lower suspension arm cam nut
………110 ft/lbs
Lower suspension arm rear nut
……….88 ft/lbs
Upper suspension arm axle nut
……….89 ft/lbs
Upper suspension arm frame nut
……..62 ft/lbs
Track Rod Bolt
……………………...…..110 ft/lb
Photo 16
Photo 12
Photo 13
Photo 14
Photo 15