Rough Country 1173 User Manual
Page 3
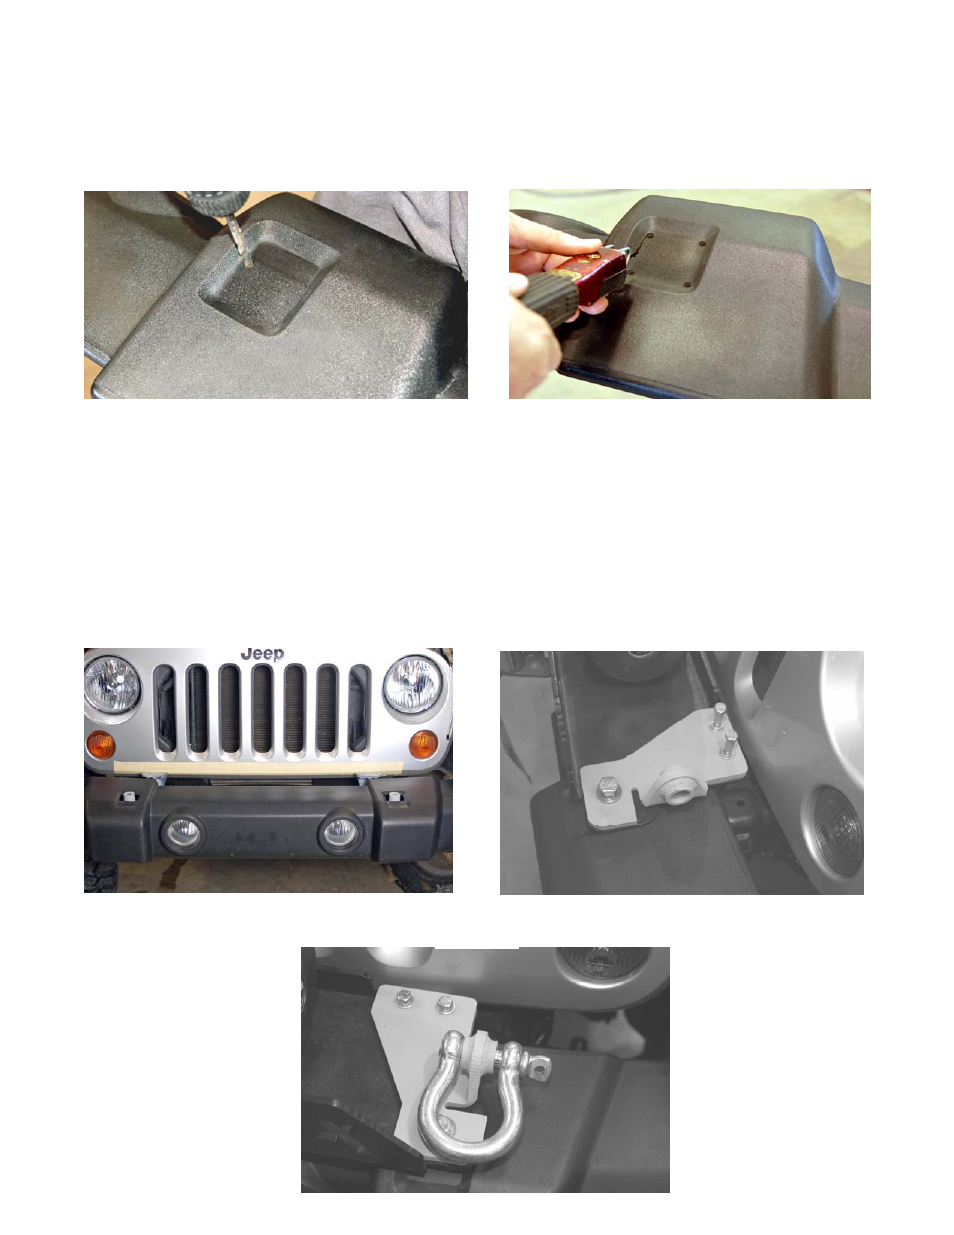
Photo 12
13. Reinstall bumper, using the studs from the new bumper bracket, and supplied 12mm-1.75 nuts. Tighten using a
19mm socket.
14. Using a 7/8” wrench and 13/16” socket tighten the bolts on the driver and passenger side winch plate bracket from
step 9.
15. Plug the fog light harness back up, that was unplugged in step 5.
16. Reinstall the skid plate using factory hardware.
17. Bolt your winch onto the new winch plate at this time.
18. Before placing the winch plate on the bumper we recommend that you cover the bottom of the grill to keep the plate
from scratching the paint while installing the winch plate to the bumper. See Photo 11
19. Set the winch and winch plate & D-ring Mount on top of the bumper and align the holes. Apply thread locker to the
supplied 3/8”x 1 1/2” bolts washers and lock washers and install. Tighten using a 9/16” socket. Using the 9/16” x1
1/2” bolts, lock washers and flat washers provided, tighten using a 13/16” socket. See Photo 12.
Photo 11
10. If your vehicle does not have tow hook cutouts in the top of the bumper it is necessary to cut access holes in the top
of the bumper. Place the plastic portion of the bumper on a flat working surface. Using a 1/4” drill bit and drill motor,
drill the corners of the formed area as shown in Photo 9.
11. After drilling the corners of the tow hook area, use a utility knife, or ther cutting device to cut the plastic between the
drilled holes as shown in Photo 10.
12. Place the impact bar on the front bumper cover, using the stock hardware. Tighten using a 15mm socket.
Photo 9
Photo 10
20. Install the d-rings on the d-ring mount as shown in Photo 13.
Photo 13