Rough Country 581.20 User Manual
Page 3
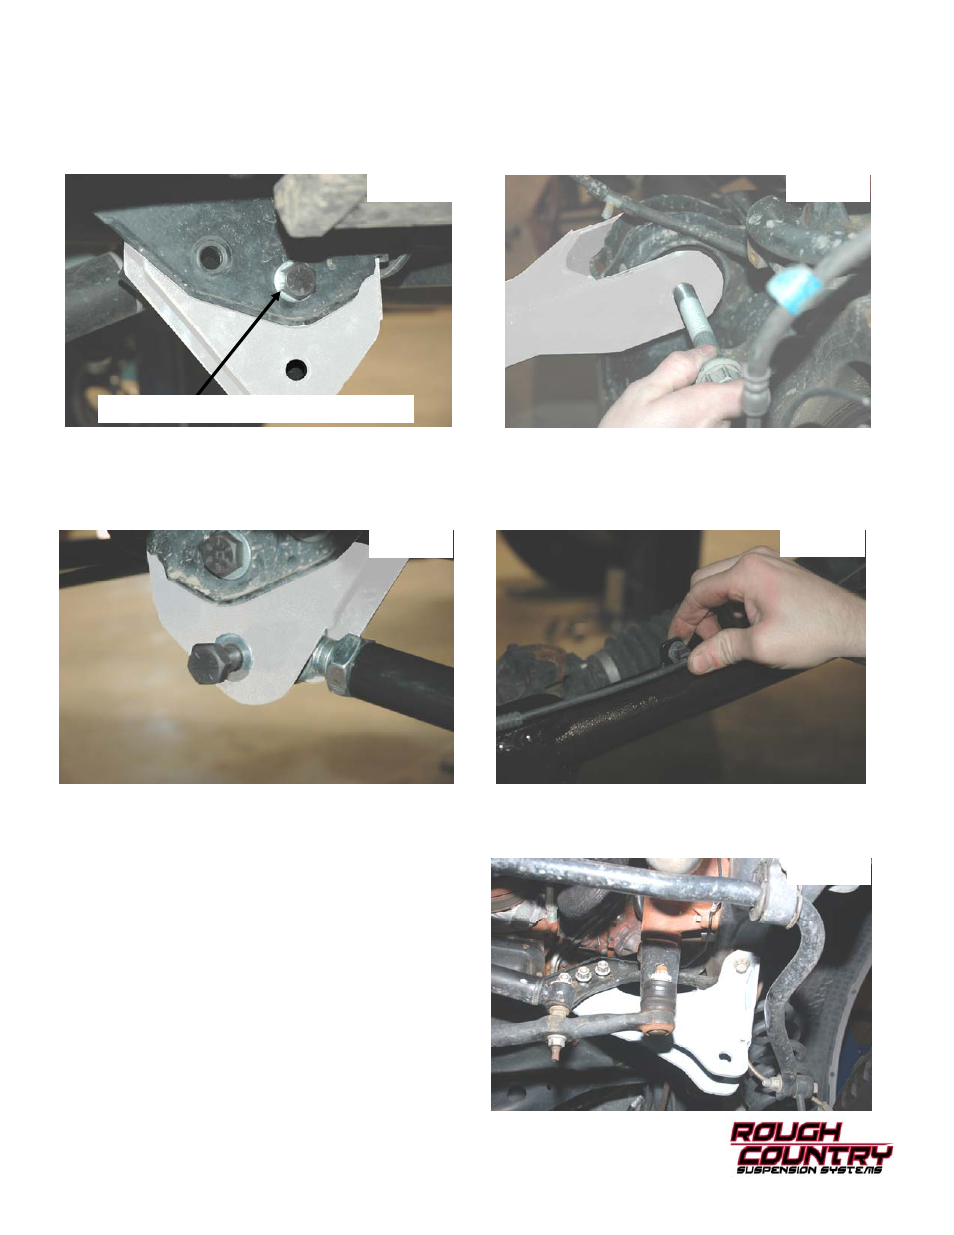
14. Insert the adjustable end of the lower radius arm into the radius arm drop bracket as shown in Photo 7. Bolt into
place using a 3/4” x4.75” bolt, nut and washer provided in the kit bag. Using a 1 7/8” wrench tighten the jam nut.
Center of end to center hole of opposite end should be 36 1/8”. Reattach the ABS wire to the upper radius arm. See
Photo 8.
15. Repeat step 12-15 on the opposite side.
16. Using a 21mm wrench and 19mm wrench socket remove the factory track bar bracket. Retain stock hardware for re-
use.
17. Position the Rough Country track bar bracket on the frame in the same position as the original and secure using the
factory hardware. See Photo 9. Tighten the three cross-
member bolts, then the two frame bolts.
18. Using the nylon bump stop extension provided, place the
extension between the frame and the bump stop cup.
Bolt back into the original location using the 8mmx95mm
bolt supplied. Torque to 15 ft. lbs.
19. Lower the front axle enough to install the new coil
springs. Position the coil springs in the lower coil buckets
on the axle and rotate as necessary to be sure that the
pigtail of the coil in indexed properly in the bucket. Posi-
tion the factory rubber isolator on top of each coil, then
raise the axle enough to seat the coil springs in the upper
spring buckets.
20. Install the bushings and sleeves on the front gas shock
absorbers part # 658459.
21. Compress the front springs enough to install the front
shocks. Bolt the lower end of the shock to the axle using the stock hardware , using a
18mm wrench. Attach the upper end of the shock using the stock hardware, and a 19mm
wrench, tighten only enough to bulge the bushing.
11. Insert the radius arm drop bracket into the stock location. Bolt into place using a 3/4” x4.75” bolt, crush sleeves, nut
and washer provided in the kit bag. Do not tighten at this time. See Photo 5.
12. Attach the upper radius arm to the radius arm drop bracket in the top hole. Bolt into place using a 3/4” x4.75” bolt,
nut and washer provided in the kit bag. Do not tighten at this time.
13. Attach the radius arms to the axle using the stock hardware. See Photo 6. It may be necessary to use the rear
nut from the frame mount due to some models having the radius arm nut welded to the radius arm.
Photo 8
Photo 6
Photo 5
Photo 7
Crush sleeve installs in bracket here
Photo 9