Rough Country 688.20 User Manual
Page 6
REAR INSTALLATION
1. Chock the front wheels. Jack up the rear of the vehicle and support the vehicle with jack stands, so that the rear
wheels are off the ground.
2. Remove the rear tires/wheels, using a 13/16” deep well socket. Place a floor jack under the differential.
3. Remove the rear track bar from the frame mount on the passenger side using a 18mm wrench and T55 torx head.
Loosen the track bar on the axle side using a T55 and 18mm wrench.
4. Using a 18mm socket and a 15mm wrench, remove the rear shocks. Retain the shock hardware for reuse.
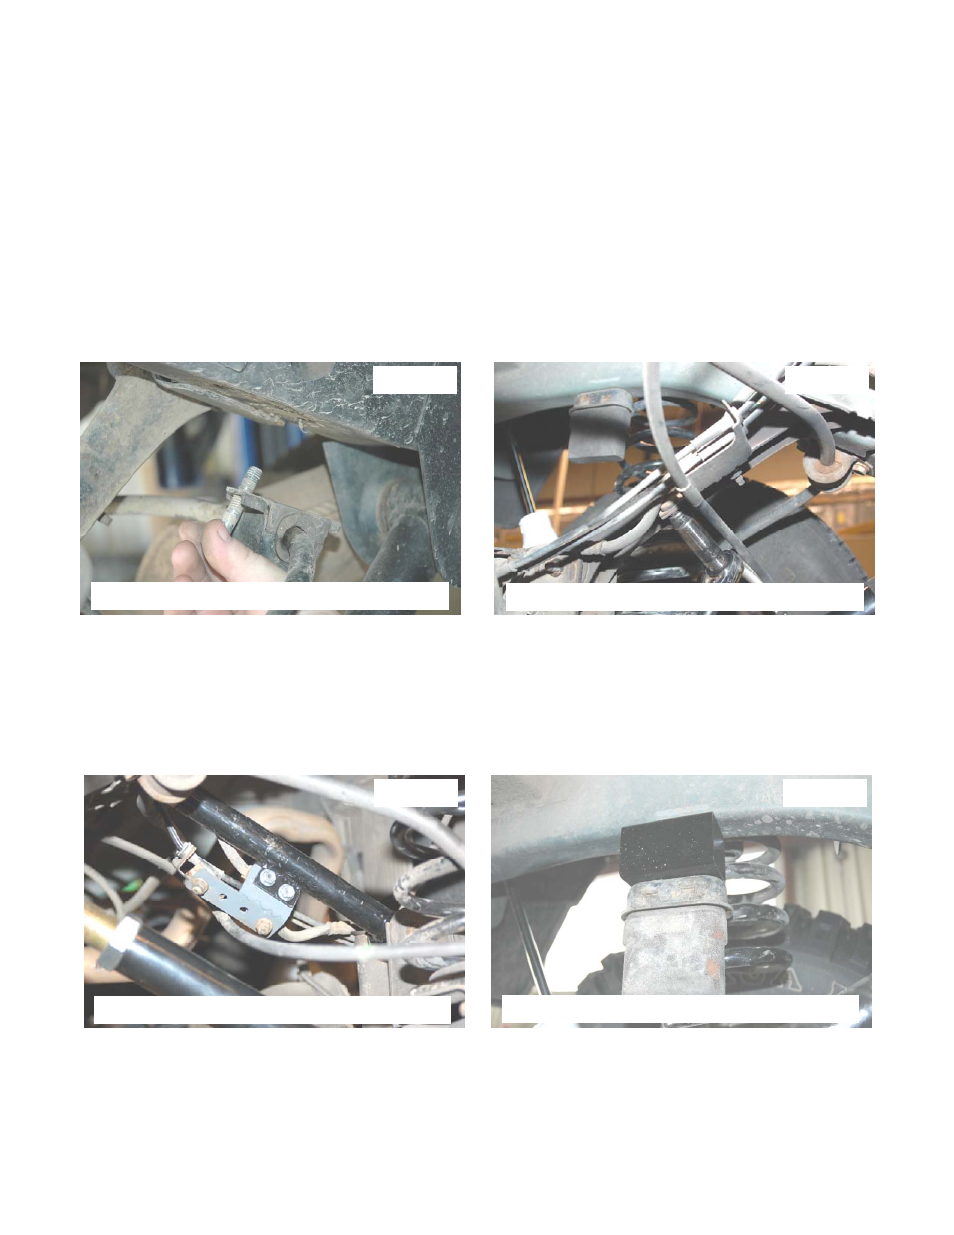
5. Using a 15mm socket disconnect the sway bar bracket from the frame. See PHOTO 1.
6. Using a 13mm wrench remove the coil spring retainer. Retain factory hardware.
7. Lower the axle and remove the stock coil spring. A coil spring or strut compressor may be needed to remove the
stock coil.
8. Using a 21mm socket and wrench remove the lower control arm. Retain the factory hardware.
9. Insert bushings and sleeves in lower control arm. Apply light grease to bushings & sleeves. Adjust arm to 17 1/2”.
Using a 21mm socket and wrench install the lower control arm using factory hardware. Do not tighten at this time.
10. Using a 15mm socket , wrench and a T50 torx head, remove the upper control arm. Using a 13mm wrench unbolt
the brake line bracket from the upper control arm. SEE PHOTO 2. Retain the factory hardware.
11. Insert the bushings and sleeves from 1195bag in the upper control arm. Apply light grease to bushings & sleeves.
Adjust the arms to a length of 14 1/8”. Using a 15mm wrench, socket and T50 install the upper control arm using
factory hardware. Do not tighten at this time. Using a 13mm wrench, reinstall the brake lines to the control arm with
the supplied bracket as shown in PHOTO 3. Secure the brake line bracket to the arm with supplied 5/16” x 3/4” bolts,
nuts & washers.
12. Pull the stock rear bump stop out of the mount. Using a 13mm socket, unbolt the 2 bolts holding the bracket to the
frame. Using the 2-8mm x 70mm bolts from 1687bag2, install the bump stop extension bracket along with the stock
bracket to the frame. Reinstall the factory bump stop. See PHOTO 4.
13. Install the new coil spring. A coil spring or strut compressor will be needed to install the new coil spring. Install the
new spring into the upper and lower coil spring seat. Make sure the coil spring is seated properly into the coil seat,
by rotating the spring until the pigtail end fits the spring pocket. Install the coil spring clip using a 13mm wrench,
Torque to 16ft/bs.
14. Install the new sway bar drop brackets in between the frame and the sway bar mount as shown in PHOTO 6. Using
the 10mm x 55mm bolts and washers supplied in 1687bag1. Tighten using a 17mm wrench.
PHOTO 1
PHOTO 2
PHOTO 4
PHOTO 3
REMOVE SWAY BAR FROM FRAME
REMOVE BRACKETS FROM STOCK ARM
INSTALL BRACKET ON ARM
INSTALL BUMP STOP SPACER