Rough Country 362.20 User Manual
Page 2
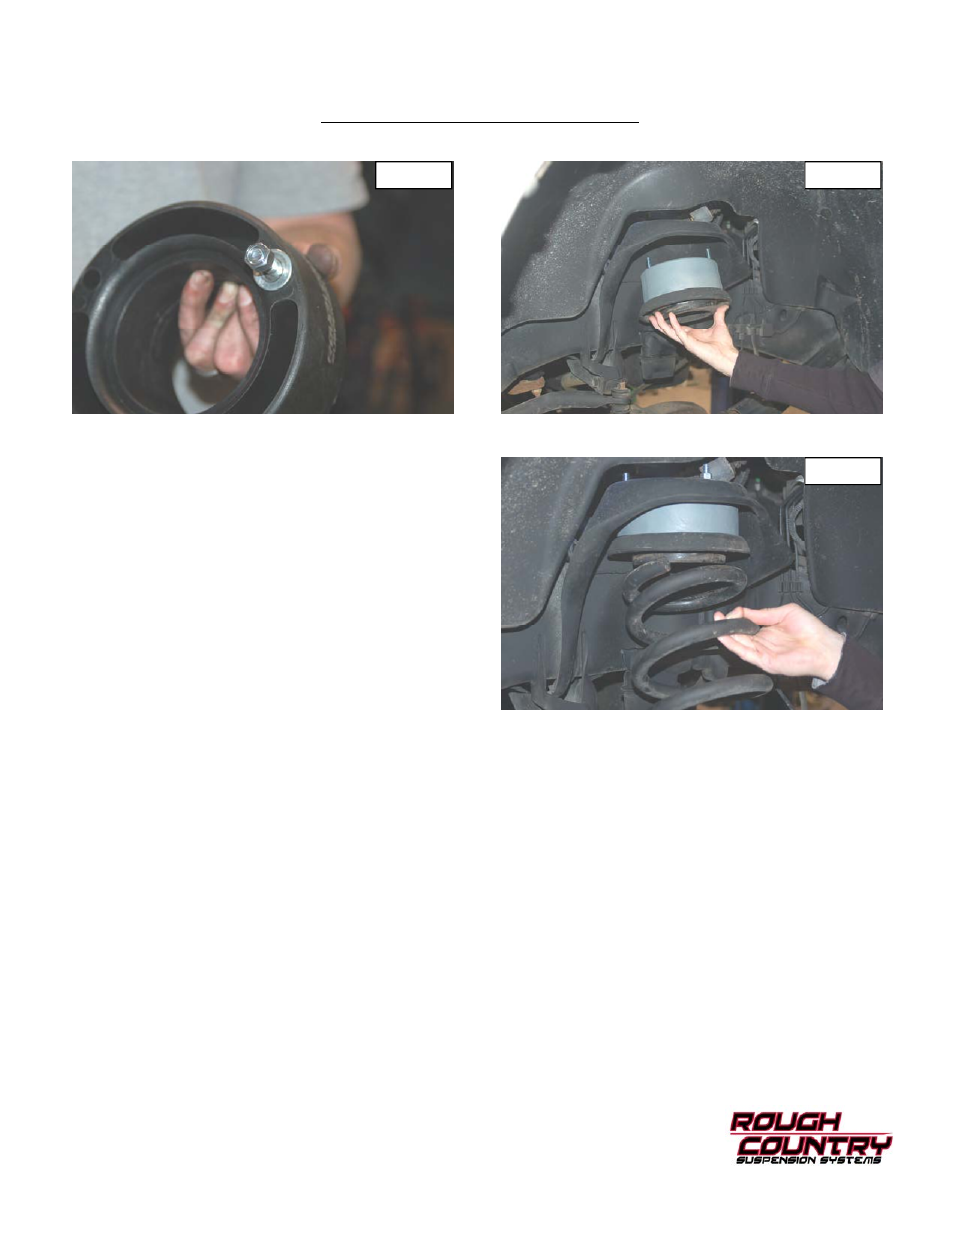
7. Locate supplied 3/8 x 3 1/4
” bolts and install in the Rough Country spacer as shown in
Photo 2 by using the sup-
plied 3/8
” flat washer and nut. Tighten with a 9/16” wrench until the bolt head is flush with the bottom of the spacer
then remove the nut and washer. Do NOT use an impact on the spacer bolts.
8. Install assembly into coil pocket , reposition the upper shock tower and tighten as shown with supplied 3/8
” lock
washers /nuts using a 9/16 wrench. Torque to 30 ft/lbs.
See Photo 3.
9. Rough Country highly recommends new application valved shocks made for 2.5
” of lifted height and additional travel
be purchased for this application. If new shock absorbers
were purchased, install with supplied hardware. If stock
shocks are being used, install using factory hardware/
bushings. Tighten hardware at this time on the top only.
The lower will be installed after the coil springs are rein-
stalled.
10. Making sure the axle is at full drop to allow installation;
install the coils springs on the vehicle by sliding the coil
over the shock and into the reused factory coil isolator.
See Photo 4.
11. Reinstall the lower eye of the shock in the factory location
with factory hardware and using a 18mm wrench and
socket tighten to factory specification.
12. Repeat for passenger side of vehicle.
13. Review each step and double check to make sure each
has been done and recheck the torque on all fasteners.
THANK YOU FOR CHOOSING ROUGH COUNTRY FOR YOUR SUSPENSION NEEDS.
Photo 4
Photo 3
Photo 2
POST INSTALLATION INSTRUCTIONS
1. Re torque all fasteners after 500 miles. Visually inspect components and re torque fasteners during routine vehicle
service.
2. Readjust headlights to proper settings.
3. Adjust headlights and have the vehicle aligned to factory specifications. Visually check all components for proper
working order prior to driving