Rough Country 1141 User Manual
Page 2
INSTALLATION INSTRUCTIONS
1. Jack up the rear of the vehicle and place jack stands under the frame rail.
2. Remove the tires and wheels.
3. Support the axle with a floor jack. Installation is performed one side at a time.
4. Make sure the shock is not connected to the lower shock mount to allow the axle to move downward.
5. Lower the axle and remove the coil springs if already installed. A coil compressor may be needed to remove the
coil springs.
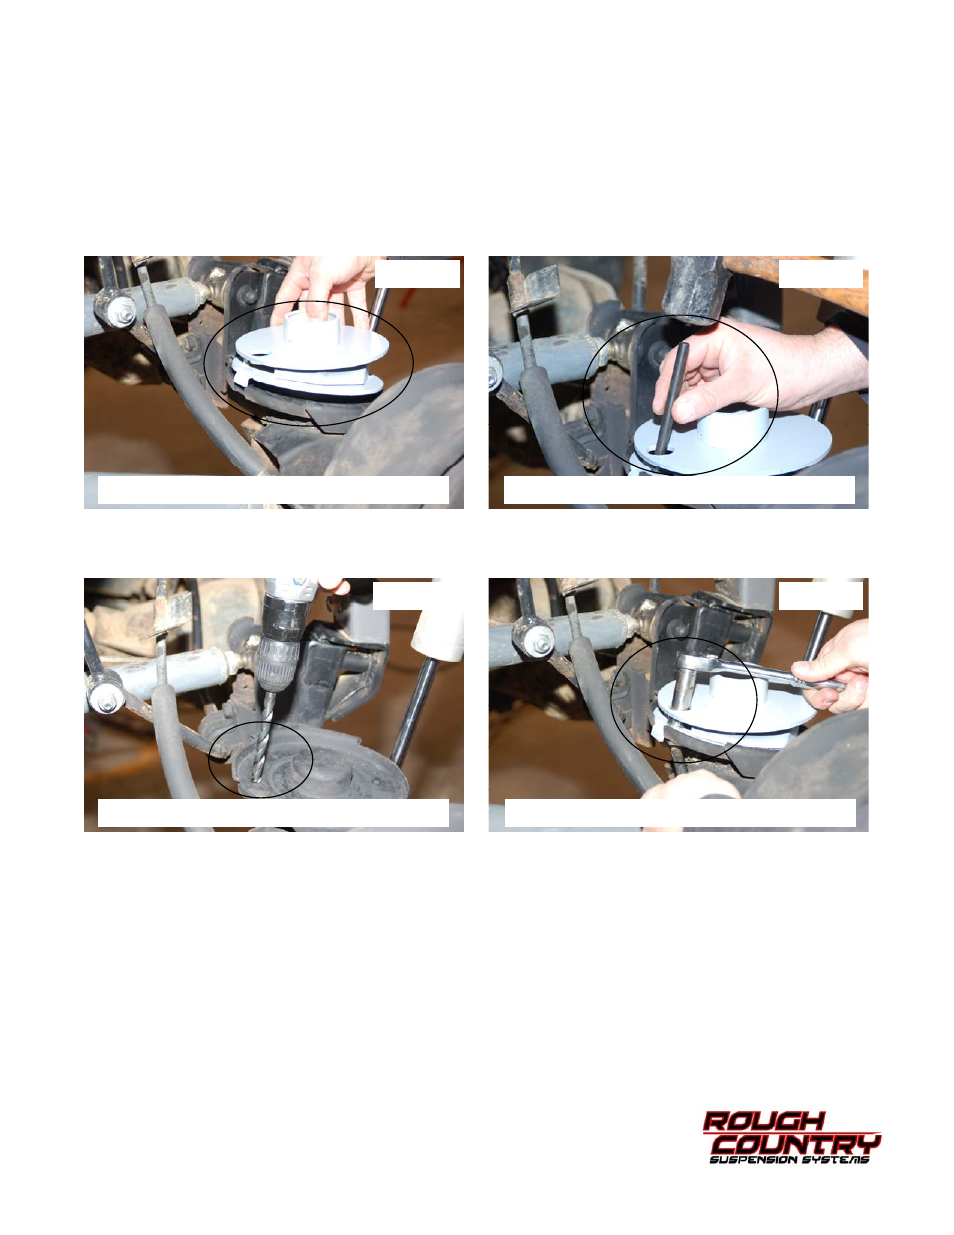
6. Install the bracket as shown in the lower coil seat by aligning the notch on the stock seat with the tab on the
bracket. See Photo 1.
7. Using the bracket as a guide, mark the hole to be drilled. See Photo 2.
8. Using a 13/32” drill bit, drill the hole in the lower coil seat. See Photo 3.
9. Reinstall the angle correction bracket on the lower seat and secure with the supplied 3/8” x 1 1/4” bolt, washer
and lock nuts. Tighten using a 9/16” socket & wrench. See Photo 4.
10. Reinstall the coil springs in the upper and new lower mount.
11. Jack up the axle to slightly compress the coil springs and install the shock absorbers with the factory hardware.
PHOTO 1
PHOTO 2
PHOTO 3
PHOTO 4
All components must be retightened after 500 miles, and every three thousand miles after installation.
POST INSTALLATION
INSTALL SPACER
MARK HOLE TO BE DRILLED
DRILL HOLE USING A 13/32” BIT
INSTALL THE SPACER AND SECURE