Rough Country 297N2 User Manual
Page 6
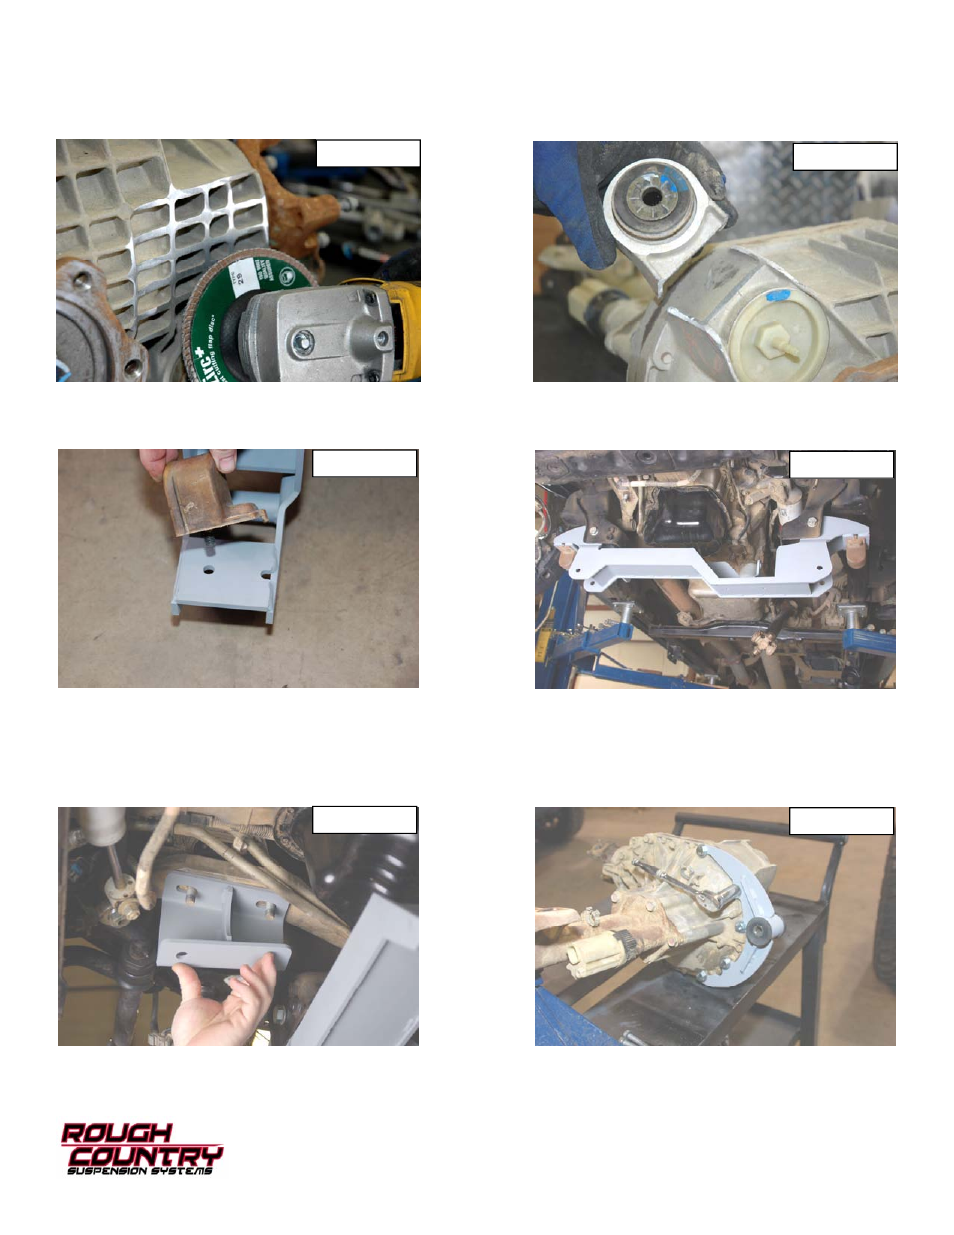
25. Lower the differential with the floor jack. Place the differential on a flat surface to allow grinding of the fins as shown
in Photo 11. It may be necessary to trial fit the differential after the cross members have been installed to
check for clearance on cooling fins. Using a reciprocating saw, cut the top of the differential mount as shown in
Photo 12 .
PHOTO 12
PHOTO 11
26. Install bump stops onto new rear cross-member as shown in Photo 13 and tighten using factory hardware.
27. Install the rear cross-member as shown in Photo 14 with supplied 16mm x 130mm hardware in 1297BAG1 using a
24mm wrench. Do not tighten at this time.
28. Install the passenger side differential bracket at this time with the slotted holes to the top and center brace as shown
in Photo 15 using factory hardware. Do not tighten at this time.
29. Locate and install the supplied 2.4” sleeve and bushings for the driver side differential bracket in 1297BAG1. Re-
move front bolts out of differential using 15mm socket and install front differential bracket with supplied 10mm x
55mm bolts in 1297BAG1 and using a 17mm socket to tighten as shown in Photo 16. Note on 07-08 models it may
be necessary to grind away part of casting around lower bolt mount to allow bracket holes to align.
PHOTO 13
PHOTO 14
PHOTO 15
PHOTO 16