Rough Country 1030 User Manual
Page 2
Thank you for purchasing a Rough Country Suspension Component.
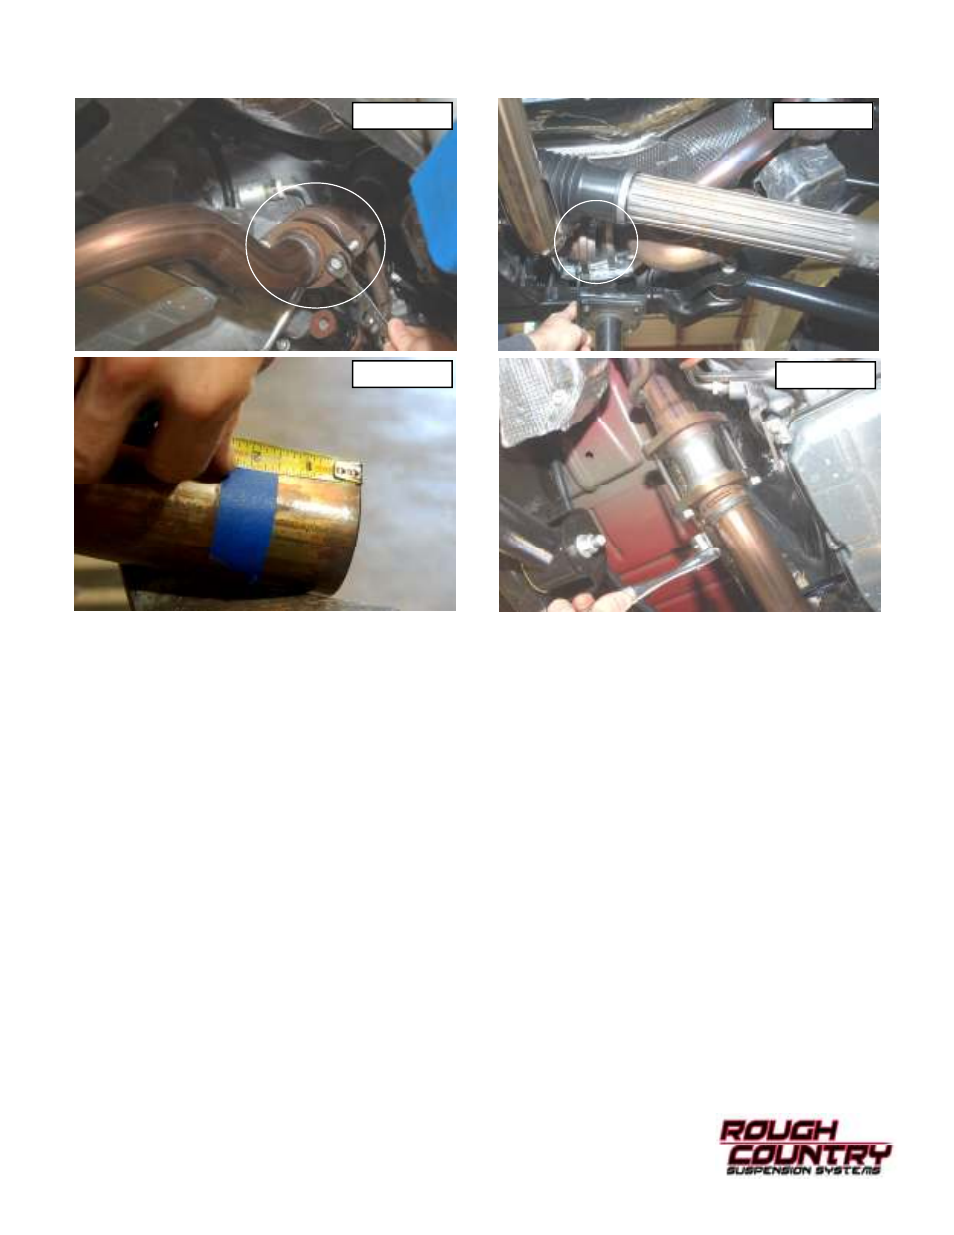
3. Remove the stock exhaust flange bolts using a 13mm socket / wrench on the Passenger Side. See Photo 3.
4. Remove the stock exhaust flange bolts using a 13mm socket / wrench on the Driver Side. See Photo 4.
5. Slide the y-pipe forward until the pipe comes out of the rear clamp and remove from vehicle. Measure and then cut
1.5” off the end of the y-pipe. See Photo 5. This will allow the pipe to side back farther in the rear clamp to make
room for the exhaust extensions.
6. Next insert y-pipe back into the rear of the exhaust clamp, then push the exhaust system rear ward.
7. After the exhaust system has been moved rear ward, insert the longer exhaust extension on the Passenger side
down pipe as shown in Photo 6 and reconnect the exhaust using the supplied 8mm x 100mm Bolts. Do not tighten
at this time.
8. The Driver side exhaust extension will be the shorter of the two and will install on the driver side with the supplied
8mm x 80mm Bolts.
9. Tighten the exhaust flanges and extensions using a 13mm socket / wrench.
10. Check to make sure the exhaust does not come in contact with the frame or any other components after it has been
relocated.
POST INSTALLATION INSTRUCTIONS
•
All hardware must be tightened at 500 miles after installed and then checked periodically to ensure all fasteners are
tight.
PHOTO 3
PHOTO 4
PHOTO 6
PHOTO 5