Rough Country 561.20 User Manual
Page 3
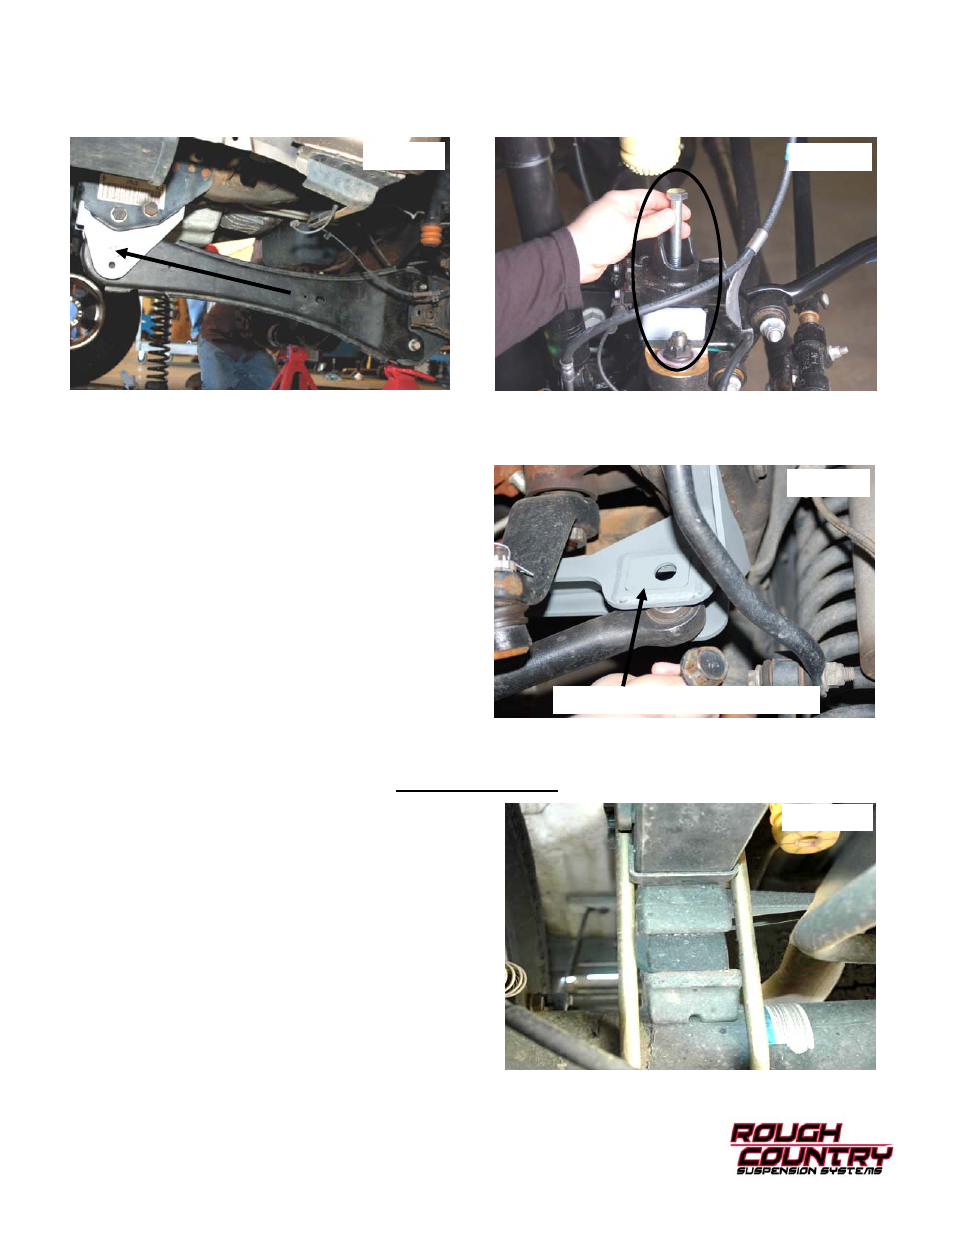
13. Reinstall the stock radius arm in the new bracket in the upper hole with stock hardware. See Photo 7. Leave loose.
Do not tighten the radius arm to bracket at this time.
14. Remove the lower coil seat using a 23mm socket and install the supplied spring spacer in between the axle and the
coil seat with the supplied 14mm x 130mm bolt. Tighten with a 23mm socket. See Photo 8.
15. Reinstall the stock coil springs and slightly compress the coils springs in the mount using the floor jack. Reinstall the
sway bar nut using a 21mm wrench & socket.
16. On 05-08 models, install the stock brake line bracket on the new spacer block using the 5/16” self tapping bolts.
NOTE: On 09 F250 Models the brake line will reinstall
back on the factory coil seat.
17. Install the front shock part # 658640 on the lower mount
and upper mount using the 142731 bushing kit from
1486Kit box and using a 18mm wrench.
18. Install the wheels/tires. Jack up the vehicle and remove
jack stands. Lower the vehicle to the ground
19. Position the cam washer as shown in Photo 9 and swing
up the frame end of the track rod. Install in the frame
mount using the stock hardware using a 30mm wrench.
Note: It may be necessary to have another person
turn the vehicle as it sits still to align the track rod
with the mount.
20. Tighten the radius arm to new bracket hardware using a
1 1/8” wrench & socket.
REAR INSTALLATION
1. Chock front wheels and jack up the rear of the vehicle. Se-
cure with jack stands on the frame rail.
2. Place a floor jack under the rear differential. Using a 18mm
wrench for the upper, and 19mm and 15mm wrench for the
lower, remove the stock shock absorbers, retain the stock
hardware for reuse.
3. Remove the stock u-bolts using a 24mm socket. Use the
floor jack to lower the axle assembly to allow for the lifted
block installation
4. Install the Rough Country block in between the factory block
and the axle. The block being installed has a taper, the short
end of the block should be towards the center of the truck.
Photo 1 shows proper block placement. Jack up the axle
and align the pins in the blocks and axle seat.
5. Secure with the new u-bolts and torque evenly to 120ft lbs
using a 24mm socket using a “X” pattern.
6. Locate shock number 650377 and assemble poly bushings and 12mm sleeve in lower shock mount. Install using fac-
tory mounting pin on upper and factory bolt on lower shock mount. Tighten using a 18mm
wrench for the upper and a 19mm & 15mm wrench for the bottom.
7. Install the wheels and tires. Jack up the vehicle with the floor jack to remove the jack stands.
Photo 1
Radius Arm
Frame Mount
Bracket with
Radius Arm
Reinstalled
Photo 7
Photo 8
Photo 9
Note the position of the cam washer