Rough Country 479.20 User Manual
Page 2
FRONT INSTALLATION INSTRUCTIONS
1. Block the rear wheels of the vehicle. Raise the front of the vehicle and support the frame with jack stands. Remove
the front wheels and tires and set aside. Position a hydraulic jack under the front axle and raise the jack until the
front suspension begins to compress.
2. Disconnect the track bar from the driver side frame bracket, using a 30mm wrench.
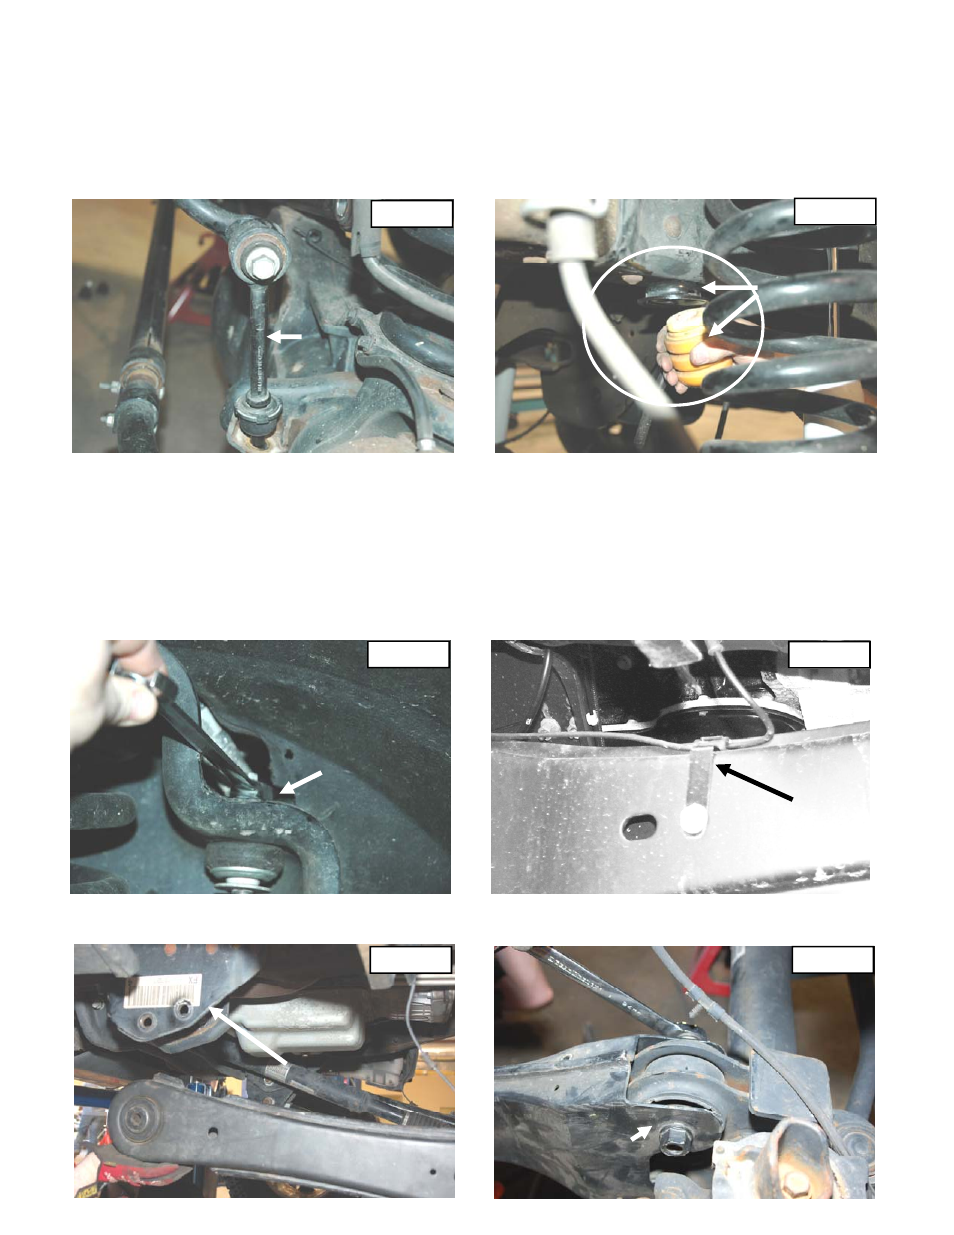
3. Disconnect the sway bar end links from the axle bracket, using a 21mm wrench. Remove end links See Photo 1.
Retain for reuse.
4. Remove the bump stop from the cup shaped bracket. Remove the bracket from the frame rail. See Photo 2.
5. Disconnect the ABS sensor wire from the lower spring seat and the radius arm, using a 8mm wrench.
6. Unbolt the brake line brackets from the axle to ensure brake line free play during the suspension system installation
using a 10mm wrench.
7. Remove the center disconnect vacuum lines from the clamp on the axle.( If equipped with automatic hubs).
8. Using a 19mm wrench, remove the nut, retaining washer and rubber bushing from the both upper shock mounts.
Using a 18mm wrench remove the lower shock bolts. Retain hardware for re-use. See Photo 3.
9. Carefully lower the jack until the coil springs are free. Remove the coil springs from the vehicle. Note: use of a coil
spring compressor may be required for spring removal.
10. Remove the ABS line from the retaining tab on the radius arm and carefully pull the plastic clip free from the radius
arm. See Photo 4. This is done to prevent over extending the line during bracket installation.
11. Using a 1 1/8” wrench, and socket remove the bolt holding the radius arm to the frame. See Photo 5.
12. Using a 24mm wrench, and socket loosen the bolt holding the radius arm to the axle. See Photo 6.
Photo 1
Photo 2
Photo 3
Photo 5
Photo 6
Remove
Factory Sway
Bar Link
Remove
Bump Stop
and Bump
Stop Cup
Front Upper
Shock Mount
Passenger
Radius Arm
Frame Mount
Passenger
Radius Arm
Axle Mount
Photo 4
Radius Arm
ABS Line
Mount