Velleman К8077 User Manual
Page 16
16
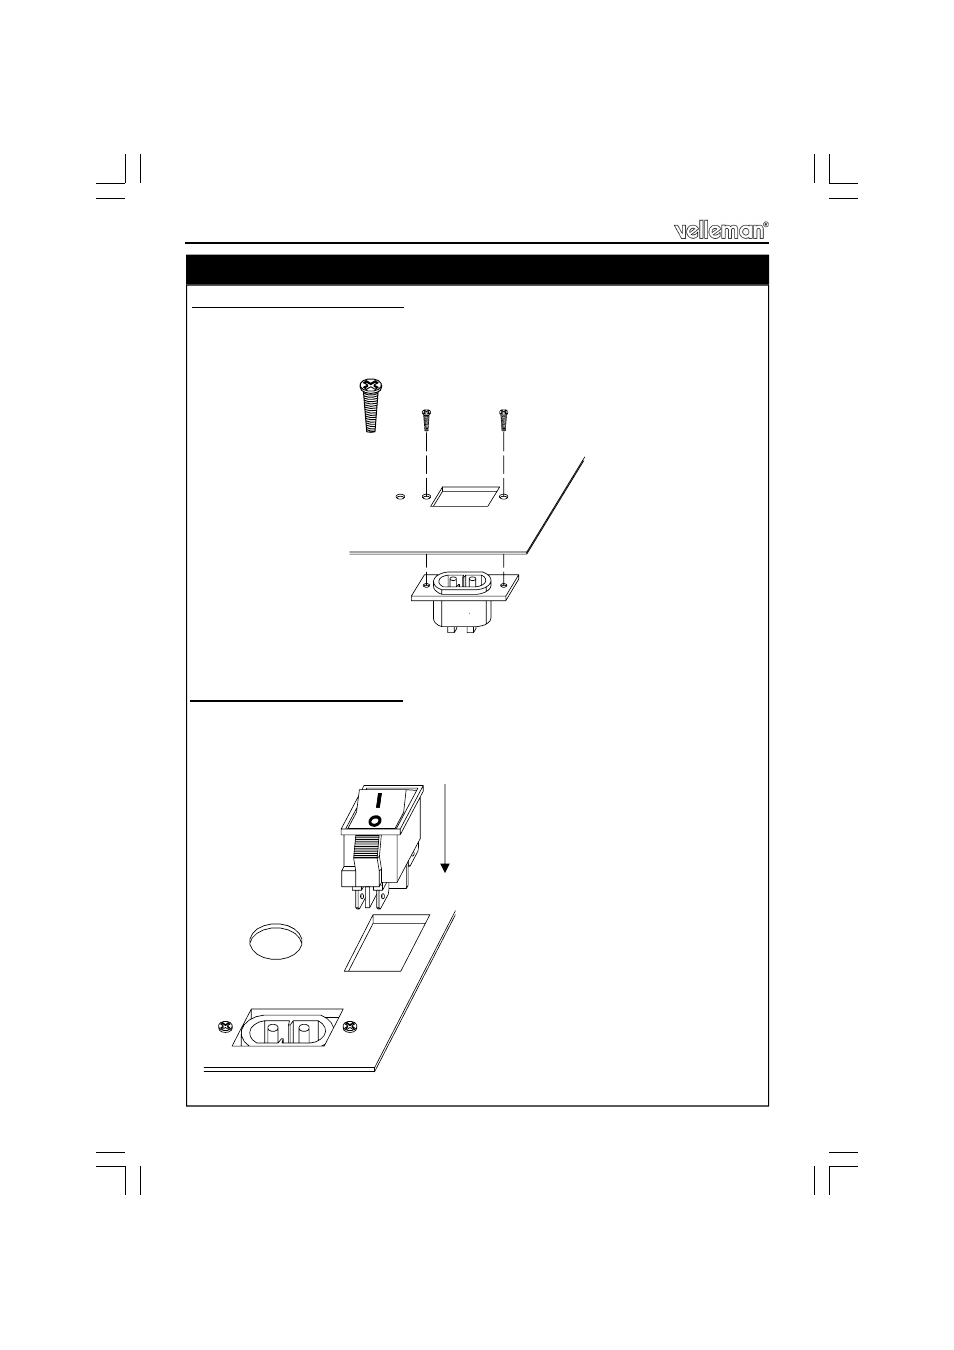
2. Mounting the power switch
Click the power switch onto the heatsink. Make sure the '0'-position of the switch
faces the AC connector.
Mounting power supply section
29. Mounting the power supply section
10mm screw
1. Mounting the AC connector
Position the AC connector at the PCB side of the heatsink and fix by means of
two 10mm black screws.
See also other documents in the category Velleman Hardware:
- NC3MDL1-B (2 pages)
- NC3MXX (1 page)
- NC5FDL1 (2 pages)
- NC3MDL1 (2 pages)
- EDU01 (32 pages)
- NC5MX (1 page)
- MK166 (1 page)
- К8095 (9 pages)
- VMa02 (4 pages)
- VM8090 (1 page)
- VM116 (32 pages)
- EDU02 (28 pages)
- VM202 (1 page)
- NL4MP (1 page)
- NC3MXX-BAG (1 page)
- VM120 (48 pages)
- VM153 EU (1 page)
- VM119 (32 pages)
- VM133 (24 pages)
- VM148 (24 pages)
- MK155 (1 page)
- VCC6 (20 pages)
- MK179 (2 pages)
- VMa04 (4 pages)
- VM122 (44 pages)
- VM134 (24 pages)
- NAC3FCA (1 page)
- VM121 (32 pages)
- К8048 (15 pages)
- К8048 (14 pages)
- VM150 (1 page)
- VMa01 (4 pages)
- NL4FX (2 pages)
- VM152 (20 pages)
- MK157 (1 page)
- VM112 (4 pages)
- VM130 (20 pages)
- NC3FXX-BAG (1 page)
- MK160 (1 page)
- NC5MDL1 (2 pages)
- VM118r (36 pages)
- VM179 (2 pages)
- VM192ir (2 pages)
- VM138 (40 pages)
- VM160 (20 pages)