Regulator mounting – MSD 2922 Fuel Pump Return Kit Installation User Manual
Page 2
2
INSTALLATION INSTRUCTIONS
M S D
• W W W . M S D P E R F O R M A N C E . C O M • ( 9 1 5 ) 8 5 7 - 5 2 0 0 • F A X ( 9 1 5 ) 8 5 7 - 3 3 4 4
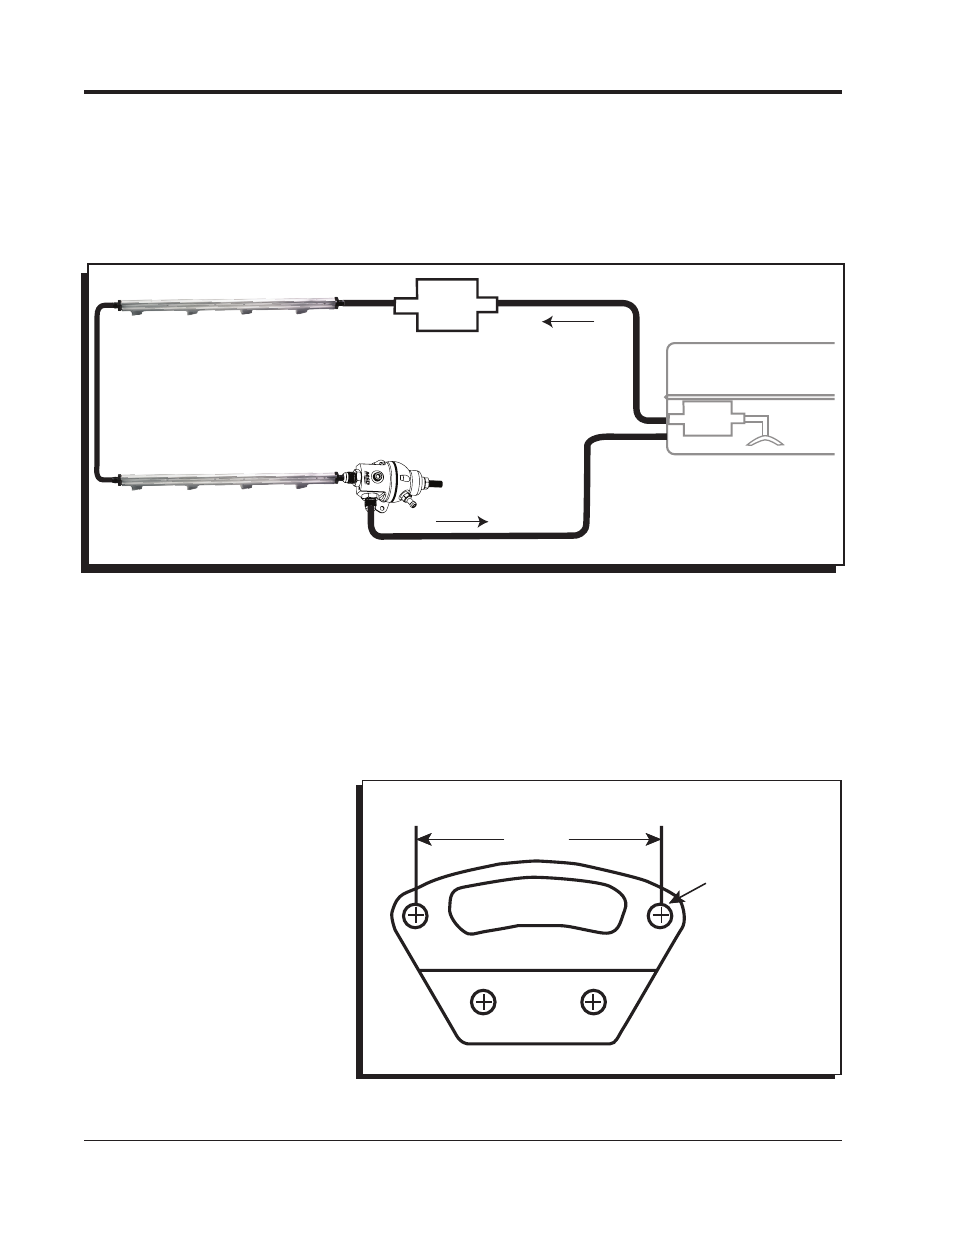
Use the schematic below as a guide when installing the kit in conjunction with an Atomic LS EFI system.
There are two possible connection points (one at the rear of each fuel rail assembly). One rail will be
connected to the fuel supply in an operational system. DO NOT “tee” into the supply line and leave
the opposing fuel rail plugged or capped. Fuel from the opposing rail should be routed to the regulator
inlet port (using the supplied hose and fittings). The hose length between the rail and regulator is not
critical, but generally speaking, should be kept to a minimum. Route and secure the hose as necessary
to prevent chafing, stretching due to engine movement, and heat-related damage.
Figure 3 Regulator Mounting Bracket Template
FUEL
FILTER
FUEL TANK
FUEL
PUMP
IT IS RECOMMENDED TO MOUNT
THE FUEL PUMP IN THE TANK
WHENEVER POSSIBLE. IF IT MUST
BE MOUNTED EXTERNALLY, MOUNT
THE PUMP WITHIN 2-FEET OF THE
FUEL TANK SENDING UNIT.
FUEL RAIL
(UNDER COVER)
FUEL RAIL
(UNDER COVER)
FUEL RAIL
(UNDER COVER)
MSD ADJUSTABLE
REGULATOR
Figure 2 Atomic LS Return Fuel System.
The regulator-to-tank connection should be made using the supplied hose and fittings. Install the
supplied -6AN port plug in whichever regulator return port is not used. Depending on the configuration
of your fuel tank / fuel cell, the supplied high pressure fuel hose clamp may be used at the tank fitting
connection.
Use care when routing the hose from the regulator to the tank. Route and secure the hose as necessary
to prevent chafing, stretching due to engine movement, and heat-related damage.
REGULATOR MOUNTING
Using the two (2) supplied 10-32
x 0.375 Button Head Cap Screws
and a 1/8-inch hex key (Allen
wrench), attach the regulator
bracket to the regulator body. The
regulator may then be mounted
to the firewall, or other convenient
surface. Regulator orientation
is not critical, but be mindful of
adjustment screw access and hose
routing. Refer to Figure 3 for a
mounting bracket template.
2.200”
ACCOMMODATES
#10 SCREW