Blue Ox SC4200 User Manual
Page 4
292-2880 Rev. B
Page 4 of 10
07/12/11
SC4200
SportLift III
Installation Instructions
DO NOT INSTALL OR USE THIS EQUIPMENT UNTIL THE
FOLLOWING OPERATING AND INSTALLATION INSTRUCTIONS
HAVE BEEN READ AND UNDERSTOOD.
IMPORTANT NOTES BEFORE INSTALLATION
• Be sure to read the “Lift & Carrier Initial
Information Sheets” to figure out if the
SportLift III can be applied to the motorhome
chassis and to figure out how much
weight will be added to the rear axle of the
motorhome.
• Never exceed the weight rating of the rear
axle or tire load ratings of the RV. Doing so
will cause dangerous driving conditions and
possible damage to the RV.
• Installation of the receiver may require
modification of mount plates or fabrication of
new mount plates depending on the coach
and chassis. Welding the mount plates to the
3 receiver weldment is also required.
• Use 3/8” or 1/2” thick hot rolled plate
depending on application when fabricating
the mount plates.
• Installers be aware of the rear exhaust of
the RV when designing the mount plates
so that the lift or carrier clears the exhaust
when in operation.
• There should be six (6) 3/4”-10 hex bolts
used on each mount plate.
• The mount plates should be mounted
directly to the main frame rails of the RV
chassis for the most support. We don’t
recomend welding the mount plate to the
frame.
• The hitch receiver needs to be welded by
a certified welder.
INSTALLING HITCH RECEIVER
1. NOTE: (OPTIONAL) - SC9000 & SC9019
RECEIVER/MOUNT PLATE KIT is
recommended when using this lift. In most
cases, the original hitch of the coach will
need to be replaced. Only when the motor
mounts are incorporated with the original
hitch, we then reccomend you don’t remove
the original hitch and try to install the SC9000
& SC9019 by dropping down and around to
miss the original coach’s hitch. When you
are doing that, please keep in mind that
the ground clearance can be no lower than
13”. For further installation of the SC9000 &
SC9019, please see the Operator, Parts and
Installation Manual included with receiver
hitch.
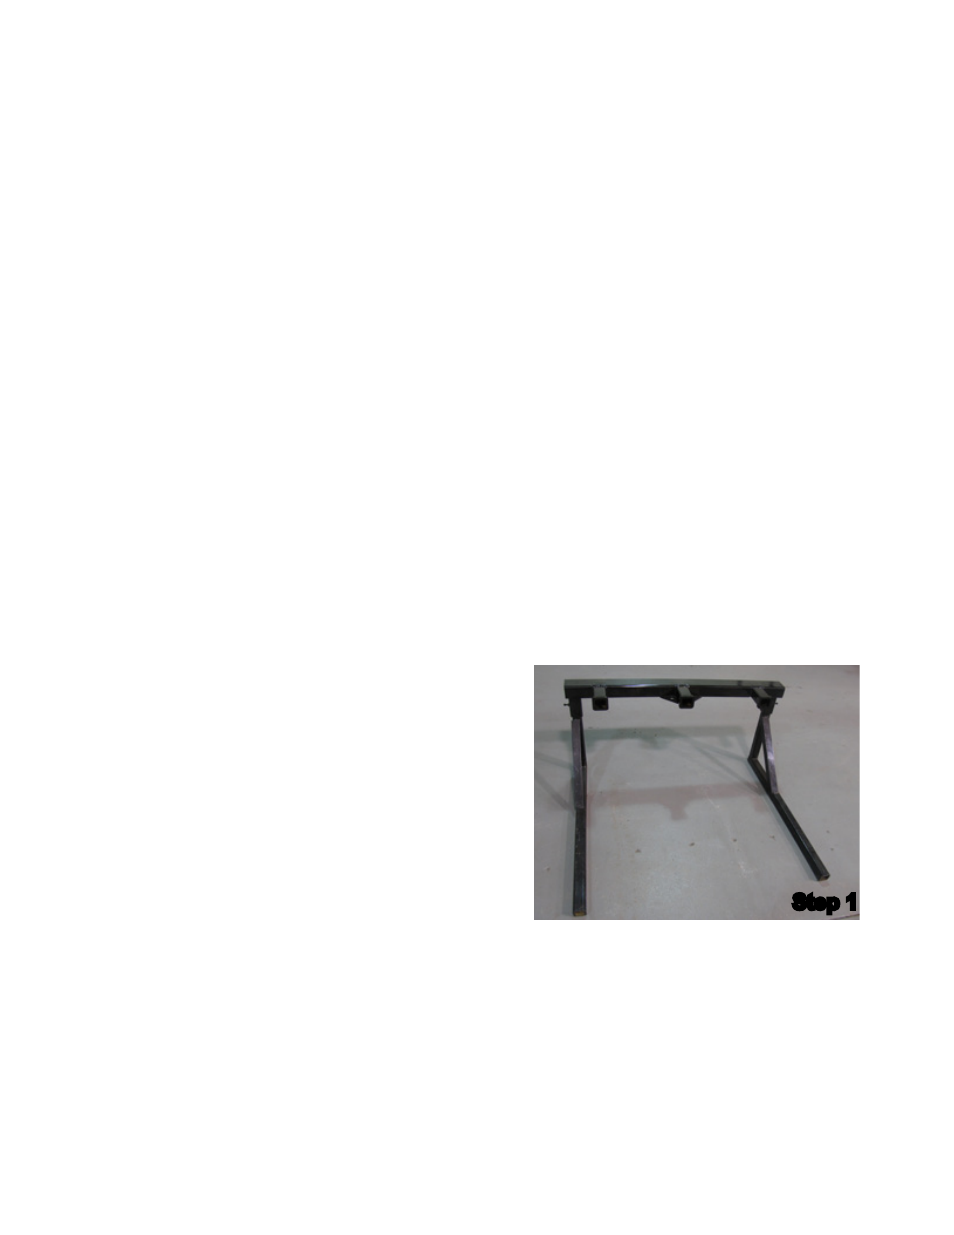
INSTALLING SPORTLIFT™ III
2. Insert driver side arm assembly into the
optional receiver hitch (SC9000) and hold it in
place with a 5/8” x 3” pin with clip. There will
be three (3) pins included with the SC9000.
Step 1